
Applies to: Leconfe 1.5.0-beta.3
The Conference panel manages the continuing identity of a conference series. From this panel you can create scheduled events, manage proceedings, configure the conference website, prepare publication metadata and DOI settings, and manage users and roles.
Important: Leconfe 1.5.0-beta.3 is a pre-release. Labels and layouts may still change before the final 1.5.0 release. The screenshots retained on this page were captured from an earlier interface; captions identify screens that differ from the current source.
Before You Start
- Confirm that you opened the correct Conference panel. A Conference is the continuing series; a Scheduled Conference is one occurrence of that series.
- Make sure your account has permission for the task. Menus are hidden when the account cannot view or update the relevant resource.
- Create a backup before deleting records, changing URLs, installing plugins, or depositing DOI metadata.
- Prepare final names, dates, publishing details, license terms, and DOI credentials before making an event or proceeding public.
- Test public pages in a private browser window after saving website or publication settings.
Understand What Belongs to the Conference Panel
- Conference panel: conference-series identity, scheduled events, proceedings, conference website, distribution settings, users, roles, plugins, and conference-level static pages.
- Scheduled Conference panel: one event’s workflow, submissions, review, participants, fees, schedule, email templates, and Publisher Library.
- Administration panel: installation-wide conferences, website settings, plugins, static pages, system information, and maintenance tools.
A Conference-level role can be inherited by its scheduled conferences. A role assigned only inside one Scheduled Conference does not automatically grant access to other events.
Manage Scheduled Conferences
Open Scheduled Conference to create and manage individual events. In Leconfe 1.5, the list uses two tabs: All and Trash. The older Current, Draft, Upcoming, and Archived submenu description is no longer accurate.
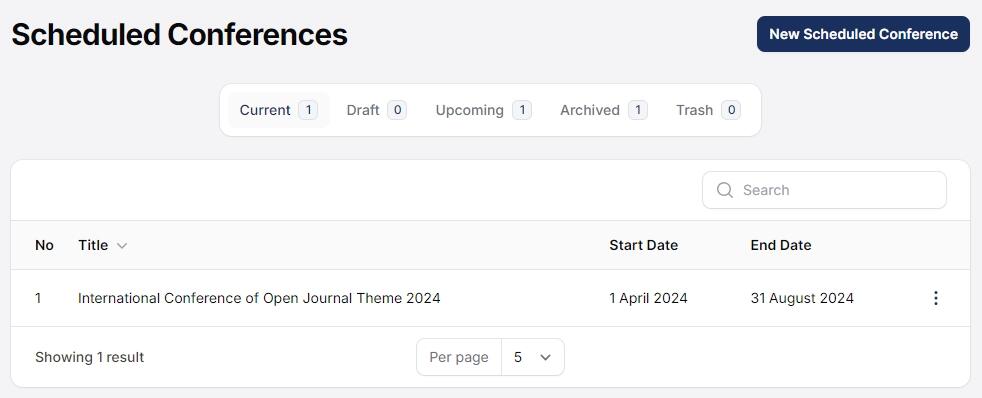
Create a Scheduled Conference
- Open the correct Conference panel and select Scheduled Conference.
- Select Create.
- Enter the required Title.
- Enter a unique Path. It becomes part of the public event URL and supports the alpha-dash format: letters, numbers, dashes, and underscores.
- Enter the start and end dates. The end date cannot be earlier than the start date.
- Save the event, then open its Scheduled Conference panel for event-specific configuration.
Publish, Draft, Trash, and Restore
- Publish: makes a draft event public after confirmation.
- Set as Draft: removes a published event from public availability while retaining its data.
- Move to Trash: soft-deletes the event so it can still be reviewed in Trash.
- Delete Permanently: is available for trashed events and cannot be undone through the interface.
Before publishing, verify the event title, public path, dates, registration configuration, and assigned team. Before permanent deletion, confirm that submissions, participants, payments, and publication records are no longer needed.
Manage Proceedings
Proceedings group published papers and publication metadata. In Leconfe 1.5, Future Proceedings means unpublished proceedings and Back Proceedings means published proceedings. These labels are based on publication status, not whether a conference date is in the future or past.
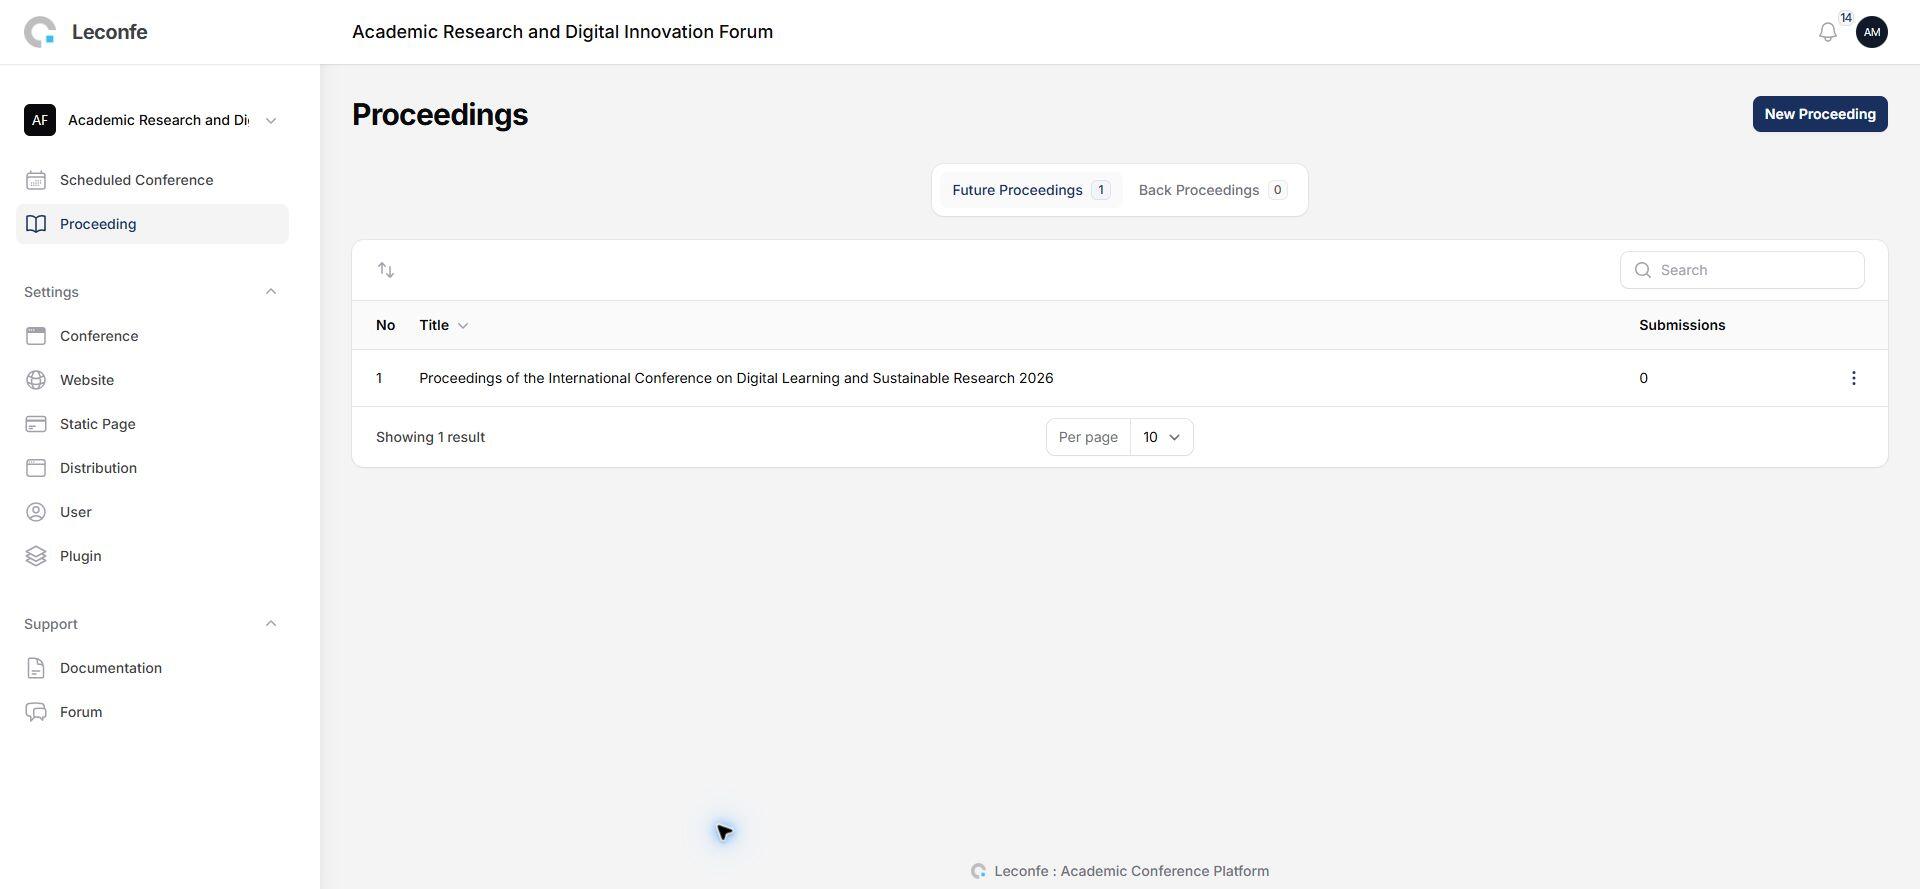
Create a Proceeding
- Open Proceedings and select Create.
- Upload an optional cover image.
- Enter identification information when applicable: volume, number, and year.
- Enter the required title and an optional description.
- Add optional titled content sections and reorder them when needed.
- Save and preview the proceeding before publication.
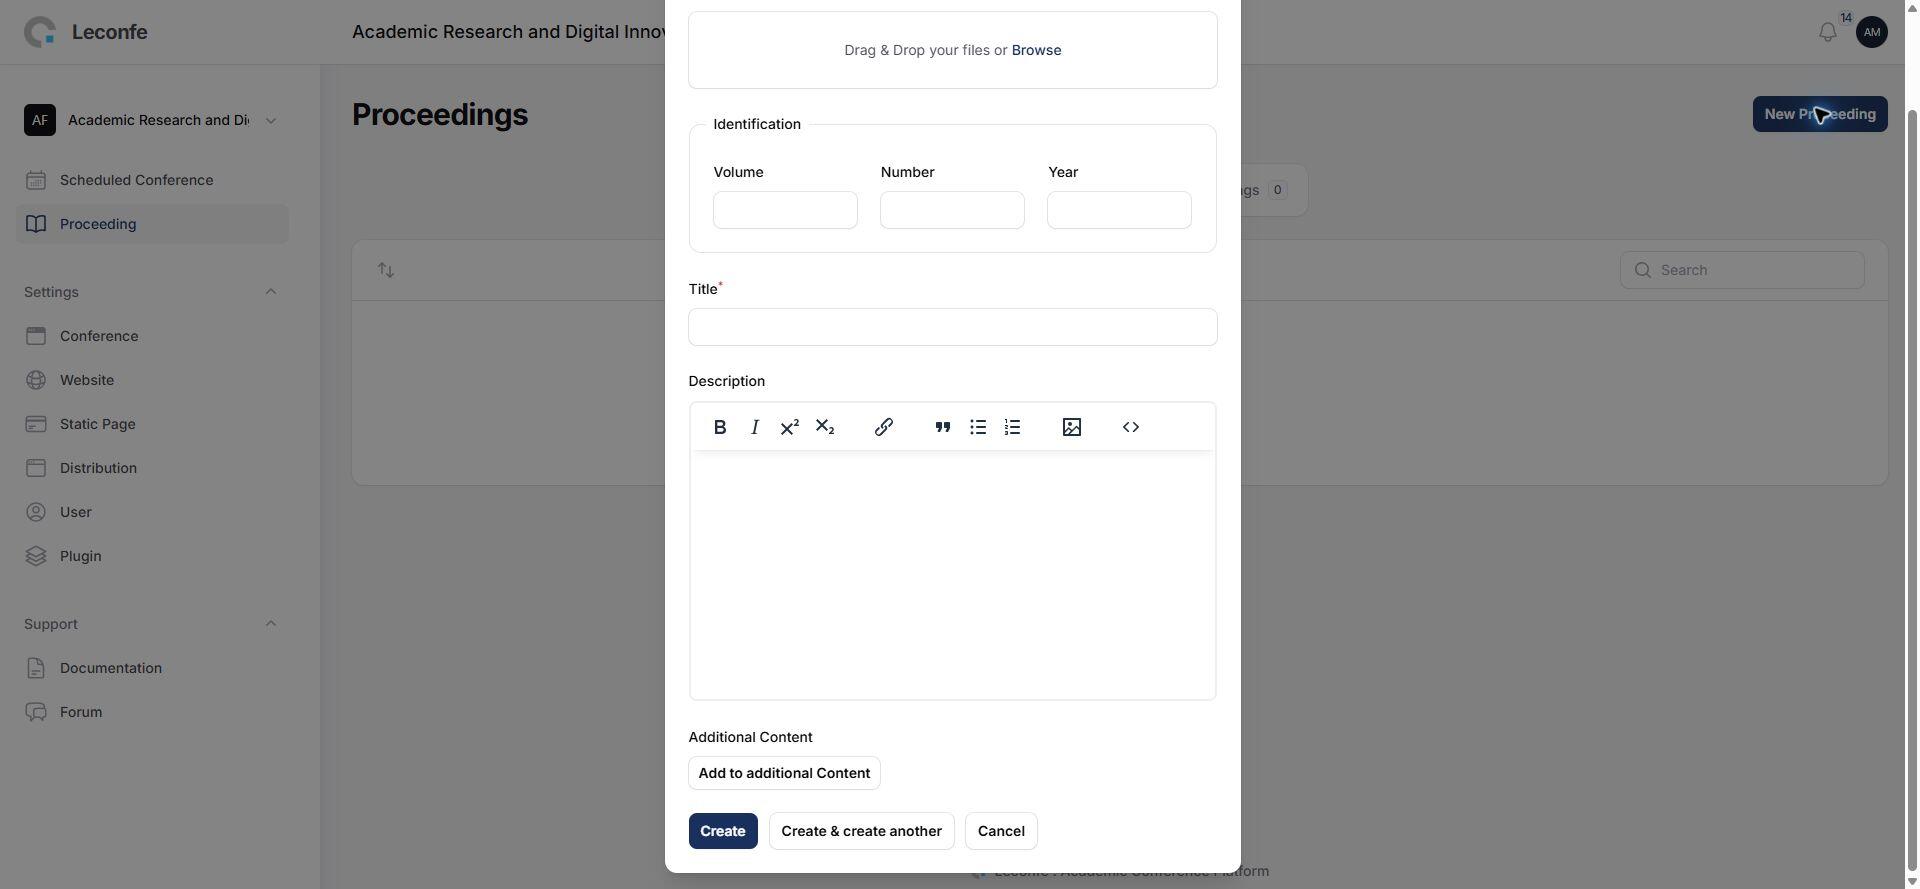
The earlier documentation recommends a 353 by 500 pixel cover under 500 KB. The 1.5 source does not enforce those exact dimensions or file size. Use a consistent portrait image optimized for the web, then verify the thumbnail and full proceeding page.
Proceeding Actions
- Edit: updates proceeding metadata and content.
- Preview: is available for published proceedings.
- Publish or Unpublish: changes public availability after confirmation.
- Set as Current: marks one published proceeding as the current proceeding.
- Reorder: changes the order used in the proceedings list.
- Delete: may fail when related records prevent safe removal.
Configure Conference Settings
Open Settings > Conference to update the identity of the conference series. Access requires permission to update the current conference.
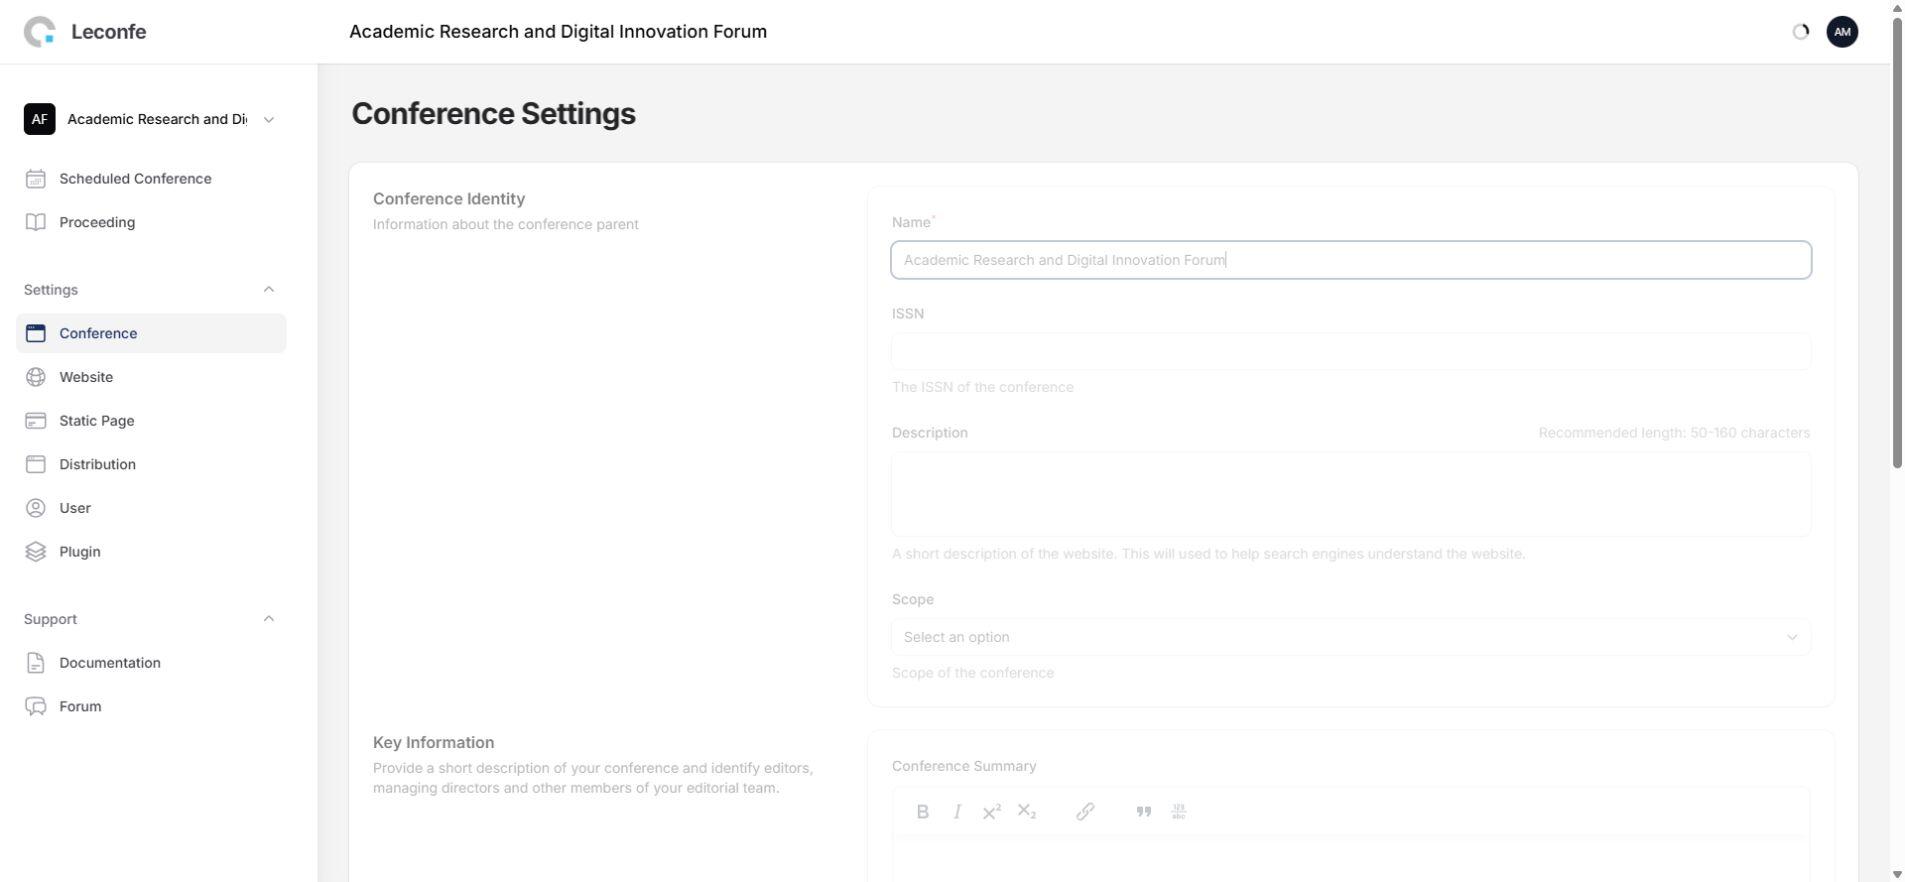
- Name: the required conference-series name.
- ISSN: the conference publication’s ISSN when one has been formally assigned.
- Description: a short description of the conference website.
- Scope: International or National.
- Conference Summary: concise key information used to introduce the conference.
- About the Conference: the longer public description of the conference series.
These fields describe the conference series; they are not the detailed schedule for one event. Event dates and operational information belong in the relevant Scheduled Conference.
Configure the Conference Website
Open Settings > Website. In Leconfe 1.5, the page contains these tabs:
- Appearance: Setup and Sidebar.
- Setup: Navigation Menu, Languages, and Date & Time.
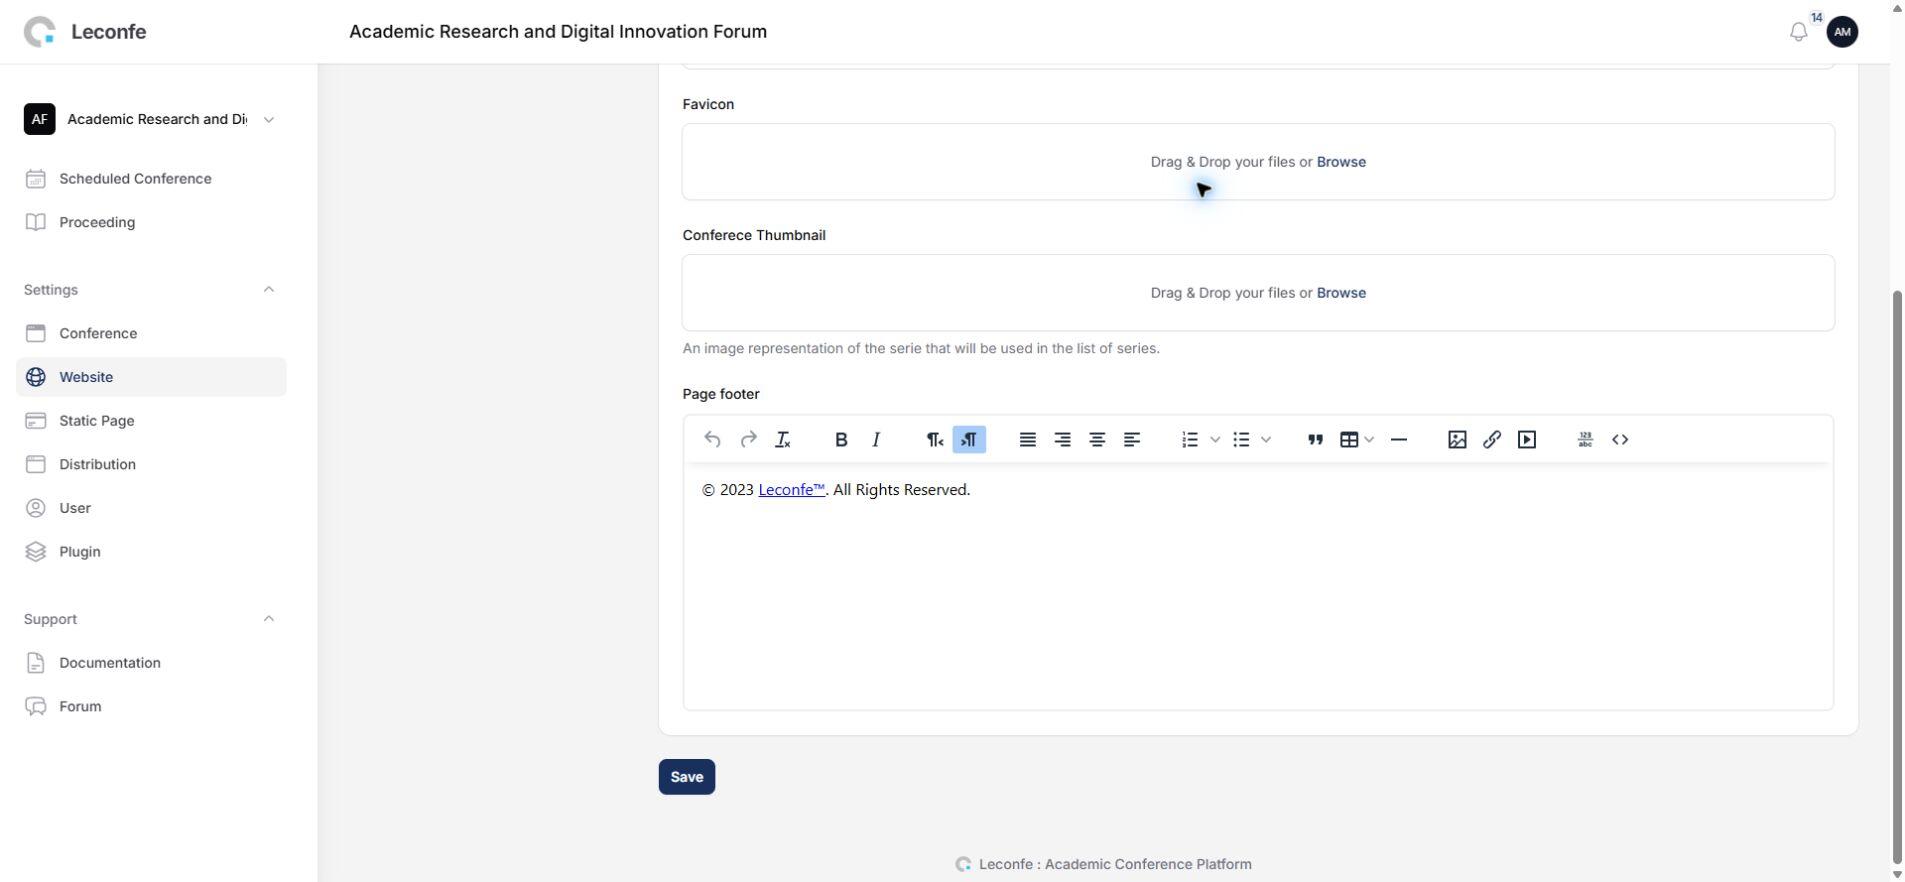
Appearance: Setup
- Scheduled Conference Redirect: optionally directs the conference homepage to one selected scheduled event.
- Logo: the conference logo.
- Favicon: the browser-tab icon.
- Conference Thumbnail: a visual representation of the conference series.
- Page Footer: rich-text footer content for conference pages.
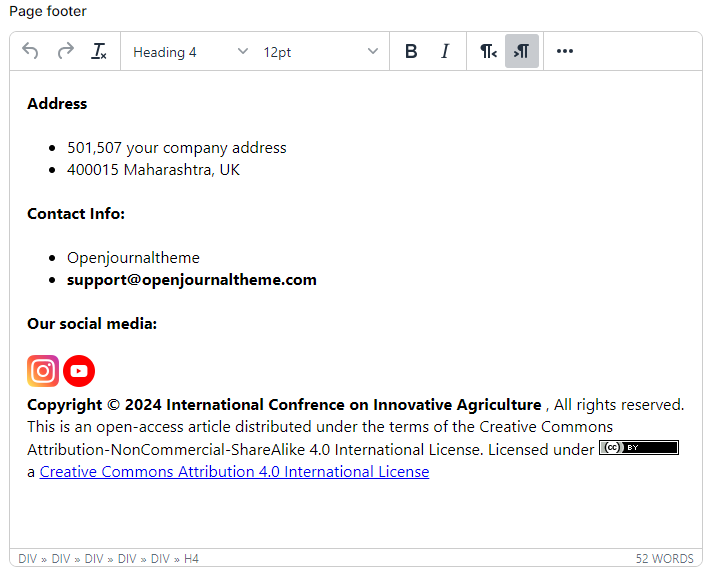
Do not copy the old sample footer unchanged. It contains example addresses, contact details, external images, and outdated copyright text. Create footer content that belongs to your organization, verify every link, use accessible image descriptions, and review the result on mobile.
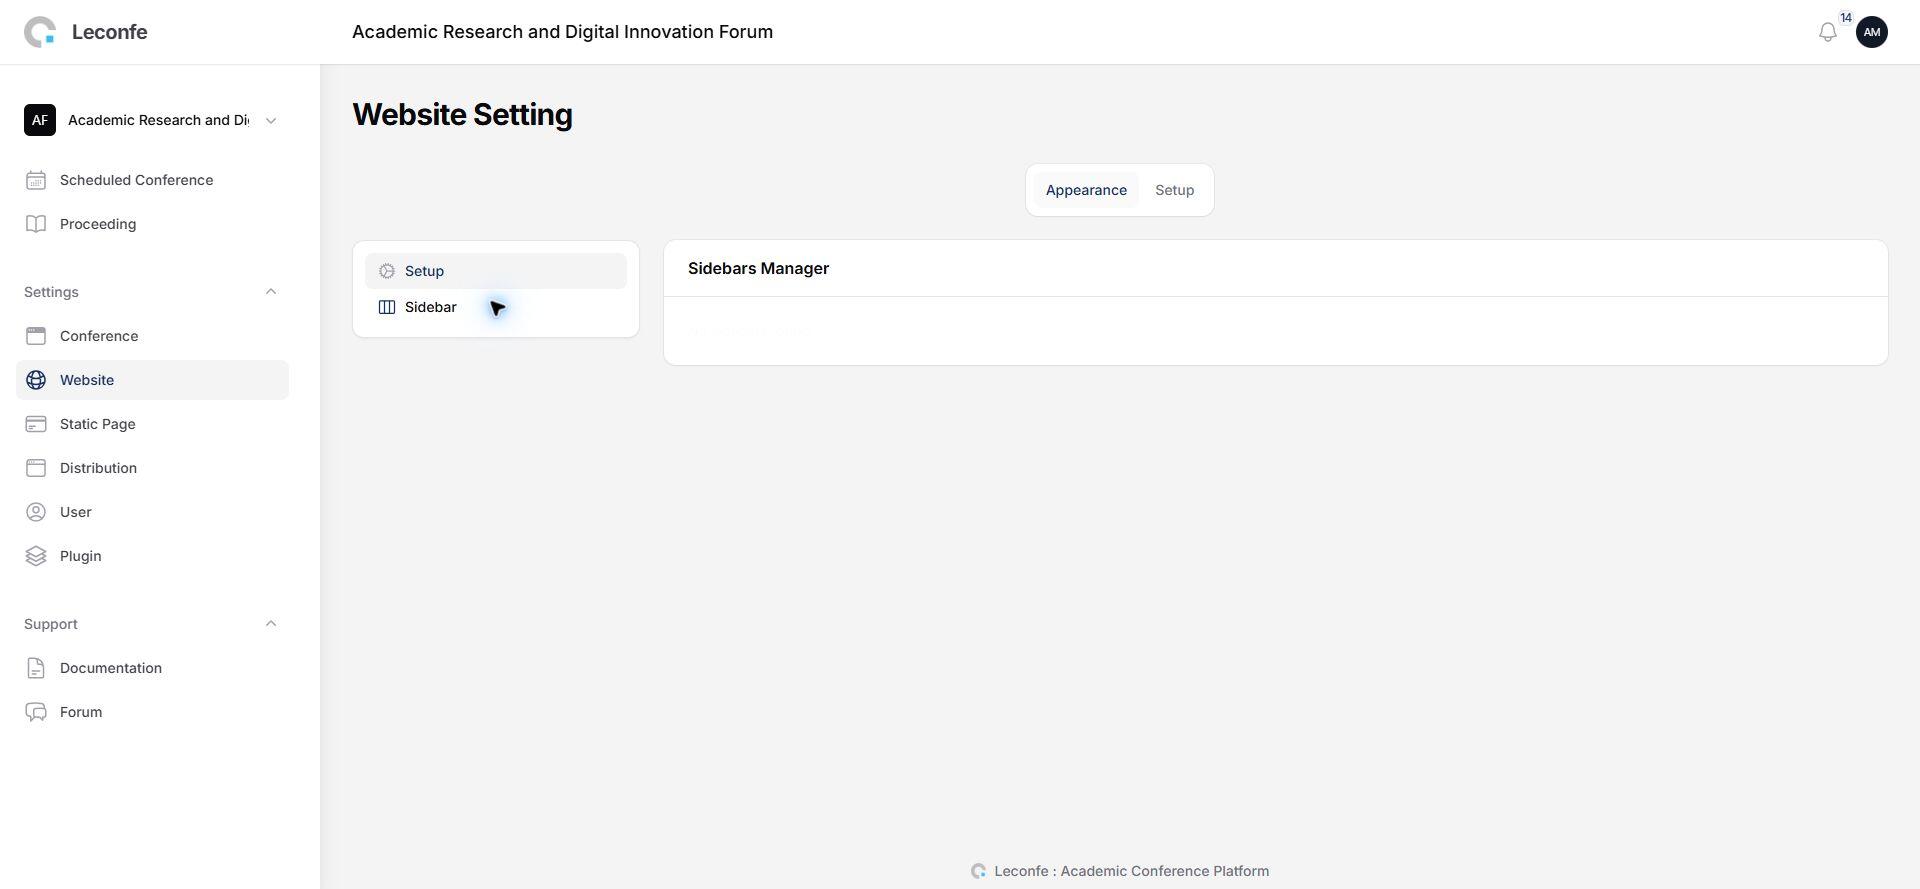
Appearance: Sidebar
Use Sidebar to activate, deactivate, and reorder sidebar items. Create or configure custom sidebar content before enabling it, then verify that empty or duplicate sections are not displayed.
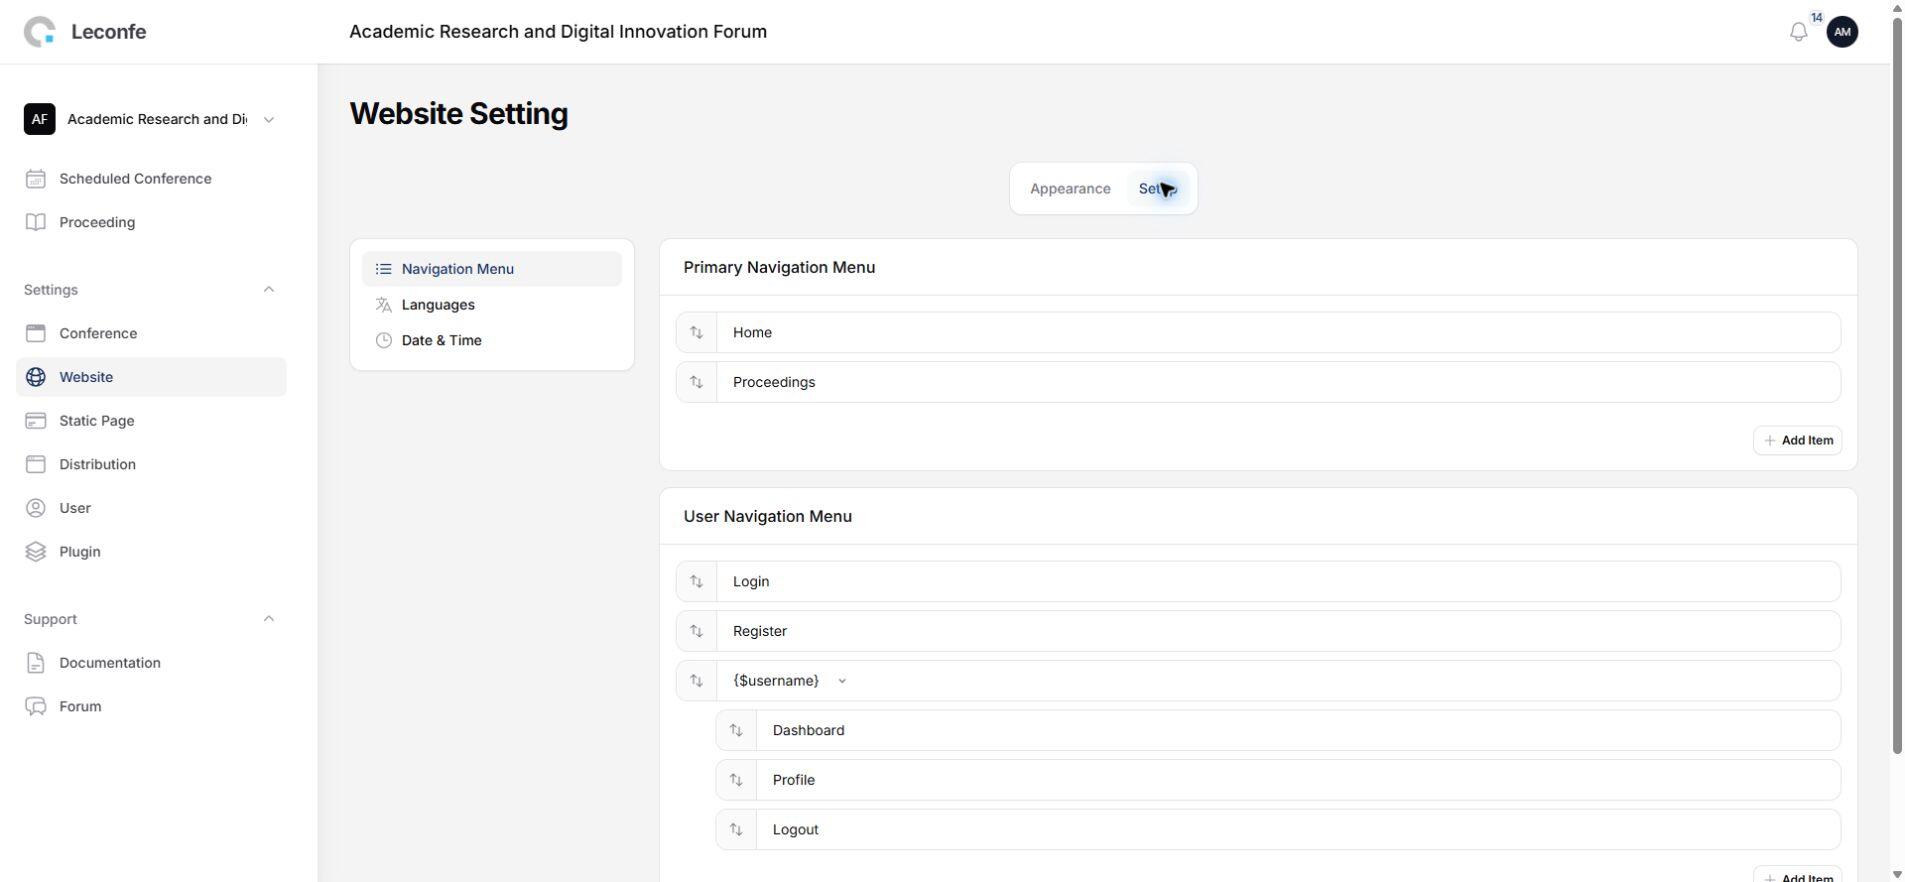
Setup: Navigation Menu
Navigation Menu supports creating, editing, and deleting menus and menu items. Items can be nested and reordered. Check both the primary public navigation and the signed-in user navigation after every structural change.

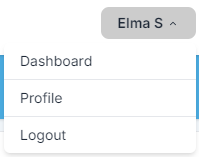
Setup: Languages
Select the enabled languages and choose one default language. This screen enables available translations; it does not create a new translation. Confirm that the default language is included in the enabled-language selection.
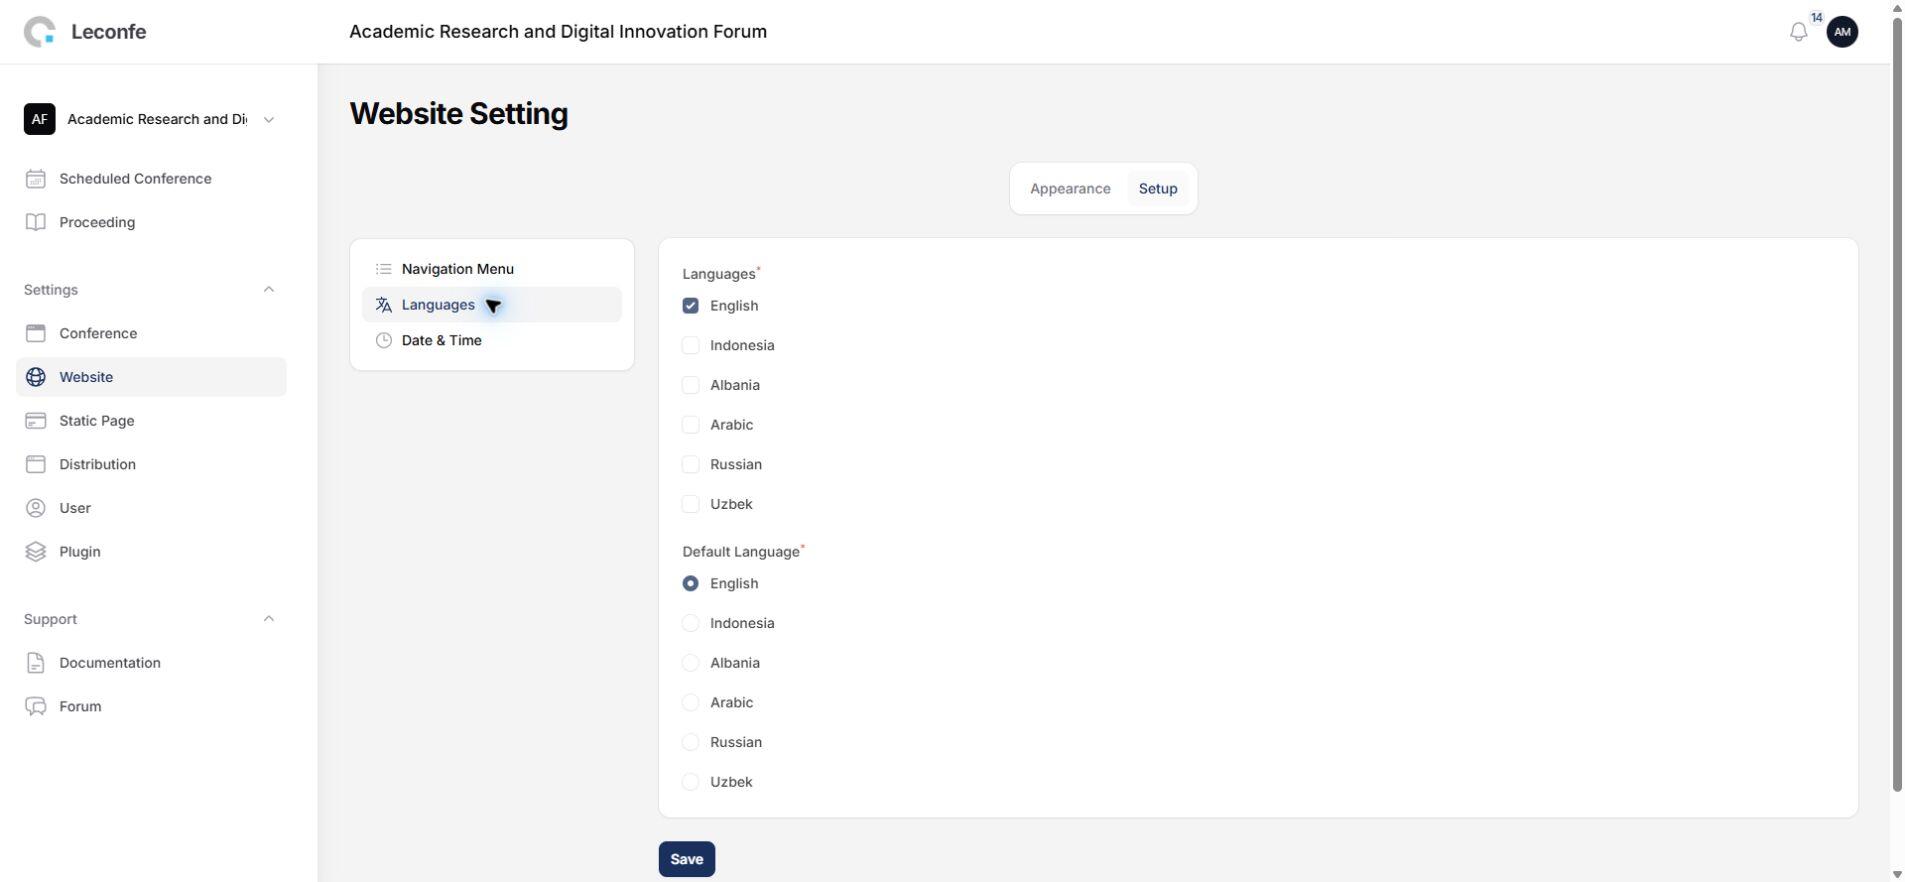
Setup: Date & Time
Select a predefined date and time format or enter a custom format. Review the examples before saving because these formats are reused across conference pages.
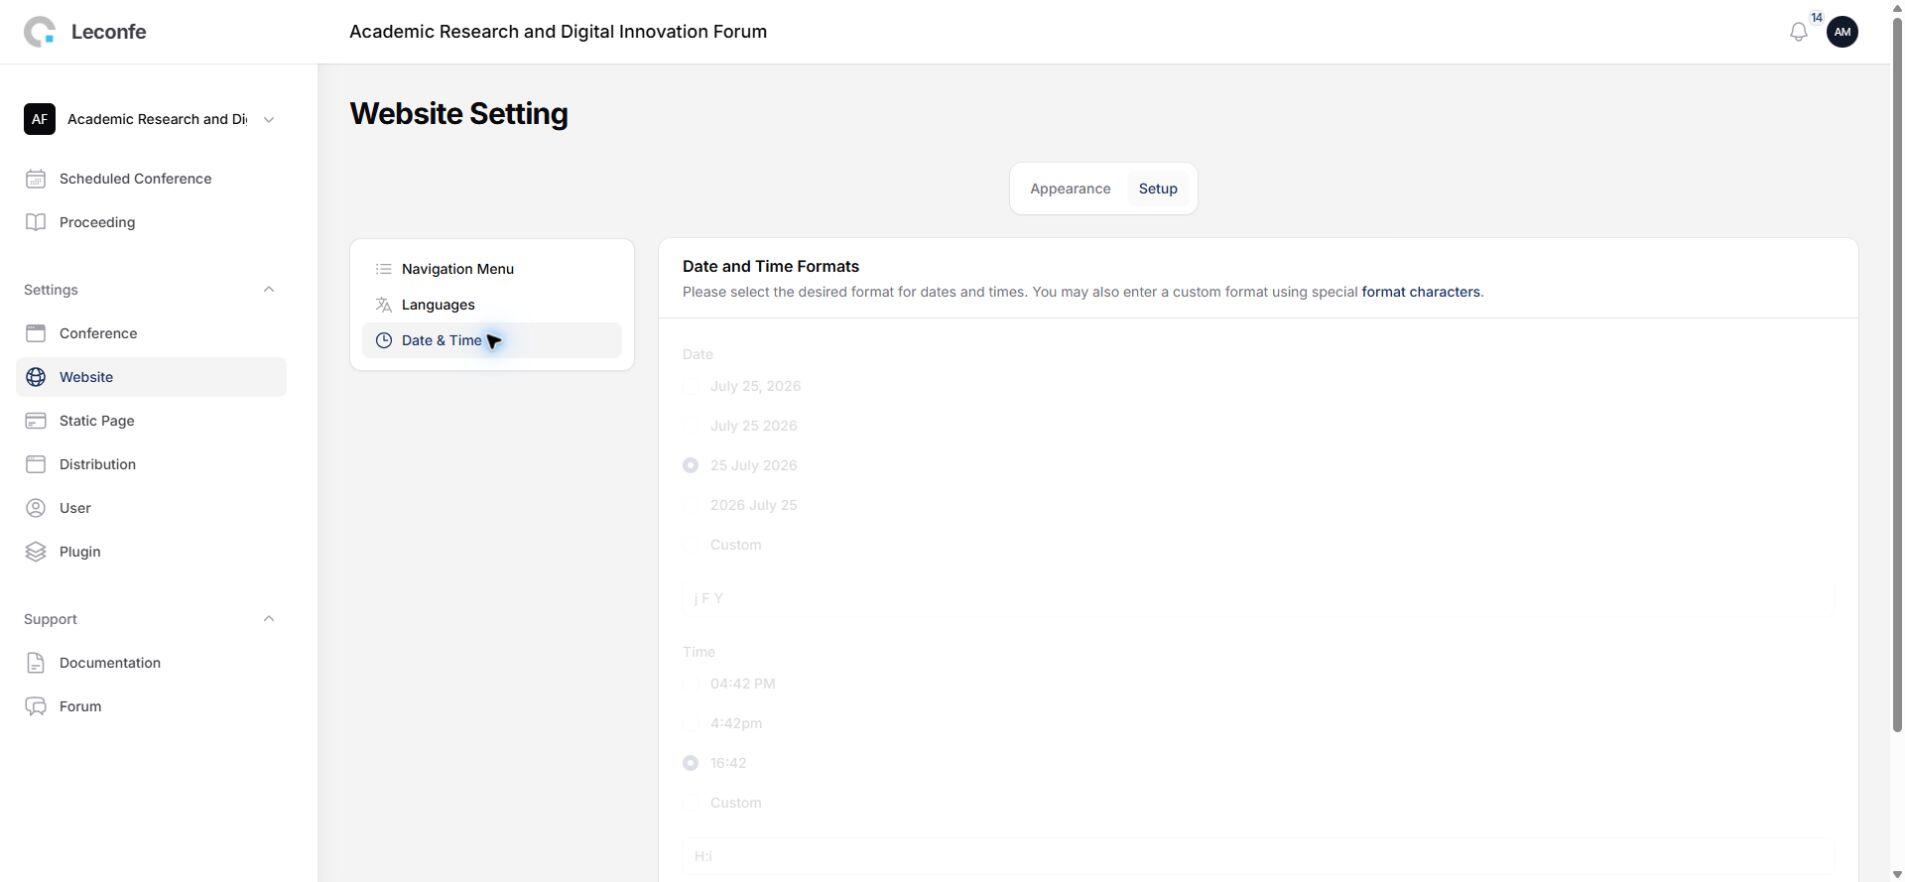
Legacy Theme Screenshot
The earlier page documented a Theme tab with Appearance Color and Custom Stylesheet controls. That Theme tab is not registered by the Conference Website Settings page in the 1.5.0-beta.3 source. The screenshot is retained for historical reference; do not rely on it as a current 1.5 workflow.
Manage Plugins
The Conference Plugin page uses the same plugin-management foundation as Administration. Leconfe 1.5 includes Installed Plugins and Plugin Gallery. Available actions depend on permissions.
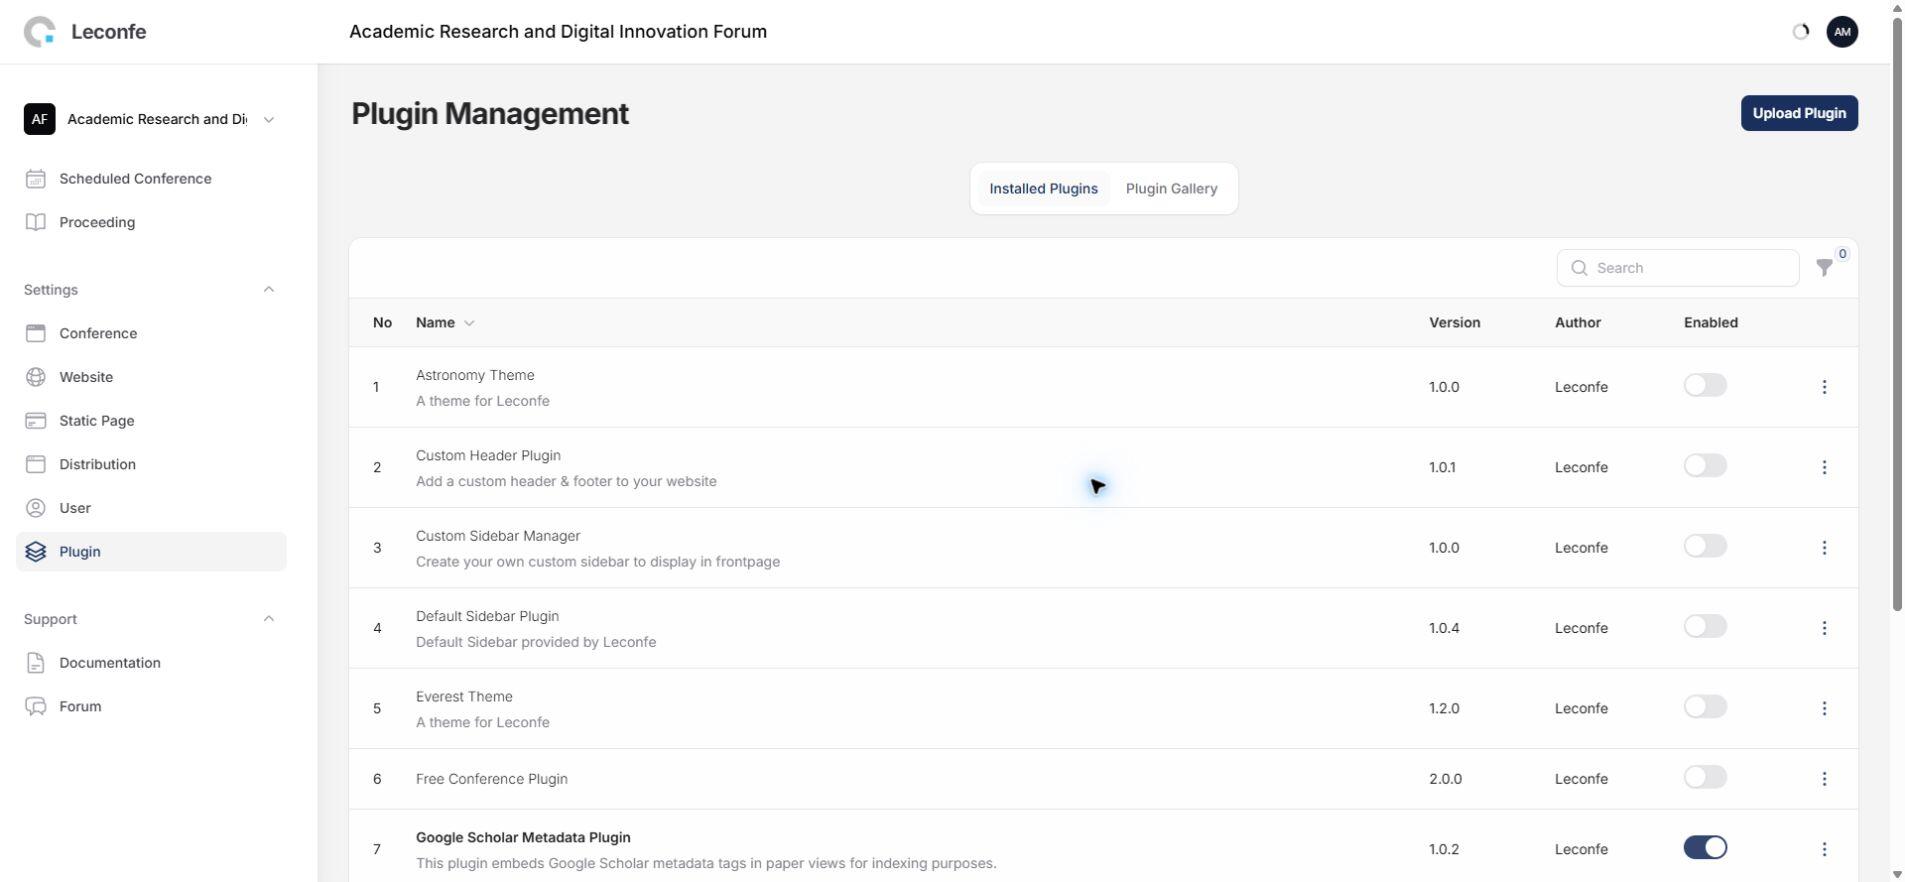
Caution: Plugin activation can affect the wider Leconfe installation, not only the current conference. Install ZIP packages only from trusted sources, verify compatibility with your Leconfe version, create a backup, and test important submission, payment, and publication workflows after a change.
Manage Conference Static Pages
In Leconfe 1.5, Static Page is a core resource rather than a Static Pages plugin. A Conference-level static page belongs to the current conference context.
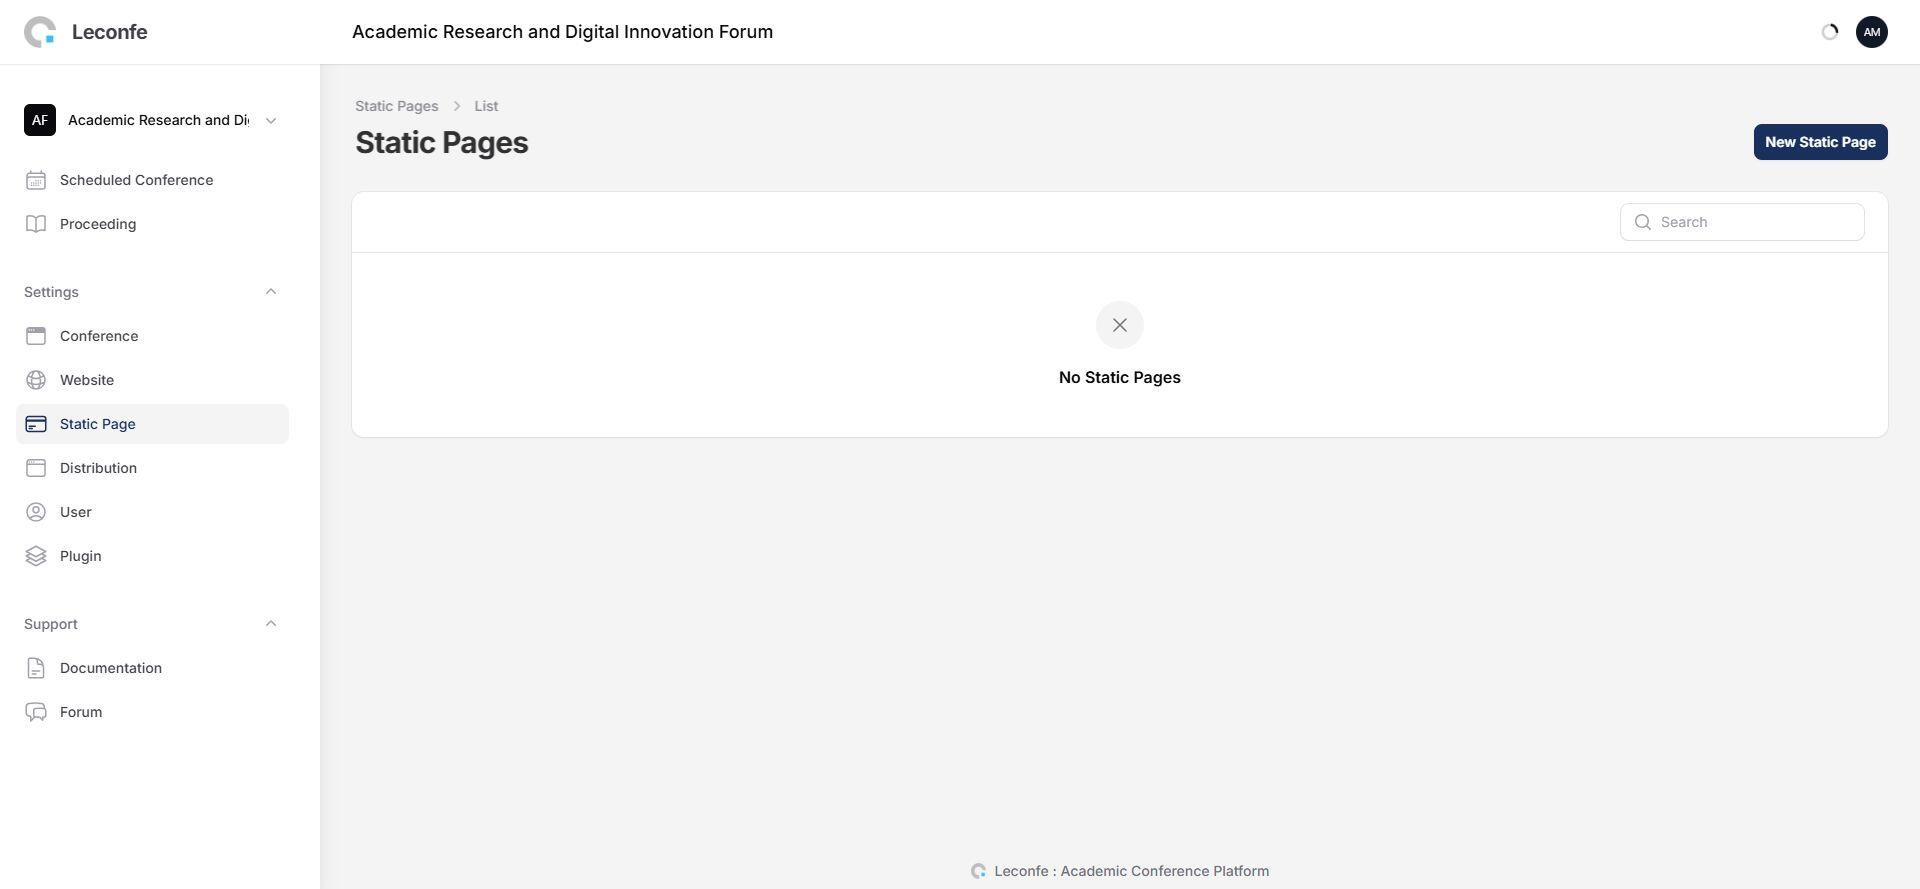
- Open Settings > Static Page.
- Create a page and enter its required title.
- Enter a unique alpha-dash slug for the public URL.
- Add the complete page content and save it.
- Preview the page before adding it to a navigation menu.
Before deleting a static page, remove navigation items and external links that point to it.
Configure Distribution Settings
Open Settings > Distribution. Access requires permission to update the current conference. Leconfe 1.5 organizes the page into Papers, DOI, and Search Indexing.
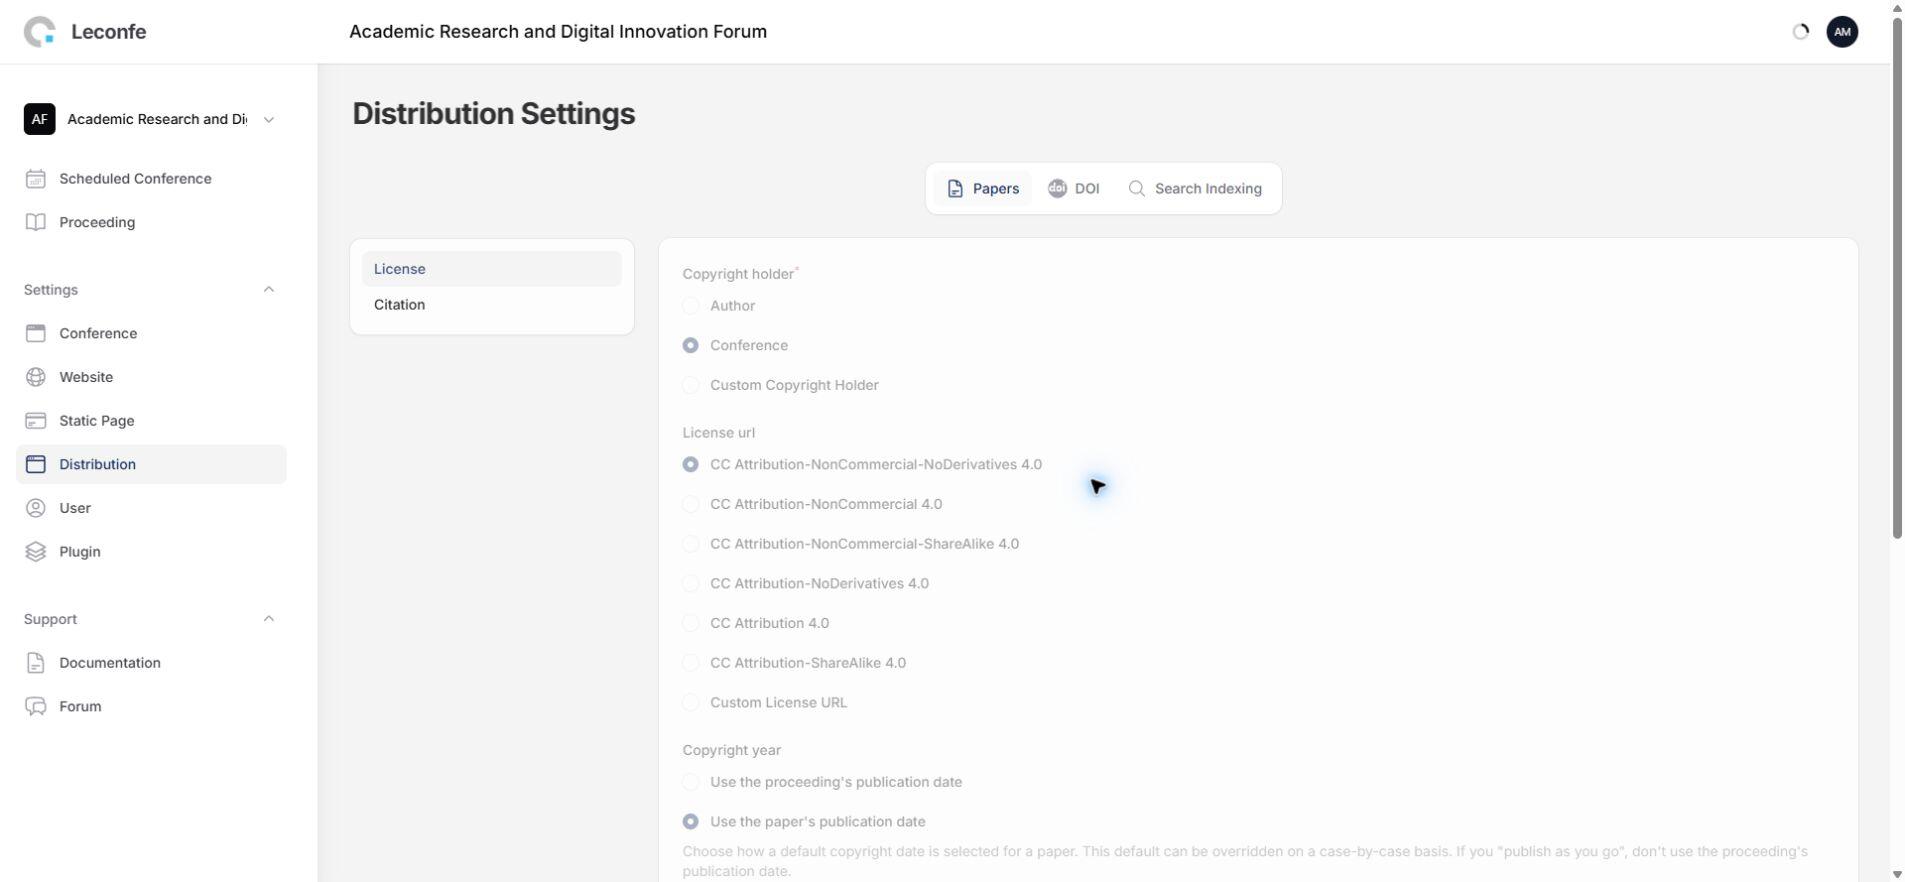
Papers: License
- Copyright Holder: Author, Conference, or a required custom holder.
- License URL: select a supported Creative Commons license or provide a valid custom URL.
- Copyright Year: use the proceeding date or paper date.
- License Terms: add the terms shown with published papers.
Use only a license your conference is authorized to apply. Confirm the exact license URL and wording with the publisher or legal owner before publication.
Papers: Citation
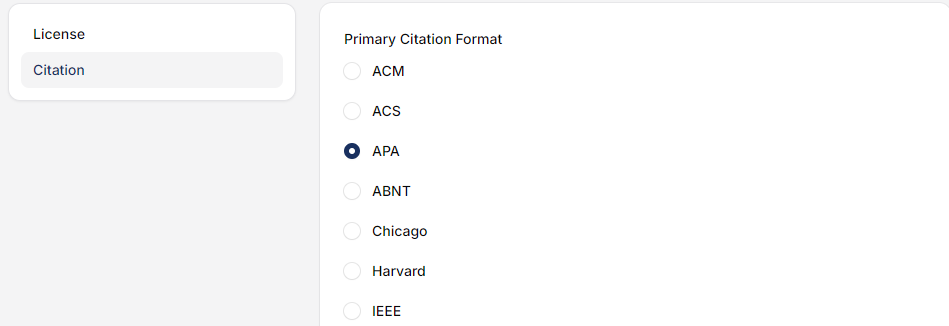
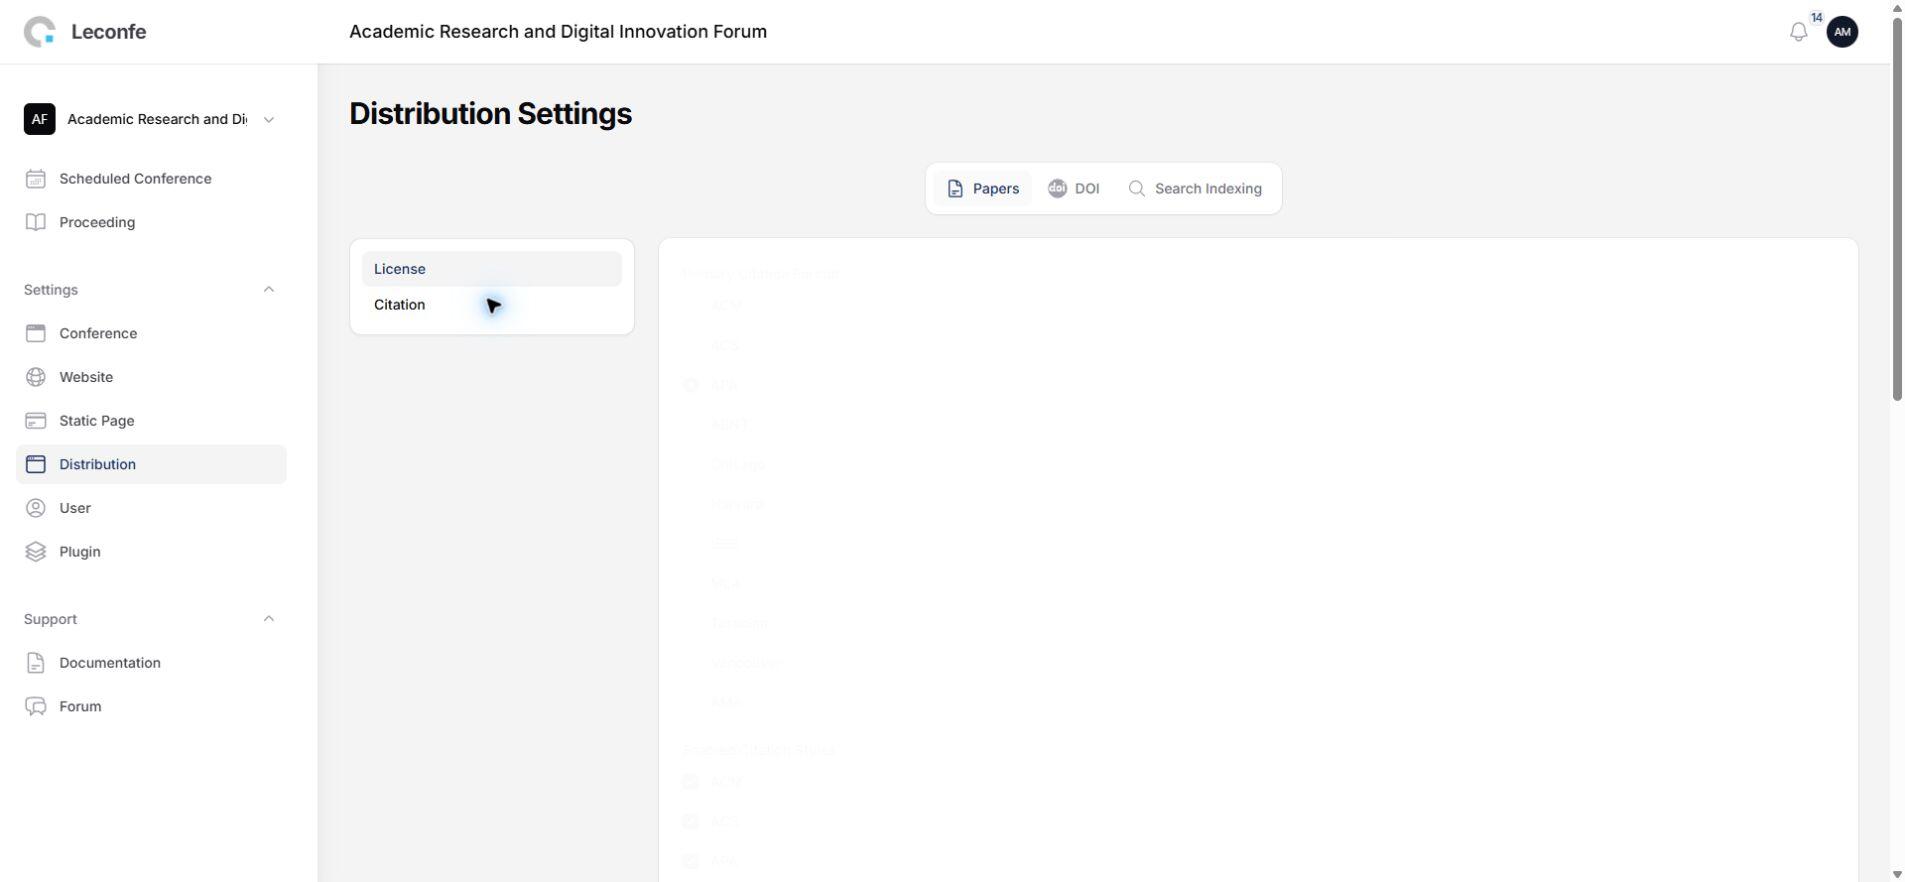
- Select the Primary Citation Format.
- Select the citation styles users can display.
- Select downloadable citation formats.
- Map relevant author roles to citation authors and translators.
DOI: Setup
- Enable DOIs and select the items that receive them. In this beta source, Articles is the available item type.
- Enter the DOI prefix assigned by your registration agency, such as
10.xxxxx. - Choose automatic assignment at the editing stage, upon publication, or leave it unset for manual assignment.
- Choose the default unique suffix generator or manual DOI suffix management.
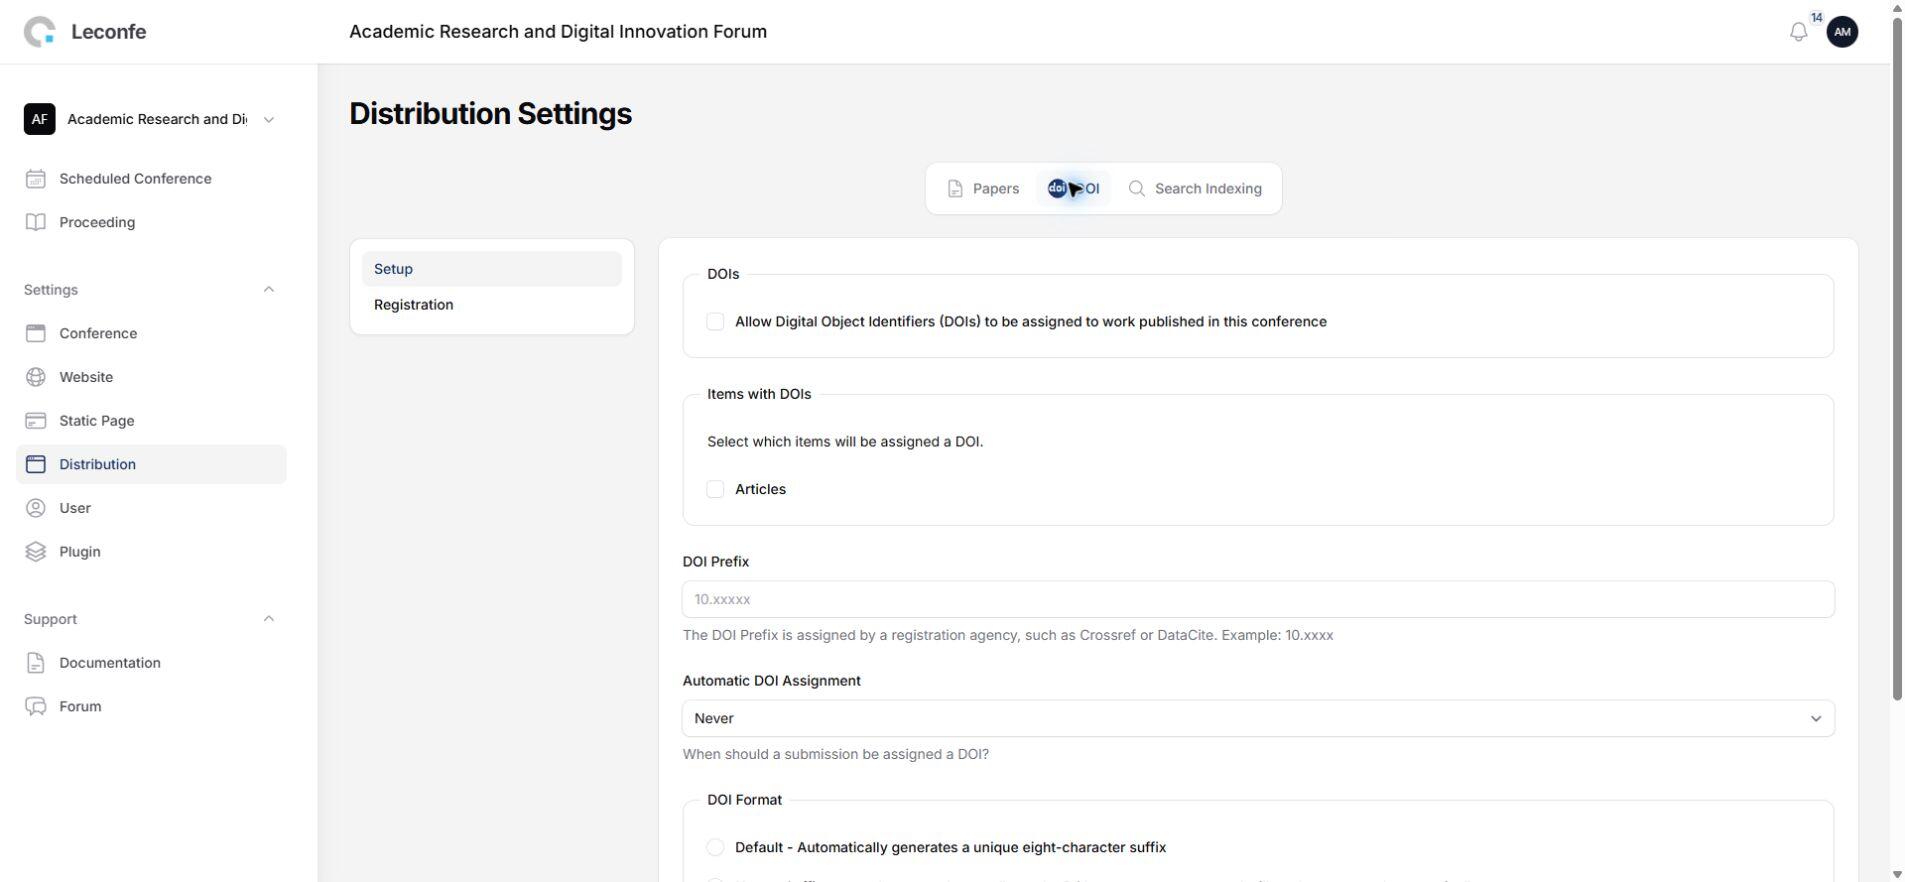
If you manage DOI suffixes manually, you are responsible for uniqueness. Never reuse a DOI assigned to another object.
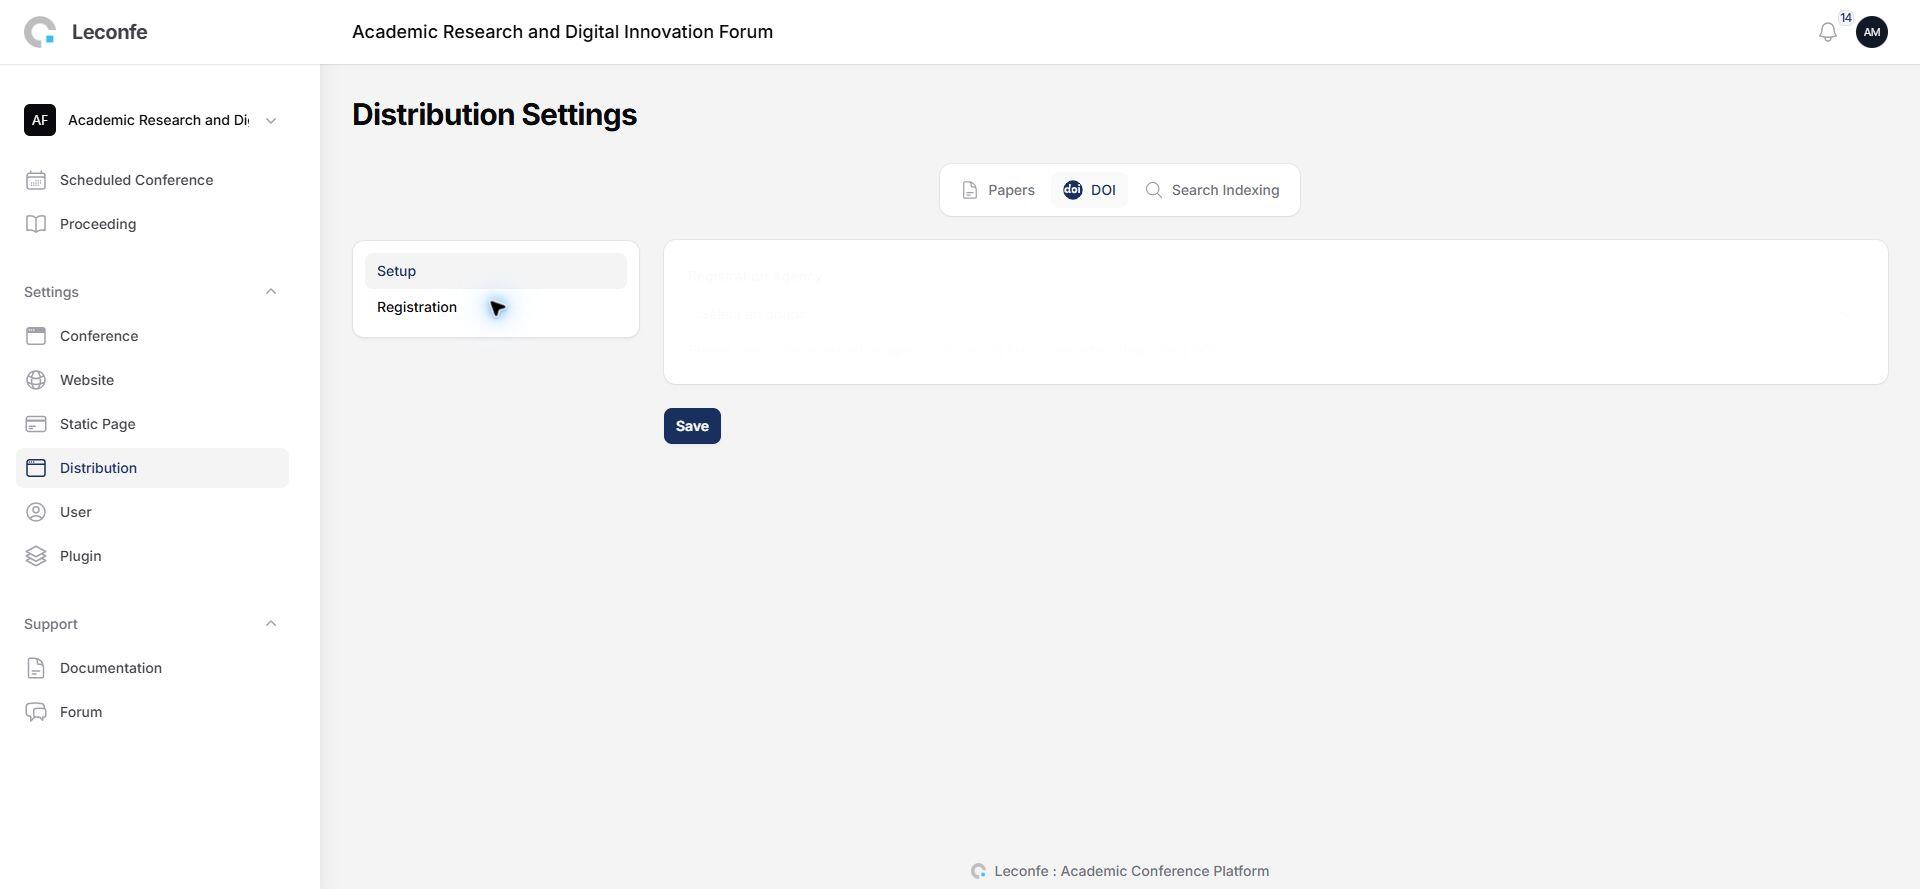
DOI: Registration
Select a registration agency and complete the settings supplied by that agency’s driver. Crossref actions are available only when the Crossref integration is installed and configured. Store credentials securely, use the correct test or production endpoint, and deposit only verified metadata.
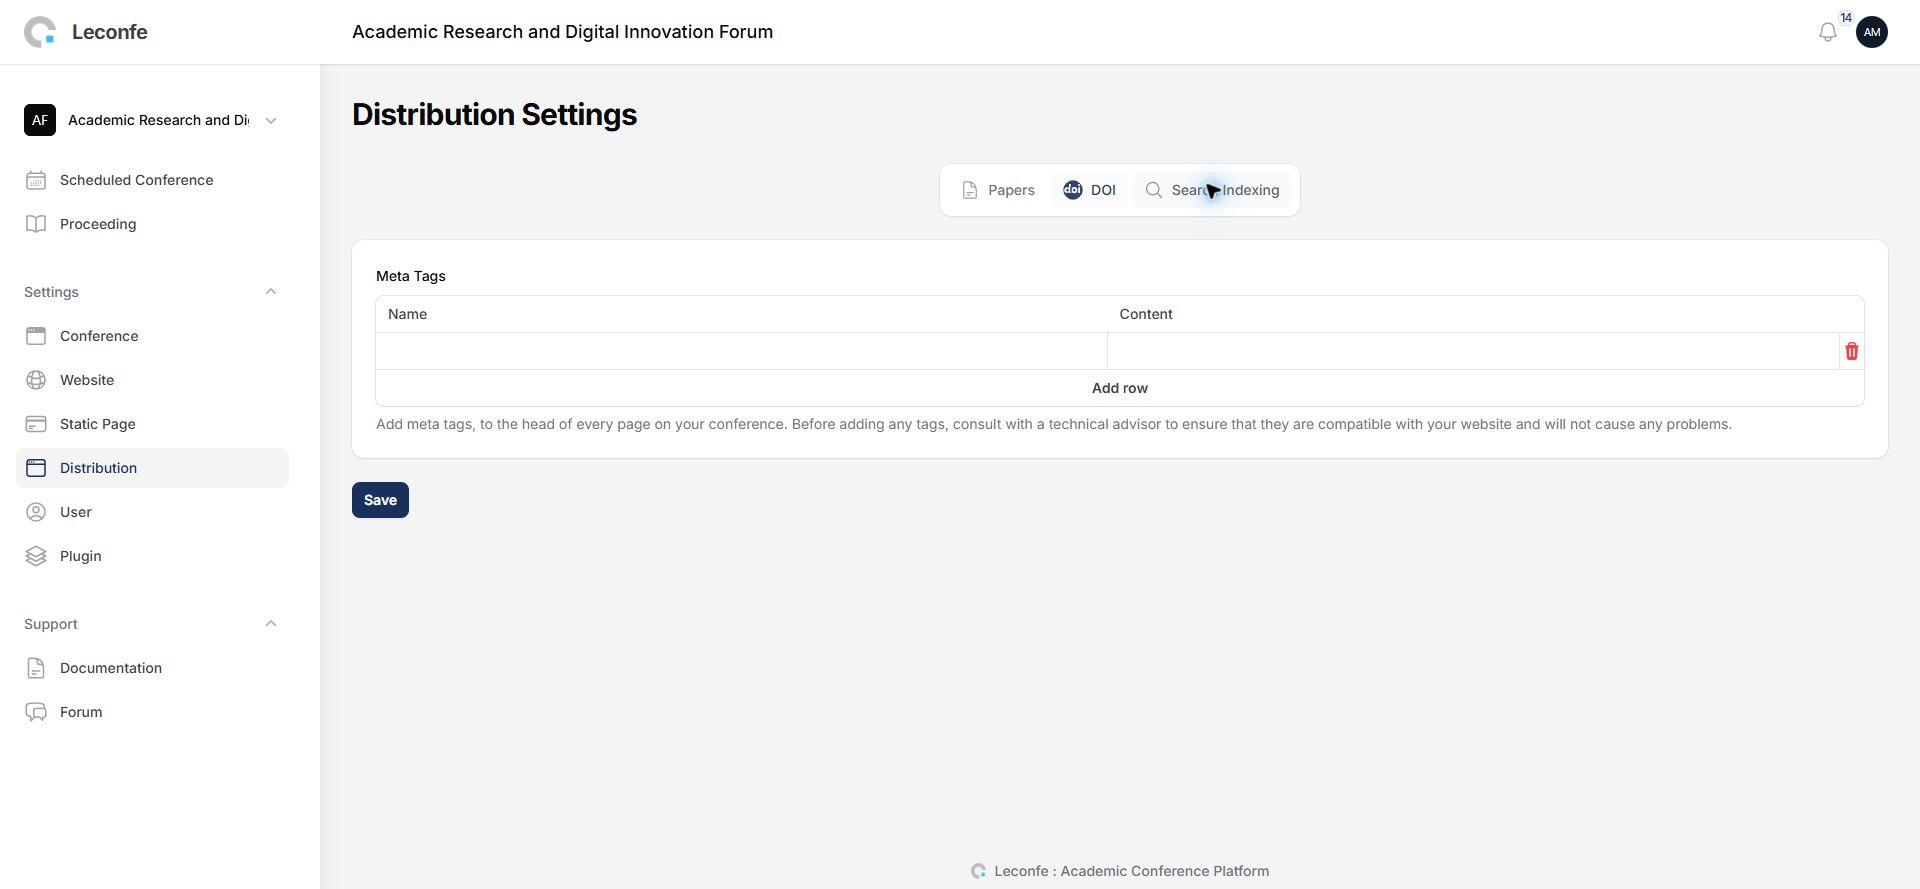
Search Indexing
Add conference-level meta tags as Name and Content pairs, for example a concise description or relevant keywords. Do not add duplicate, misleading, or sensitive metadata.
Generate and Register Paper DOIs
The DOIs page appears only when DOI support is enabled and at least one DOI item is selected. For article DOIs, the list includes submissions in the Editing or Published state. It does not contain only published papers.
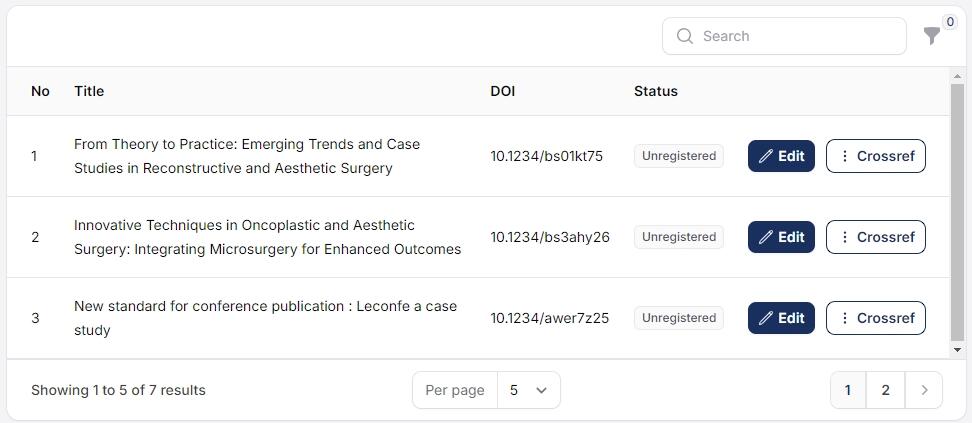
- Complete Distribution > DOI Setup and Registration first.
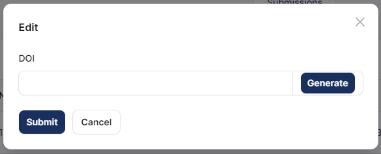
- Open DOIs and select Edit for the paper.
- Generate a DOI suffix or enter a verified DOI manually.
- Save and confirm that the DOI is unique and associated with the correct paper.
- Use the registration action provided by the configured agency driver, then check the resulting status.
Do not redeposit blindly: correct metadata first, confirm the intended action with your registration agency, and retain the returned status or error details. Exported XML is useful for inspection or a manual agency workflow, but exporting a file does not register a DOI by itself.
Manage Users
The User resource lists the signed-in user and users who have roles available in the current conference context. Actions are permission-dependent.
- Create or edit a user profile, email address, password, contributor details, and conference roles.
- Filter users by role.
- Send an email to one user when permitted.
- Enable or disable an account when permitted.
- Send a notification and email to users in selected roles.
- Use Login as User only for authorized support and audit it according to your privacy policy.
Use the least-privilege principle. Do not create duplicate accounts, disclose personal data, or assign administrative roles merely to solve a temporary access problem.
Invite Users
- Open the User page and its User Invitations section.
- Select Invite User.
- Enter the recipient’s email address and select a role available in the current context.
- Send the invitation and monitor its status.
- Pending: sent and still valid.
- Accepted: accepted by the recipient.
- Expired: past its acceptance deadline.
- Cancelled: cancelled before acceptance.
Pending invitations can be copied, resent, or cancelled when the account has User:invite permission. Resending extends the expiry by seven days. Leconfe prevents another valid pending invitation for the same email, role, and context.
Manage Roles
Roles combine a display name with a predefined permission level. Create custom role names only when the available defaults do not clearly describe the team’s responsibilities.
- The available permission levels depend on whether the role is created at Conference or Scheduled Conference scope.
- The permission level is selected when a custom role is created and cannot be changed in the current edit form; only the custom name can be renamed.
- Default roles are protected from rename and deletion.
- A custom role cannot be deleted while it is still assigned to users.
Review role assignments regularly and remove access when a team member’s responsibility ends.
Publisher Library Belongs to a Scheduled Conference
The earlier Conference documentation places Publisher Library in this panel. In Leconfe 1.5.0-beta.3, Publisher Library is configured under a Scheduled Conference’s Workflow Settings. It stores files for that event, supports ordering and downloads, and can mark a file as publicly accessible. Keep private files private and test access while signed out.
Troubleshooting
A Menu Is Missing
Confirm the current panel and conference, then ask an administrator to review the account’s permissions. Website, Conference, and Distribution settings require permission to update the current conference.
A Scheduled Conference Is Not Public
Check the Status badge and use Publish after configuration is complete. Confirm that the record is not in Trash and that its path is correct.
DOI Actions Are Missing
Enable DOI support, select an item type, enter the prefix, save Setup, then configure a registration agency. Some actions appear only when the selected driver provides them.
Website Changes Are Not Visible
Confirm that the correct tab was saved, reload the public page in a private window, and check whether a Scheduled Conference Redirect is taking visitors to another page. Clear caches only when there is evidence that an old cached view is being served.
Final Checklist
- The correct Conference and Scheduled Conference scopes were used.
- Scheduled-event titles, paths, dates, status, submissions, and participants were reviewed.
- Conference identity, public summary, about text, logo, favicon, thumbnail, footer, sidebar, navigation, languages, and date formats were checked.
- Proceedings were previewed and have correct volume, number, year, description, cover, publication state, and current status.
- License, citation, DOI, registration-agency, and search-indexing settings use verified publication metadata.
- Users, invitations, and roles follow least-privilege and privacy requirements.
- Plugin and deletion actions were backed up and tested.
- Public pages were tested while signed out on desktop and mobile.
After completing these checks, continue event-specific setup inside the relevant Scheduled Conference panel.


