
This guide will help you upgrade the Leconfe platform. It provides step-by-step instructions on how to upgrade and includes important information about new features and improvements.
Required Knowledge and Tools
To use this guide, you should have the following:
- Basic GNU/Linux administration skills
- Server credentials, including database credentials
- Knowledge of your server stack
- The ability to access your server’s terminal (SSH)
- The Leconfe version you want to upgrade to
Preparing for the Upgrade
Before starting the upgrade process, perform a complete backup of your data files and database. If the upgrade fails, you will need to recover from backup before continuing. Also review the changes for your upgrade version to learn about important changes and new features. Keep in mind that the upgrade process duration may vary depending on the size of your platform and the speed of your server.
Upgrading the Platform
Follow these steps to safely upgrade Leconfe. Note that each installation may have different server environments, so review and understand the commands before executing them.
1. Create a Backup
It is crucial to create a backup before upgrading the platform. This allows you to restore your platform in case something goes wrong during the upgrade.
Backup your database:
mysqldump -u [username] -p [database_name] > [backup_file.sql]Backup your platform files:
tar -czvf [leconfe_backup_file.tar.gz] [path_to_platform]/storageAlso, make sure to backup your .env file and any other customizations you have made to the software.
2. Create a Sandbox
If you have a staging server, create a sandbox to test the upgrade process before applying it to your production server. This helps identify and fix any issues before upgrading your production server.
Once testing is complete, proceed to apply the upgrade to your production server.
3. Download the Latest Version
Download the latest version of Leconfe from the Leconfe website or from the Leconfe GitHub release page.
4. Check the System Requirements
Check the README file from the downloaded release to ensure that your server meets the system requirements for the upgrade.
5. Install the New Version
Download and extract the latest release. To avoid overwriting important files, extract the archive into an empty directory first, then copy the following files and folders from your current installation:
.env— your environment configurationstorage/app— your uploaded files and data
After copying these files, backup your current installation directory and replace it with the new installation directory.
6. Run the Upgrade
There are two ways to upgrade Leconfe: using the command line or using the web interface.
Using the Command Line
If you have the CLI version of PHP installed (e.g., /usr/bin/php), you can run the following command from the Leconfe installation directory:
php artisan leconfe:upgradeThis command updates the codebase, runs database migrations, and applies any necessary configuration changes. In the screenshot below, we can see that we are currently running version 1.0.0-beta.1 and we are upgrading to version 1.0.0-beta.4:
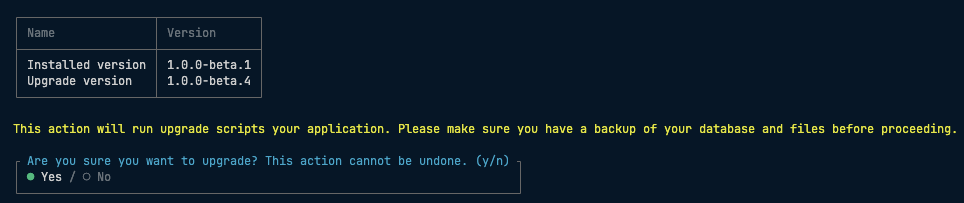
You will be prompted to confirm the upgrade process. Type yes and press Enter to proceed with the upgrade.
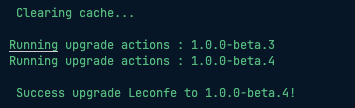
If the upgrade is successful, you will see a message informing you that the upgrade was successful.
Using the Web Interface
If you don’t have access to the command line, you can run the upgrade script from the web interface.
Access your website. Leconfe will detect that an upgrade is needed and will redirect you to the upgrade page. Follow the upgrade instructions to complete the upgrade process.
7. What’s New in v1.4.1
After upgrading to v1.4.1, you will get the following improvements:
- Enhanced Payment System — Automatic invoicing and improved payment tracking for conference registrations
- Role-Based Dashboards — Different dashboard views tailored for administrators, reviewers, authors, and attendees
- Website Builder — Easily create and customize your conference website without coding
- Improved Review Forms — More flexible and customizable peer review forms for better evaluation
- Receipt Generation — Automatically generate and send receipts for completed payments
8. Troubleshooting
If you encounter errors after upgrading, try these steps:
- Clear the application cache by running
php artisan optimize:clear - Check the Leconfe log files at
storage/logs/laravel.logfor detailed error messages - Make sure your
.envfile was properly copied from your old installation - Verify that your server meets the system requirements for the new version
9. Verify the Upgrade
After the upgrade is complete, verify that the upgrade was successful by accessing the platform and checking that all features are working as expected.
10. Celebrate
Congratulations! You have successfully upgraded your Leconfe platform. Enjoy the new features and improvements in the latest version.


