
Dashboard
Dashboard Overview
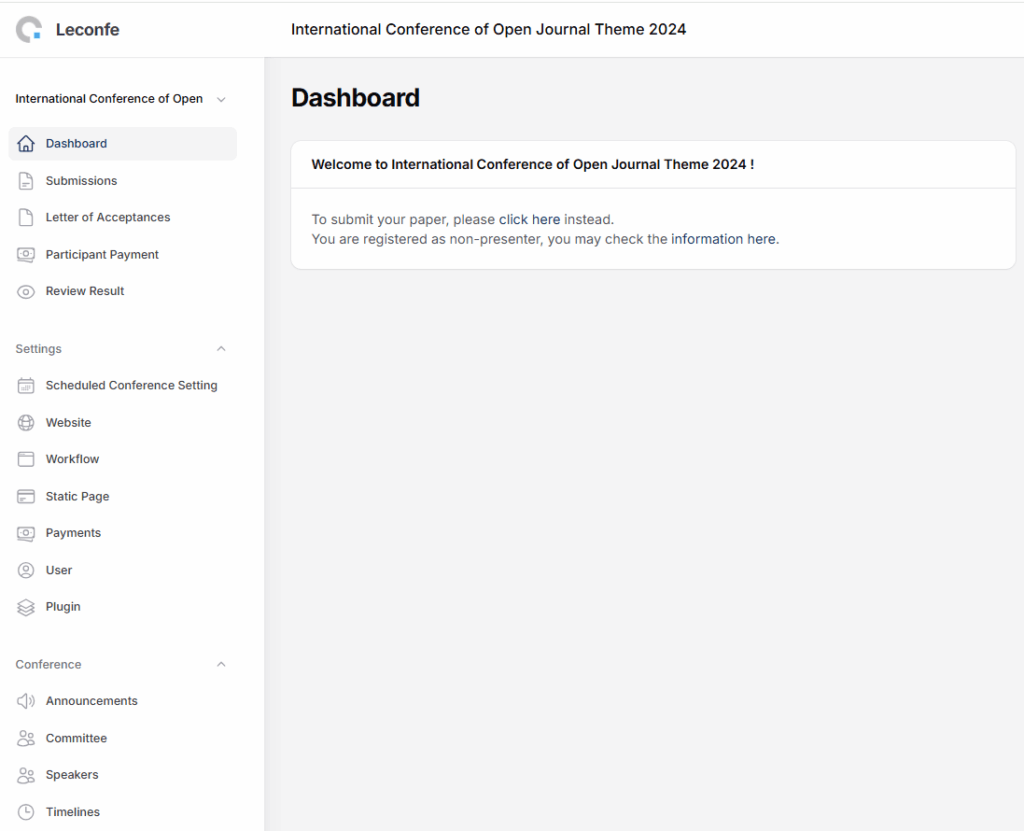
The Dashboard serves as the main control panel for managing and navigating all features within a conference instance in Leconfe. It provides a clear overview of essential functions for both authors and administrators, helping users access submission tools, manage content, and monitor conference progress efficiently.
Main Display
At the top of the dashboard, users will find a welcome message displaying the active conference title.
For example:
Welcome to International Conference of Open Journal Theme 2024!
From this section, authors can:
- Click the provided link to submit a new paper.
- Check their registration status (e.g., as a non-presenter) and access relevant information via the provided link.
Sidebar Navigation
The left sidebar offers structured access to all available features grouped by their functions:
Main Menu
- Dashboard – Displays the overview page and welcome message.
- Submissions – Manage paper submissions and monitor their status.
- Letter of Acceptances – View and download official acceptance letters.
- Participant Payment – Access participant payment information and confirmation status.
- Review Result – Check peer review outcomes and feedback.
Settings
- Scheduled Conference Setting – Configure details of scheduled conferences such as title, description, and date.
- Website – Manage the appearance and content of the conference website (logo, footer, featured conferences, etc.).
- Workflow – Define the submission and review process.
- Static Page – Create or edit static pages for additional information.
- Payments – Configure payment methods and transaction settings.
- User – Manage user accounts, roles, and permissions.
- Plugin – Enable or disable system plugins.
Conference Management
Timelines – Display important conference dates and deadlines.
Announcements – Post updates or important notices for participants.
Committee – Manage the list of conference committees.
Speakers – Add and manage conference speakers.
Role Shortcuts (v1.4.1)
The Dashboard now includes a Role Shortcuts widget that lets you pick your own role. This is especially useful for new users who do not yet have a role in the conference.
The widget shows three role options to choose from:
- Author — Submit papers and go through the review process.
- Reviewer — Review and evaluate submitted papers.
- Participant — Register as a conference participant.
Simply click a role, and the system will assign it to your account. Once a role is selected, you will be taken to the right page — for example, the submission page for Authors, or the registration page for Participants.
Note: This widget only appears if you do not yet have a role in the conference, or if your account does not have admin access. This makes sure every user can get started right away without waiting for an admin to assign a role.
Submission
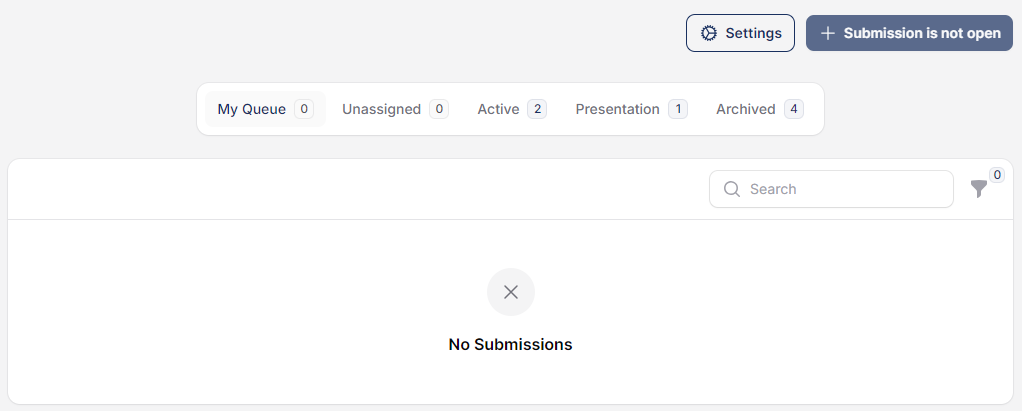
The Submission section in the conference management system provides a streamlined interface for managing and tracking all paper submissions. This section is organized into several tabs:
- My Queue: Displays submissions that have been specifically assigned to you for review or action.
- Unassigned: Shows submissions that have not yet been assigned to any reviewer or committee member.
- Active: Lists all currently active submissions that are in the process of review, revision, or awaiting final decisions.
- Presentation: Contains submissions that have been accepted and scheduled for presentation at the conference.
- Archived: Stores submissions that have been finalized and moved out of active status, either after acceptance or rejection, for future reference.

By clicking the “Settings” button, you can easily access advanced configuration options for the submission process. This allows you to customize various aspects such as paper components, author guidance, author roles, tracks, and more, ensuring that the submission process aligns with the specific requirements of your conference.

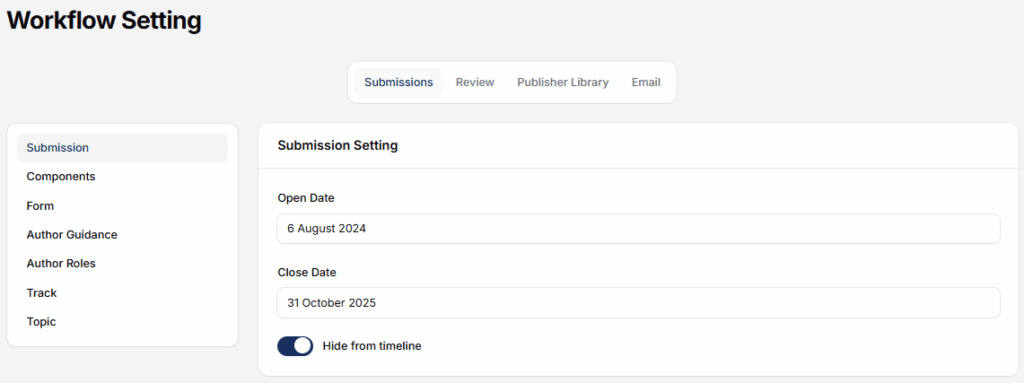
To manage the opening and closing dates for paper submissions, you can configure these settings in the “Workflow Setting” menu.
Call for Abstract (v1.4.1)
The Call for Abstract feature lets editors manage incoming abstracts with three main actions: Accept, Reject, or Skip Review. This feature can be accessed from the submission detail page.
Accepting Abstracts and Sending to Review
When you press the Accept button, you can choose which abstract file to send to the review stage. You can also send an email notification to the author that their abstract has been accepted. If submission payment is enabled, you will be asked to select a payment fee — and a payment record will be created automatically for the submission.
Rejecting Abstracts
The Reject button lets you reject abstracts that do not meet the criteria. You can write a rejection message and send it by email to the author. If a payment has already been created, the payment status will also be rejected.
Skip Review
The Skip Review button is a shortcut that lets you accept a submission right away without going through the review process. The submission goes straight to the Editing stage. This is useful for invited papers or submissions that are already guaranteed to be accepted without review.
Important: All actions above can include an email notification to the author. You can also choose not to send a notification by checking the “Do not send notification to author” option.
Scheduled Conference Setting
Masthead
The configuration you make in this menu will have an impact as shown on the following page.
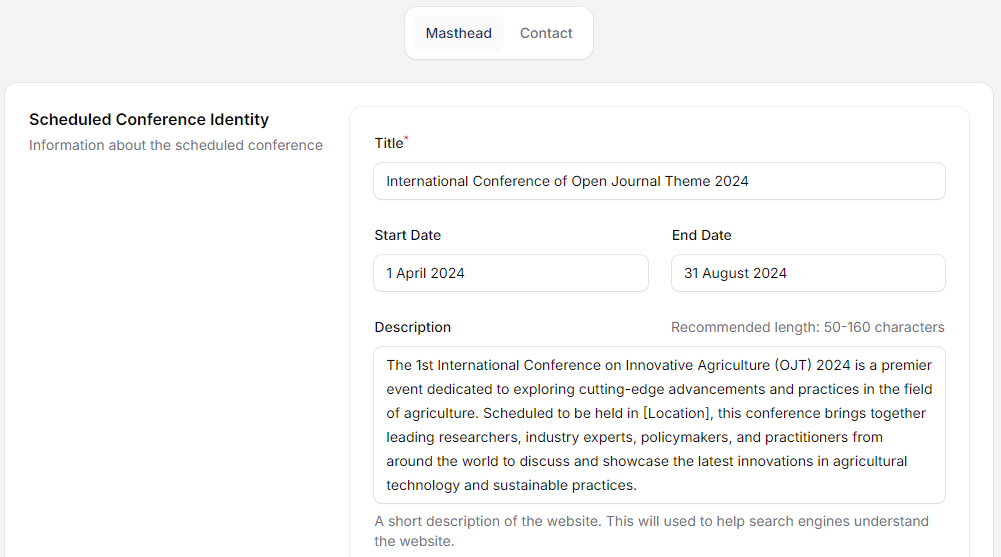
The Scheduled Conference menu provides an organized overview of upcoming conferences, displaying key details such as the conference title, start and end dates, description, and location. It also includes columns for a conference summary, information about the editorial team, and an “About the Scheduled Conference” section.
Contact
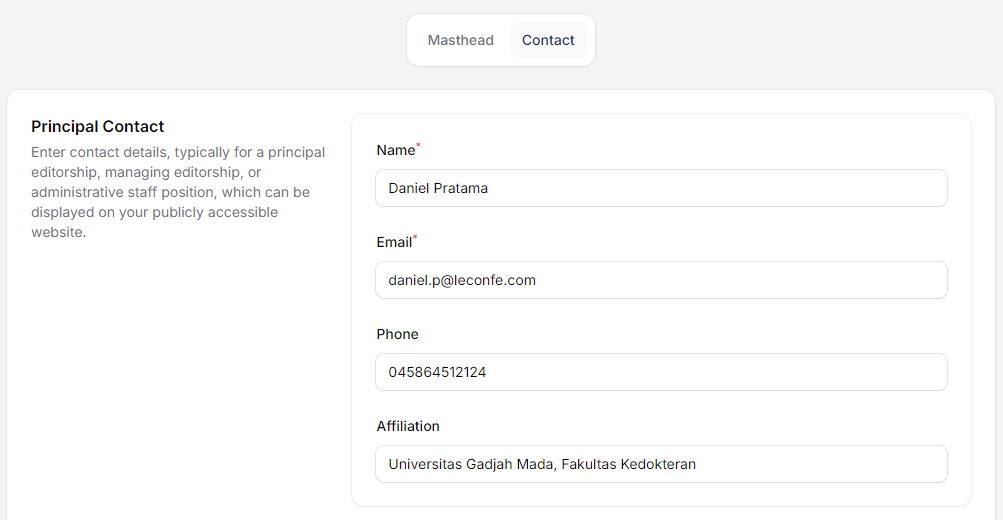
The Contact menu allows conference organizers to provide their contact details for participants and stakeholders. This form typically includes fields for the organizer’s name, email, phone number, and any additional contact information. It ensures that participants can easily reach out to the organizers for inquiries, support, or additional information regarding the conference
Website
Appearance
Theme

This menu allows you to customize the color scheme of your conference, ensuring it aligns with your branding. If you have specific customizations for your conference page, you can create them using a CSS file and upload it through the “Custom Stylesheet” menu.
Setup
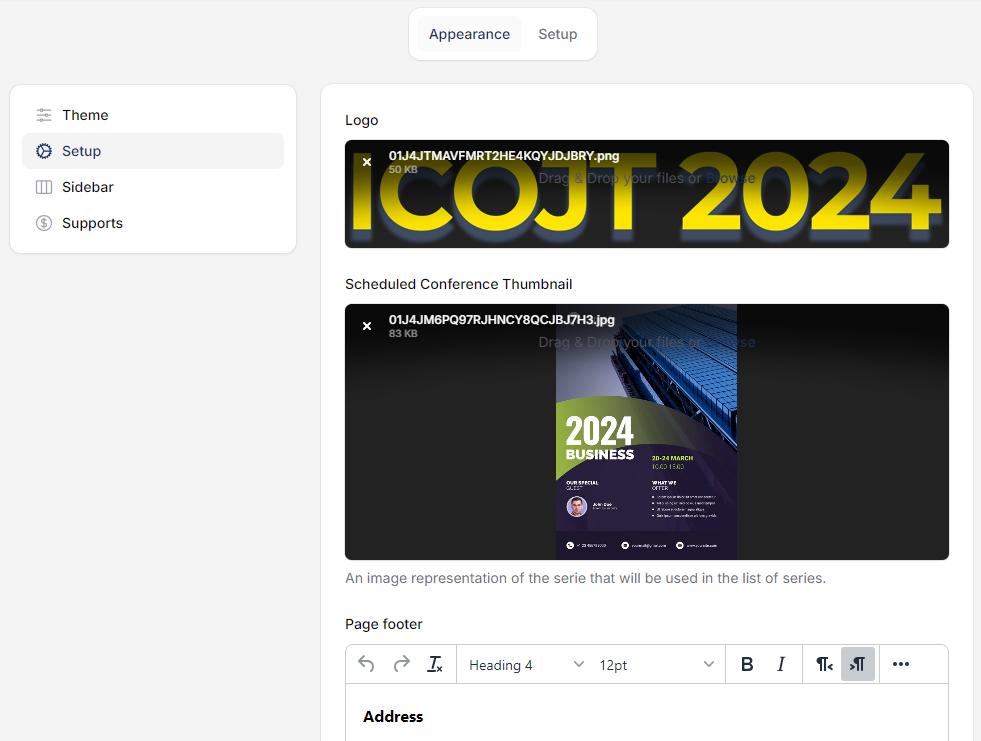
In this menu, you can customize the logo and thumbnail for your conference. Additionally, you can set the footer information for your conference pages.
Sidebar
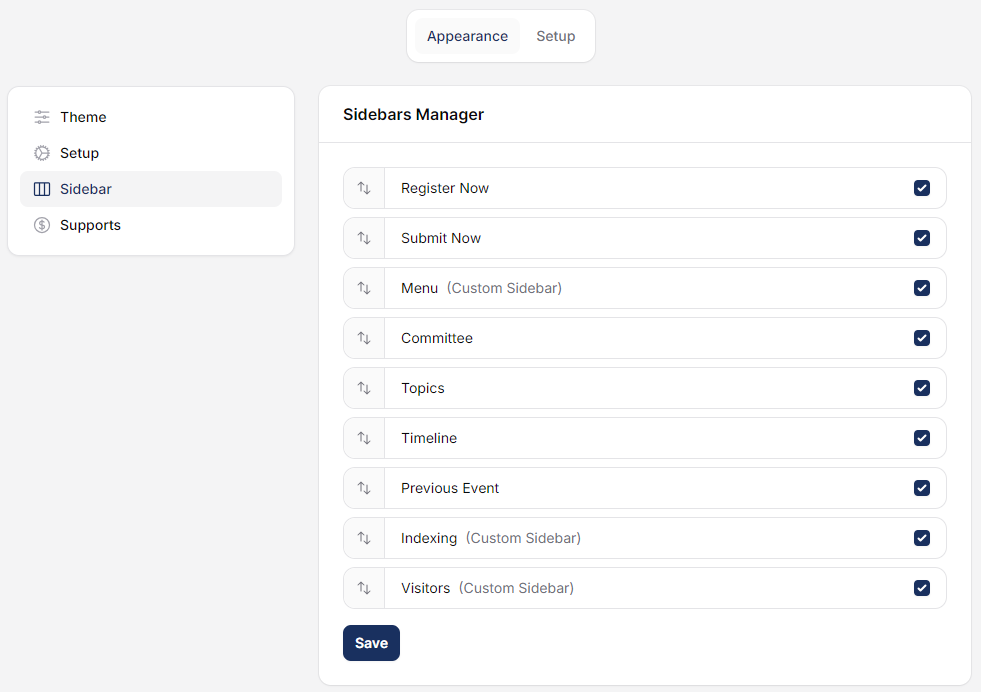
The Sidebar menu allows you to manage the display of various elements such as committees, agenda, topics, or custom blocks created in the plugin menu. All these data will appear in this sidebar, and if you want them to be visible on the front page, simply check the items you want to display. Additionally, you can organize the order of these items directly within this menu for a well-structured sidebar layout.
Supports
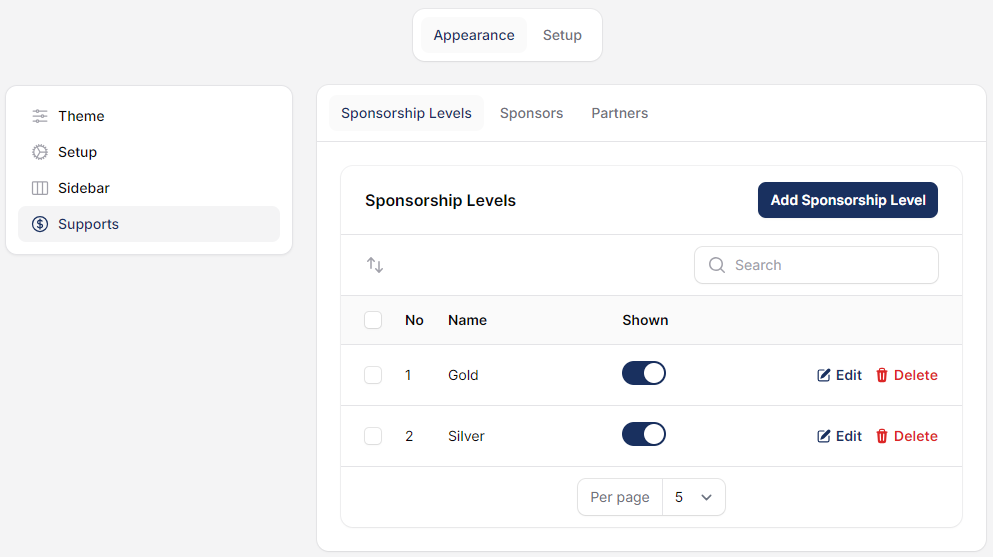
The Supports menu provides tools for managing conference sponsorships and partnerships. Within this menu, you can define various Sponsorship Levels, Add Sponsor, and Add Partner details. These options allow you to organize and showcase sponsors and partners based on their contribution levels, helping to streamline sponsor management and visibility for the conference.
Sponsorship Levels
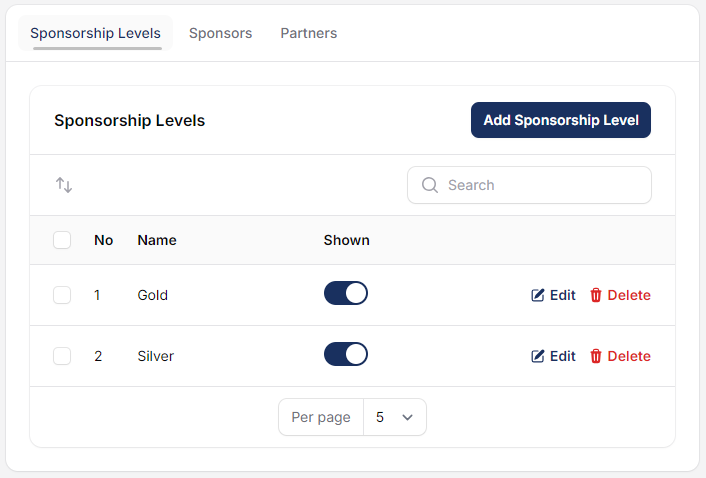
This section allows you to define different levels of sponsorship (e.g., Platinum, Gold, Silver) based on the sponsor’s contribution.
Sponsors
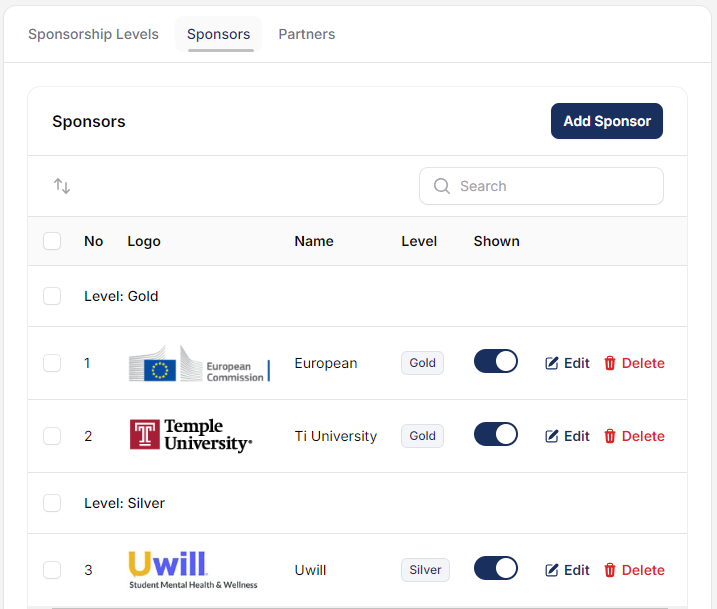
This option enables you to add detailed information about each sponsor, including their name, logo, and level of sponsorship.
Partners
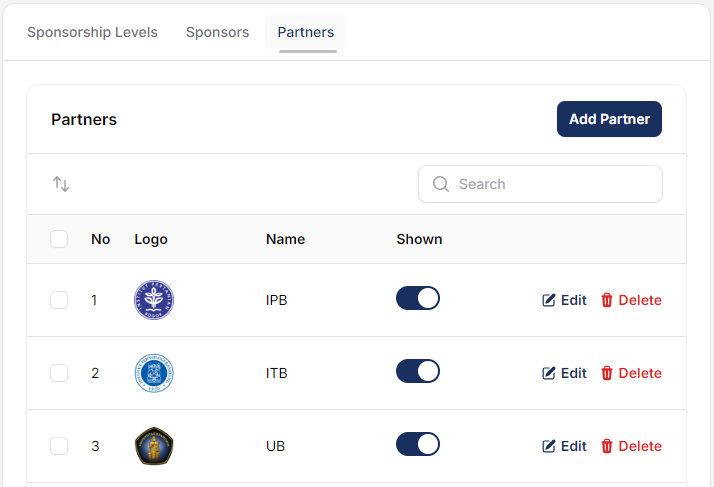
This section is for adding key partners of the conference, distinct from sponsors. You can input partner details such as logos.
Setup
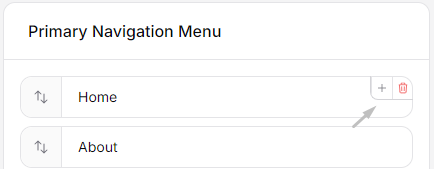
Navigation Menu
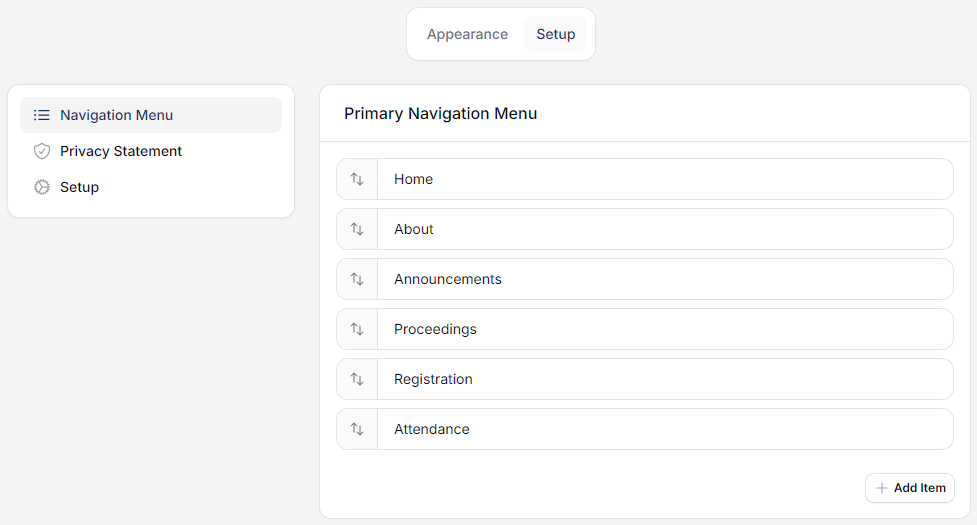
The Navigation Menu allows you to configure the main menu on your conference page, enabling you to add, remove, and organize menu items. There are two configuration options within this menu:
Primary Navigation Menu:

This is the main menu displayed prominently on the conference site. It typically includes key sections like home, agenda, submissions, and announcements, providing easy access for all users.
User Navigation Menu:

This menu is user-specific, offering options related to user accounts, such as login, profile, and register.
To remove or add child items within each navigation menu, simply hover your pointer over the top-right corner of any navigation item.
Privacy Statement
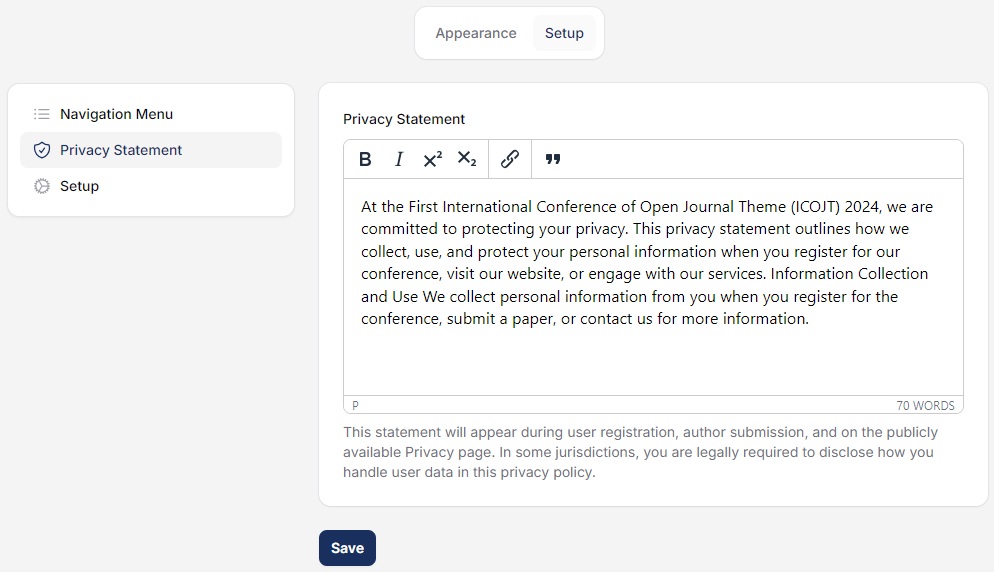
In this menu you can add information about how user data is collected, stored, and used during the conference. It outlines the platform’s privacy policies, ensuring transparency and compliance with data protection regulations.
Setup
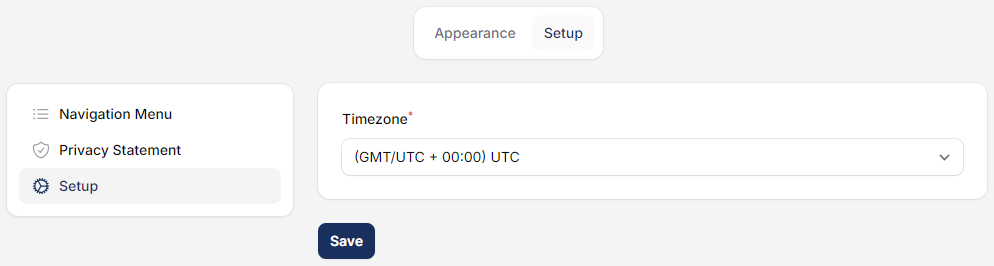
The Timezone Configuration menu allows you to set the default timezone for your conference. This ensures that all event schedules, submission deadlines, and notifications are accurately displayed based on the chosen time zone.
Workflow
Submissions
Components
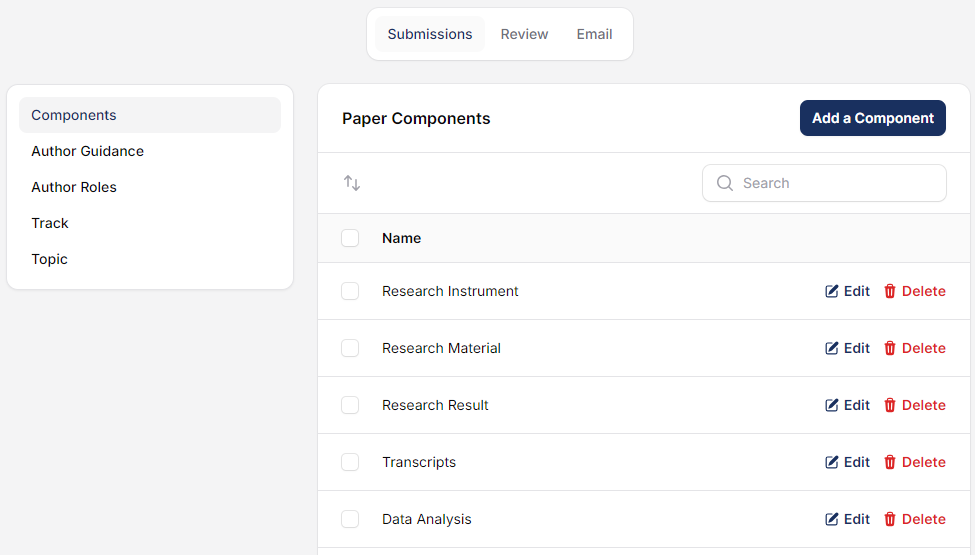
By default, Leconfe provides several commonly used paper components. However, if adjustments are needed or you wish to add specific components, you can do so within this menu, allowing for more tailored configurations to suit your conference needs.
Author Guidance
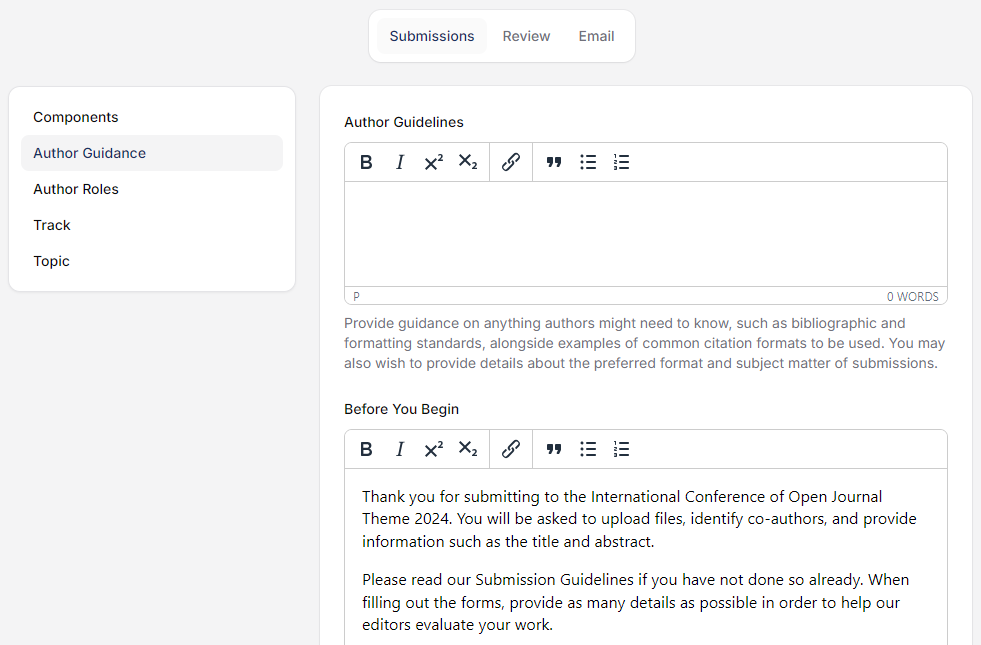
The Author Guidance menu comprises several key sections, including Author Guidelines, Before You Begin, and Submission Checklist. Each of these components can be customized to align with the specific requirements and objectives of your conference.
Author Roles
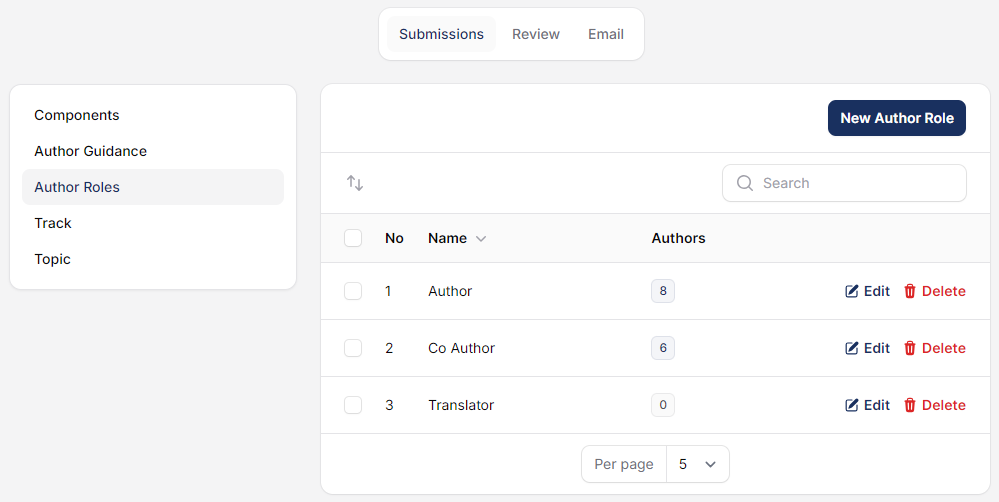
Within the Author Roles menu, you have the flexibility to customize the roles according to your conference’s.
Note:
Ensure that any changes to author roles align with your conference’s policies and academic standards. It is advisable to review and update these roles before opening submissions to maintain consistency throughout the conference proceedings.
Track
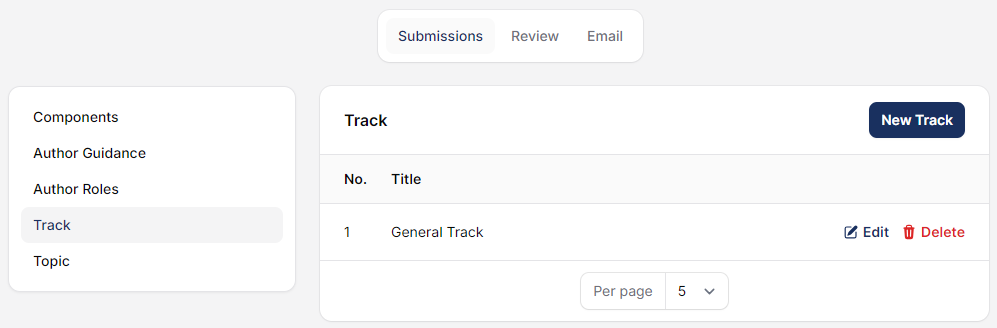
Tracks in conferences serve as an organizational framework to categorize and structure content effectively. They allow for thematic grouping of presentations or papers.
Topic
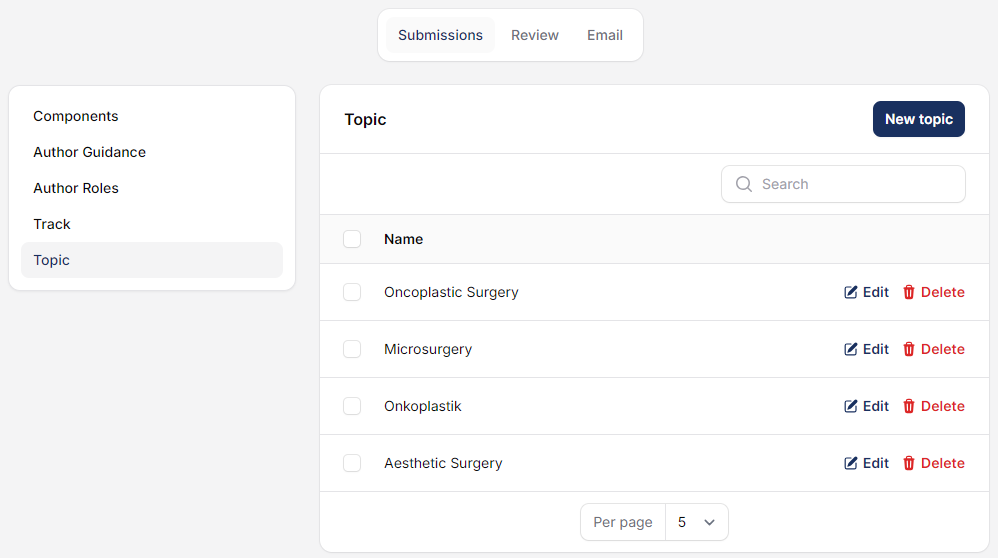
If your conference covers a variety of topics, you have the option to apply a categorization system through this menu feature. Please create and adjust the topic to the scope of your conference.
Reviewer
Setup
This tab allows you to configure your conference review process.
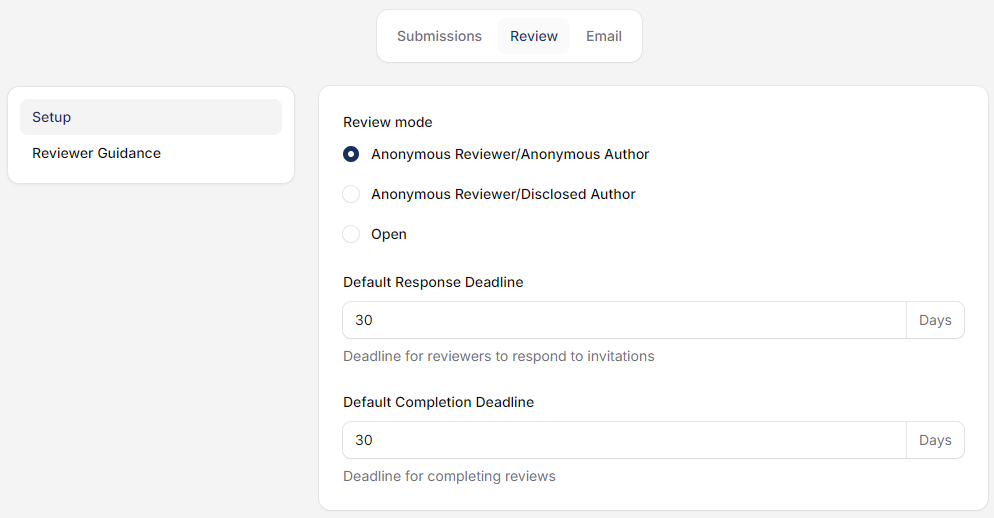
The Setup Review feature allows you to configure review process settings for your conference. It includes two key options:
Default Response Deadline: Sets the standard deadline by which reviewers should submit their feedback on submitted papers.
Default Completion Deadline: Defines the overall deadline for completing the review process, including final decisions and recommendations.
Reviewer Guidance
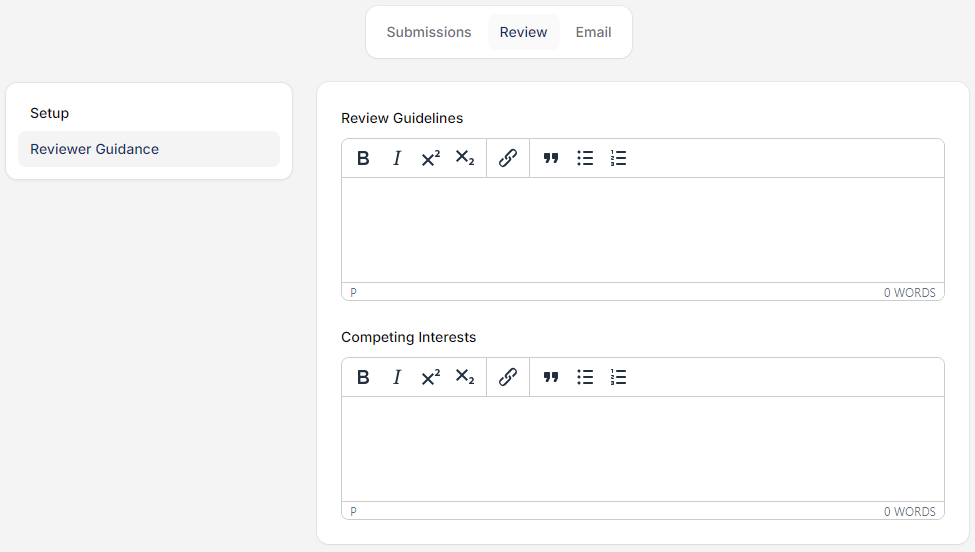
Review Guidelines: Provides detailed instructions and criteria for reviewers to follow when evaluating submissions.
Competing Interests: Requires reviewers to disclose any potential conflicts of interest that could influence their evaluation of the submissions.
Editor Guidance (v1.4.1)
The Editor Guidance menu is where conference admins can write guidelines and instructions specifically for editors. This guidance appears as a Help button that editors can access while working in the system.
On this page, you simply write the guidance using the built-in text editor. You can add formatting such as bold, italic, links, lists, and more. Once saved, the guidance is automatically available to all editors in your conference.
This feature ensures all editors follow the same reference when handling submissions, making the review process more consistent and standardized.
Email Templates
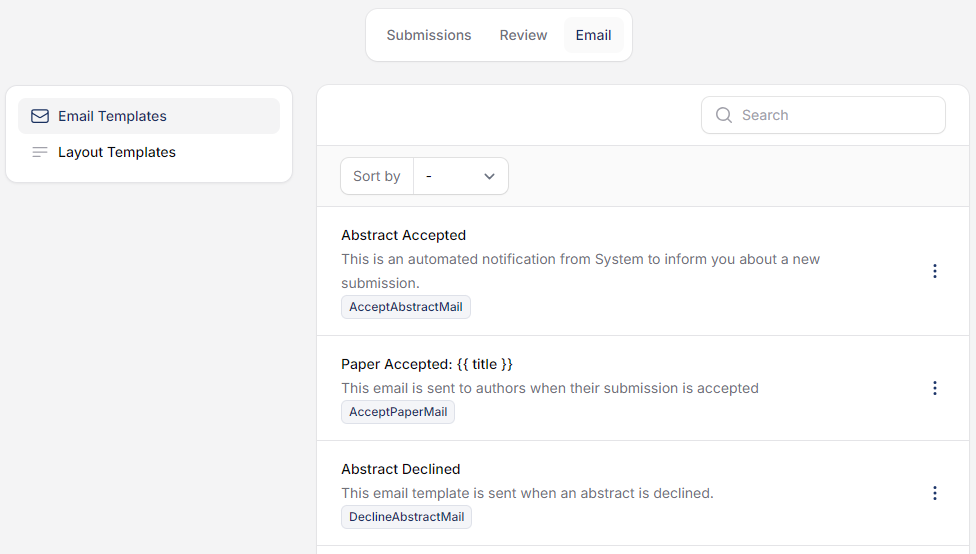
The Email Templates feature allows you to create and manage predefined email messages for various conference-related communications. You can customize templates for notifications, reminders, and updates, ensuring consistent and professional messaging to participants, reviewers, and other stakeholders.
Layout Templates
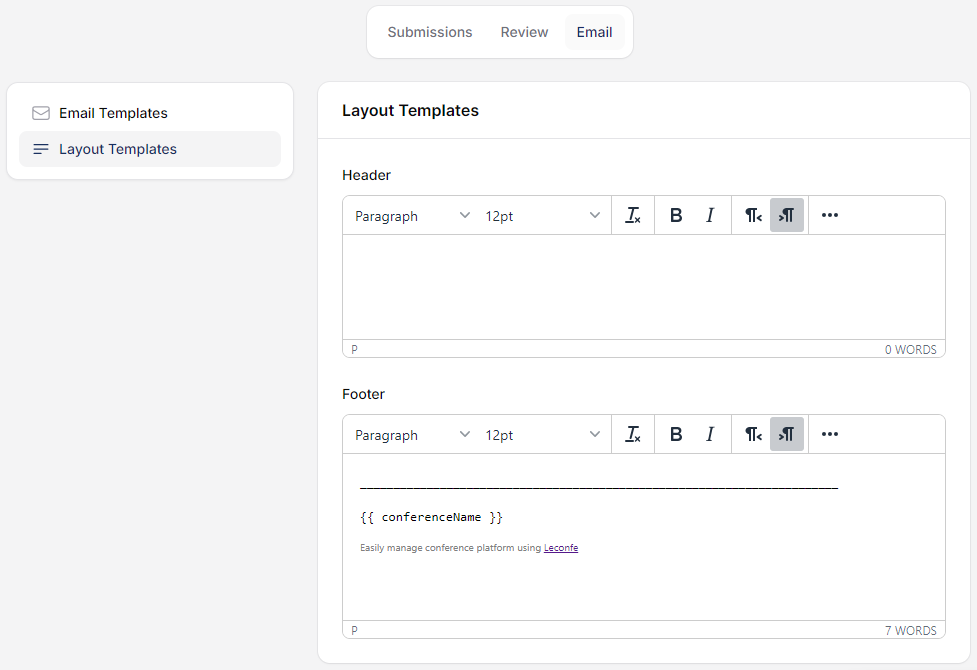
The Layout Templates feature enables you to design and customize the visual layout of your conference website. By selecting and modifying different templates, you can create with your conference branding and requirements.
Plugin
All of the plugins listed here are available in your conference. Check the Enable link to use them.
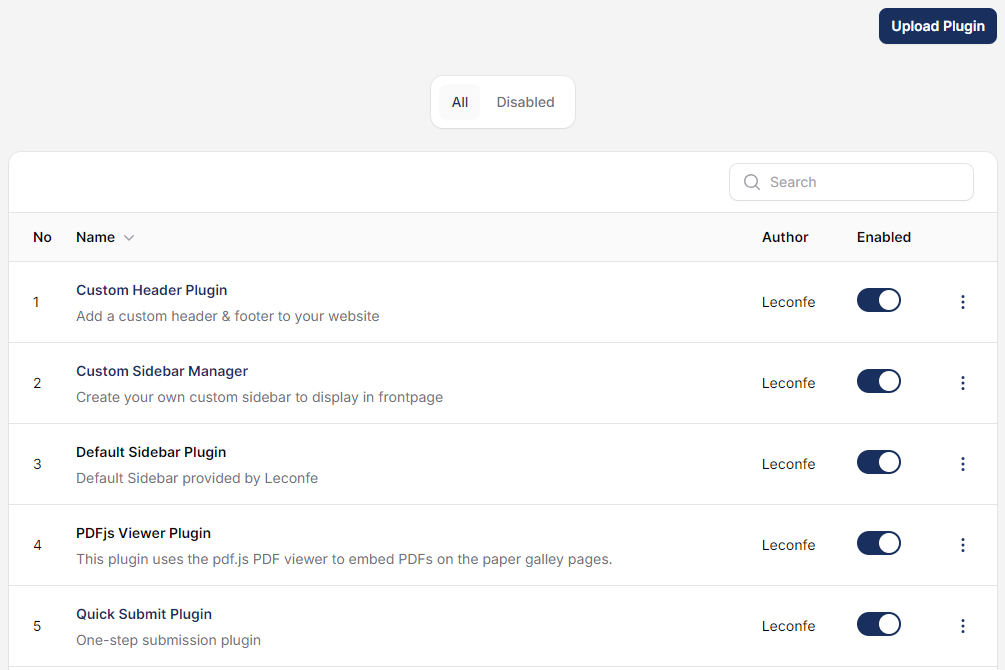
The Plugin menu in the conference platform allows you to manage and enhance the functionality of your conference site. If you want to upload custom plugins that are not available in the plugin gallery, you can use the Upload Plugin feature, which supports uploading plugins in the .tar.gz format.
Static Page
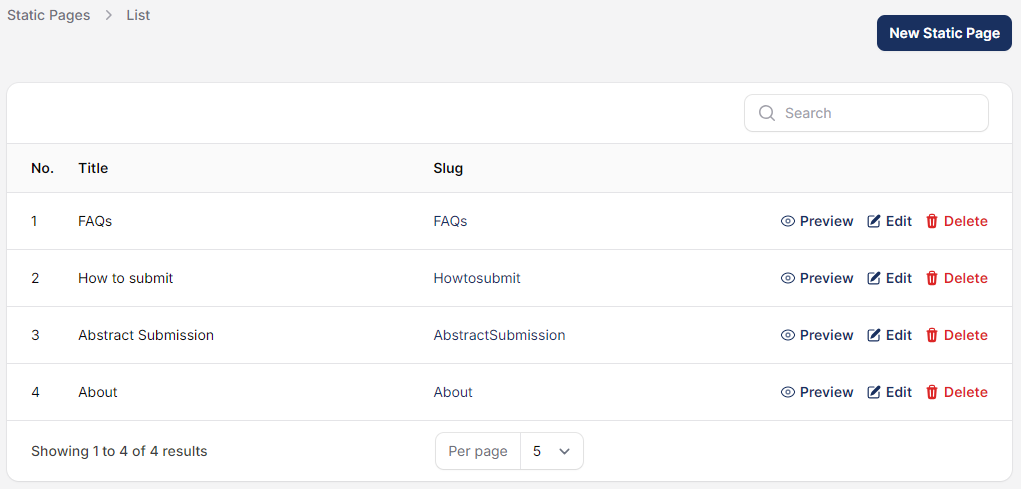
The Static Page feature in the conference platform allows you to create and manage custom web pages with static content, such as additional informational pages.
Payment
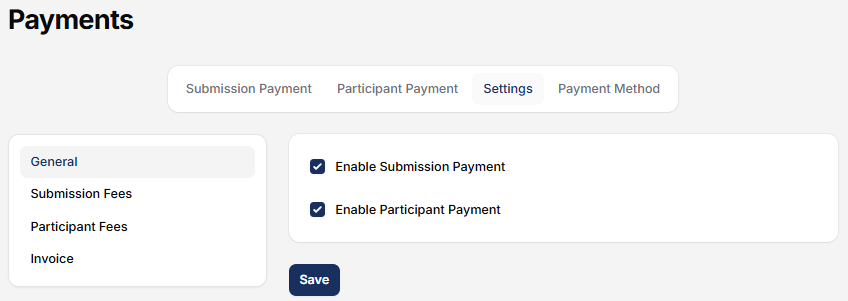
The Payments menu in Leconfe allows administrators to manage all payment-related configurations for both submission fees and participant registration fees.
This feature ensures that payment processes are handled seamlessly and transparently throughout the conference workflow.
For detailed information on configuring payment options, fees, and available methods, please refer to the full documentation:
🔗 Configuring Payment Settings in Leconfe v1.3.0
Payment Settings v1.4.1
Starting from version 1.4.1, the Leconfe payment system has more complete and flexible settings. You can configure two types of payment: Submission Payment and Participant Payment.
Submission Payment
This payment applies to authors who submit papers. In this setting you can:
- Enable submission payment — Check the box to turn on this feature.
- Choose invoice mode — Select Automatic (the system sends the invoice as soon as the submission reaches a certain stage) or Manual (the admin sends the invoice manually).
- Set billing stage — Choose at which stage payment becomes available. For example, when the abstract is accepted, or when the paper enters review.
Participant Payment
This payment applies to participants who register for the conference. You can:
- Enable participant payment — Check the box to turn it on.
- Choose invoice mode — Same as submission payment: Automatic or Manual.
Payment Periods
You can set the start date and end date for the payment period. Outside this period, the payment button will not appear. This helps you control when payments can be made.
Payment Fee
You can create multiple payment fee options, each with:
- Fee name — For example “Early Bird”, “Regular”, “Student”.
- Amount — The fee value in a specific currency.
- Currency — IDR, USD, and others.
- Active status — Can be turned off at any time.
- Quantity limit — Limit how many times this fee can be selected.
Add-on Items
Each payment fee can have add-on items. For example, you can add “Gala Dinner” or “City Tour” with a separate cost. Authors or participants can select these add-on items when paying, and the system automatically calculates the total.
Payment Forms
You can add extra fields to the payment form. Several field types are available:
- Short text field
- Long text field
- Checkboxes (select more than one)
- Single choice (only one)
- Dropdown menu
- File upload
Each field can be marked as required or optional. The data entered by users is saved and can be viewed by the admin on the payment detail page.
Invoices and Receipts (v1.4.1)
Leconfe v1.4.1 provides a complete invoice and receipt system to record each payment transaction in your conference.
Enabling Invoices and Receipts
You can enable the invoice and receipt features separately:
- Invoice — A bill sent to the author/participant before they pay.
- Receipt — Proof of payment that is automatically created after the admin marks the payment as “Paid”.
Sender Information
You can fill in the sender information that appears on invoices, such as institution name, address, phone number, and other contact details. This information can be formatted using the text editor.
Invoice Notes
You can also add special notes that will appear on every invoice. For example, bank account information for transfers, or payment cancellation policies.
Automatic Numbering
Invoices and receipts have an automatic numbering system you can configure:
- Prefix — Text before the number, for example “INV-” or “ICONF-“.
- Next Number — The starting number. The system automatically increases it with each new invoice/receipt.
- Suffix — Text after the number.
Example: with prefix “INV-“, number “001”, and suffix “/2024”, the invoice number would be INV-001/2024.
Download PDF
Invoices and receipts can be downloaded as PDF files directly from the payment detail page. Both admins and users (authors/participants) can download these documents. Simply click the “Download” link in the invoice or receipt section.
Automatic Billing (v1.4.1)
The Automatic Billing feature lets the system send payment notifications to authors automatically. This feature works based on the invoice mode you have selected in the payment settings.
How it works:
- If Automatic invoice mode is selected, the system sends an invoice notification email to the author once the submission reaches the specified billing stage.
- The system sends the notification only once per payment. This prevents repeated emails to the author.
- Notifications will not be sent if the submission has been rejected or withdrawn, or if the payment has already been marked as paid.
With this feature, you do not need to manually send invoices — the system handles it, making sure every author receives payment information on time.
User
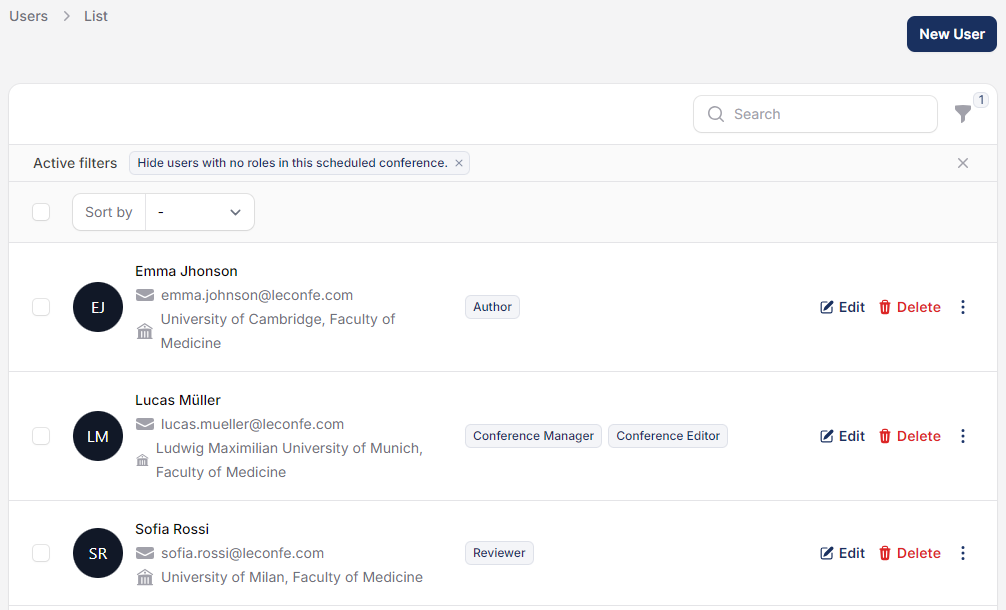
The Users feature allows you to manage user accounts within the conference platform. You can add new users, edit existing user information, delete users, and set or modify user access rights.
Announcement
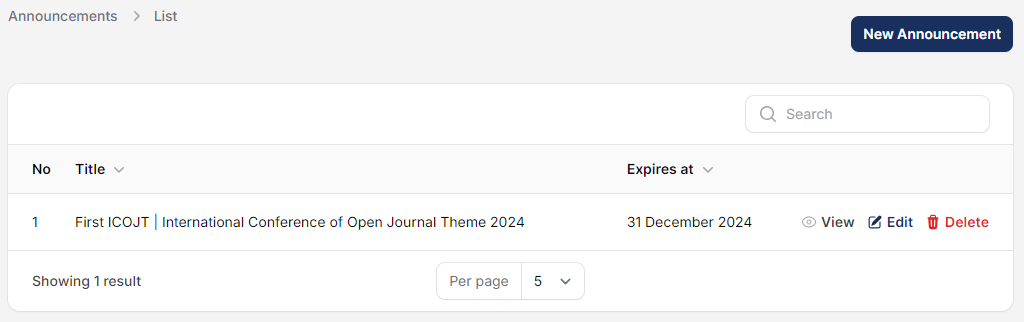
The Announcement feature in the conference platform allows you to broadcast important updates and information to all participants. You can create and post announcements about schedule changes, event details, or other relevant news, ensuring that attendees stay informed throughout the conference.
Committee
Committees
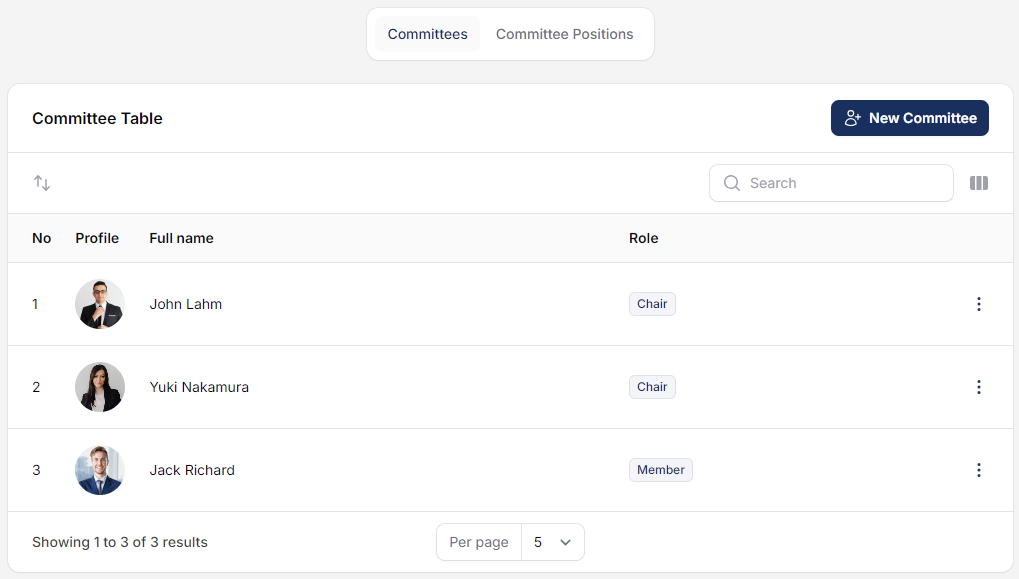
The Committees feature allows you to manage conference committees. It includes two key options: New Committee, which lets you create and add a new committee.
Committee Positions
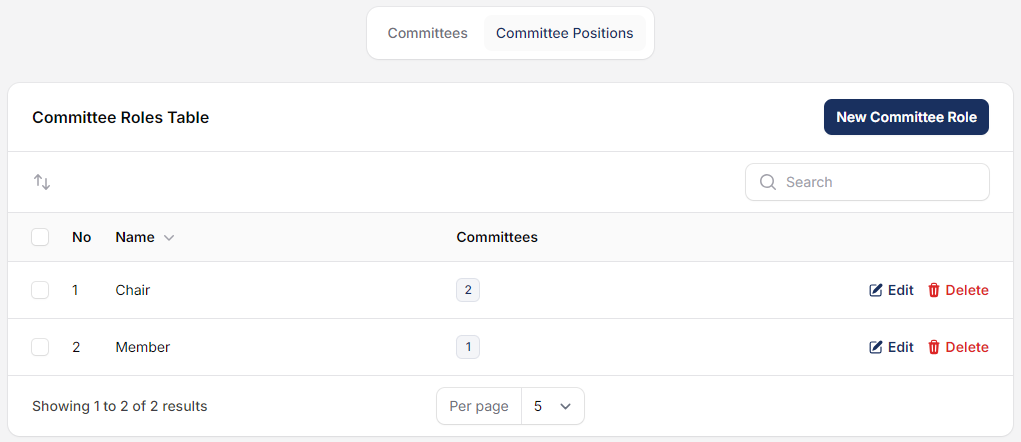
Committee Position, where you can define and assign specific roles for committee members, helping to structure and organize the leadership team for the event.
Speaker
Speaker
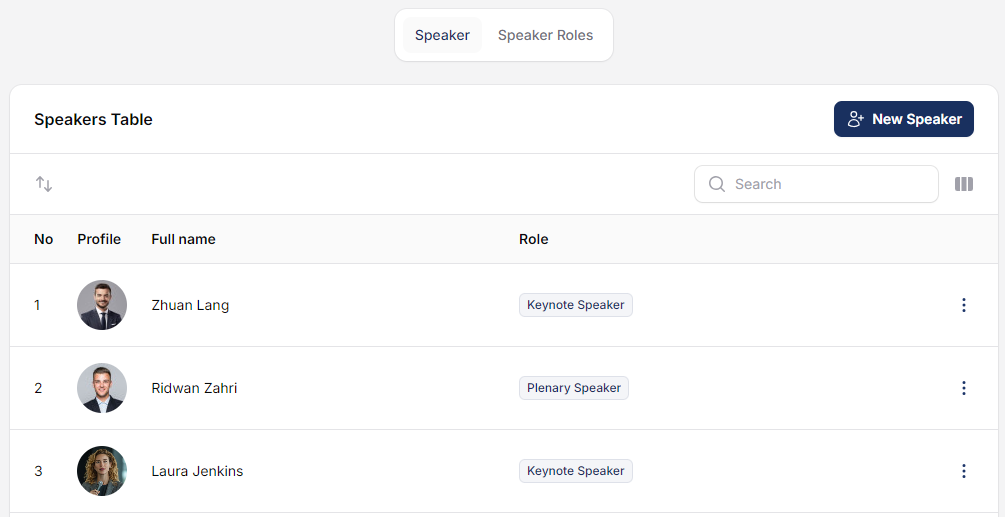
The Speaker feature allows you to manage and add details for conference speakers, including their profiles, biographies, and session assignments.
Speaker Roles
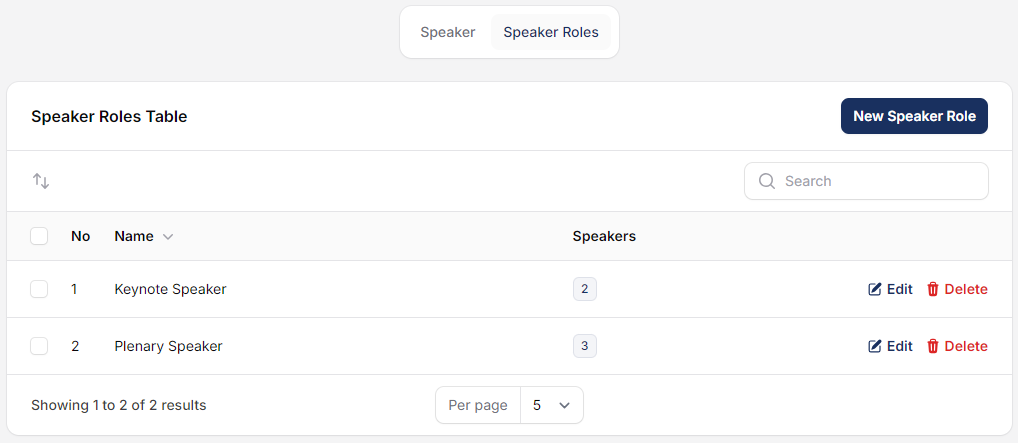
The Speaker Roles feature lets you define specific roles for each speaker, such as keynote speaker, panelist, or session moderator.
Timelines
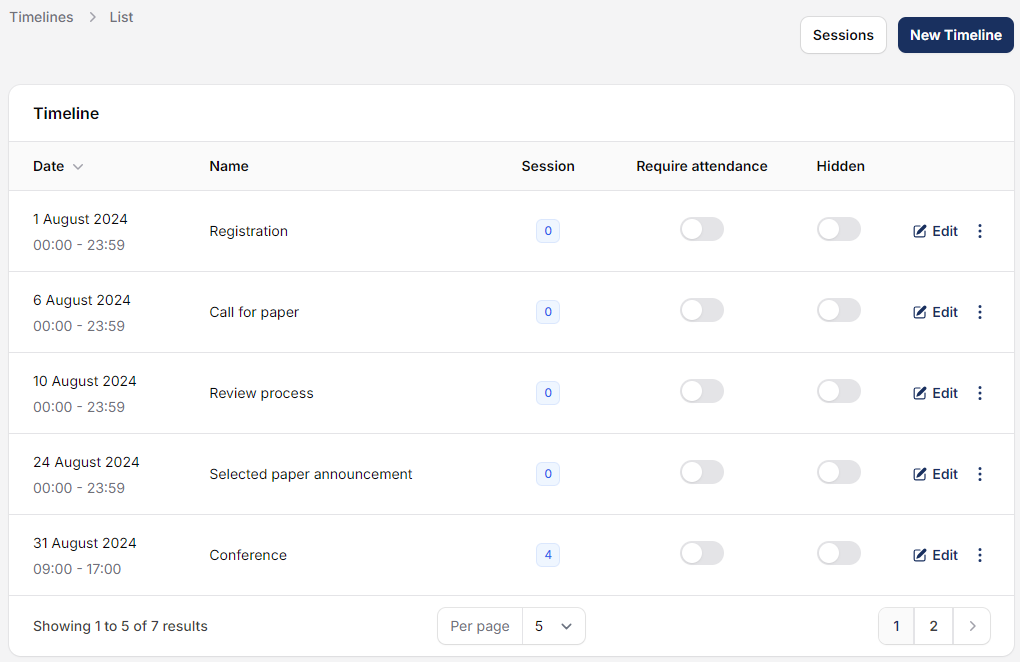
The Timeline feature allows you to manage important conference schedules. In this menu, you’ll find buttons like Session and New Timeline, which enable you to create, organize, and adjust sessions or add new timelines.
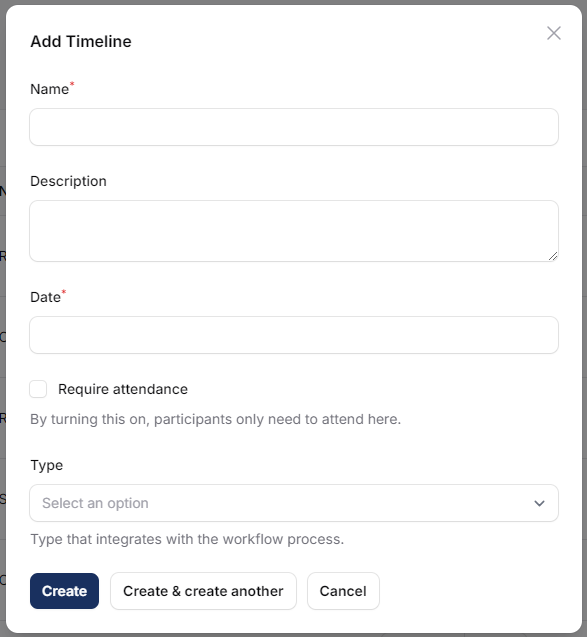
In the New Timeline creation form, you’ll find several options, such as Require Attendance and Type. Enabling Require Attendance means that participants must check in to attend the event you’ve created. Under Type, you’ll see various options for categorizing the event, as shown in the image below.


