
Certificate Manager 2.0.2 helps conference administrators create, generate, download, and email certificates for authors, contributors, presenters, participants, and custom recipients. This guide follows the complete process from first installation to delivery.
Quick workflow
- Prepare an active scheduled conference and the recipient data.
- Install Certificate Manager from the scheduled conference Plugin Gallery.
- Complete the onboarding wizard and activate a license, or continue with the available trial/billing plan.
- Create a certificate template and connect it to a Google account.
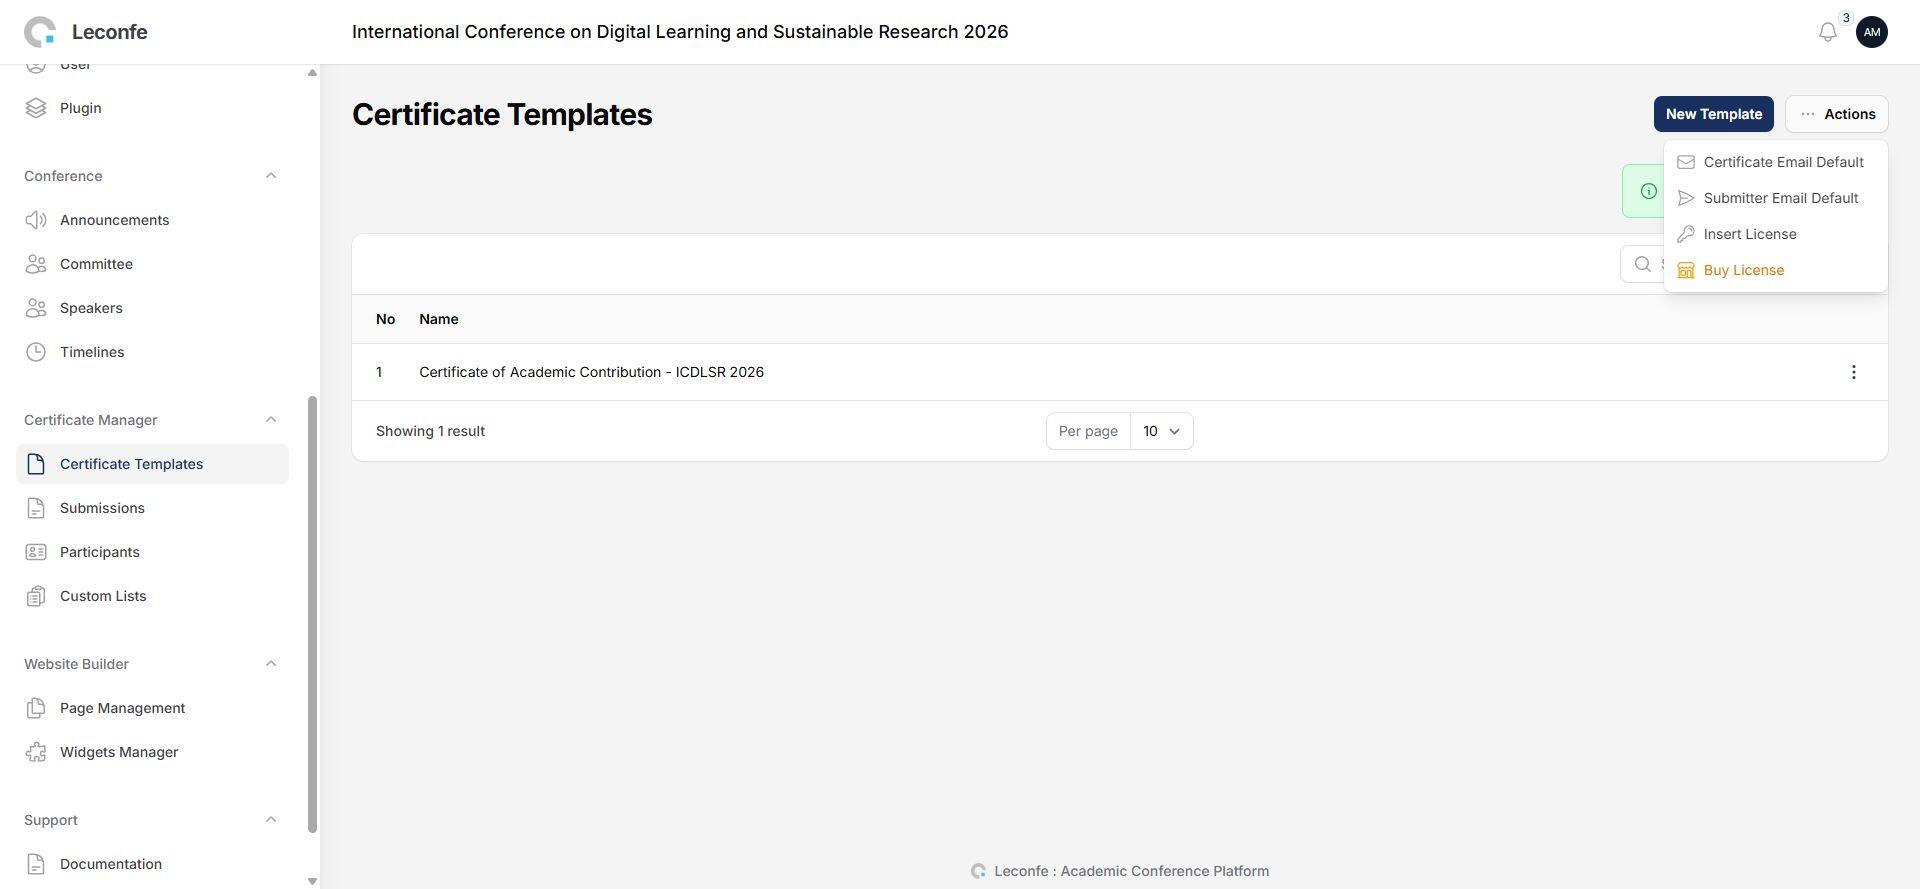
- Choose the data fields and place the matching tags in the Google Slides document.
- Open a submission author, participant, or custom recipient and click Generate Certificate.
- Check the generated document and wait for the Ready status.
- Download the file for a visual check, then use Send Email or Email Submitter.
- Tell the recipient how to use the temporary link and the Certificates page after the link expires.
Before you start
- Use an account with administrator, conference manager, or scheduled-conference editor permissions.
- Create or open the scheduled conference where certificates will be issued. Certificate Manager data is separated by scheduled conference.
- Install or obtain Certificate Manager 2.0.2. A license key, trial access, or an active billing plan may be available depending on your account.
- Prepare a Google account that can open and edit the certificate document. The account entered in the template form must be a Google account.
- Make sure the source data is complete: submission authors and roles, participant registration/payment data, or custom-recipient data.
- Decide which information should be printed on the certificate. Do not place private contact details on a certificate unless that is intentional.
1. Install Certificate Manager
- Sign in to the Leconfe panel and open the required scheduled conference.
- Open Plugin in the Settings area.
- Open the Plugin Gallery, find Certificate Manager, and select Install.
- Wait for the installation to finish, then open Certificate Manager from the conference panel.
On its first run, Certificate Manager prepares its database tables and opens the onboarding wizard. If the menu is not visible, ask an administrator to check that the plugin is installed and that your account has one of the allowed roles.
2. Complete onboarding and activate access
Certificate Manager 2.0.2 has a three-step onboarding flow: Welcome, License, and Complete.
- On the Welcome step, select Let’s Get Started.
- On the License step, check which option is shown:
- Billing Plan Active: the feature is already unlocked through billing. No plugin license key is required; select Continue.
- Activate Your License: paste the license key, select Activate, and wait for the success notification.
- Trial: select try trial if you want to test the workflow before purchasing a license. A trial may have limits.
- On the Complete step, select Open Certificate Manager.
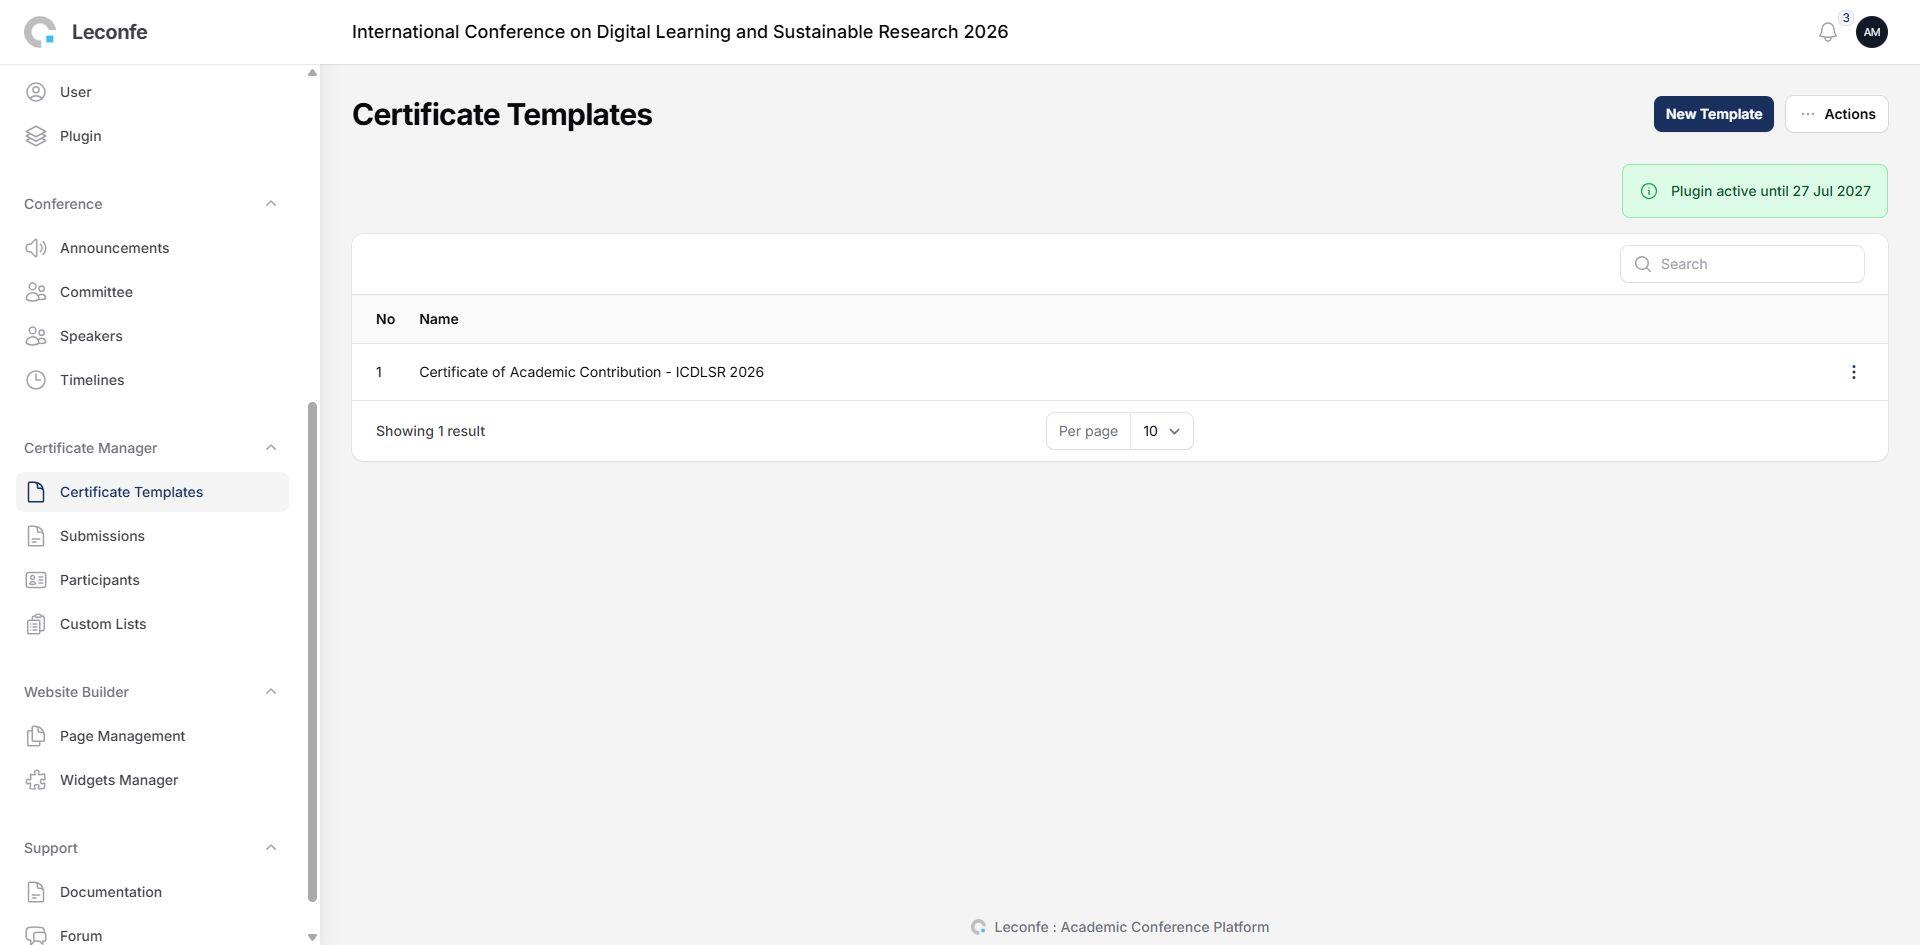
If you skip onboarding, open Certificate Manager > Certificate Templates, select Actions, and choose Insert License. Paste the key and submit it there.
3. Create a certificate template
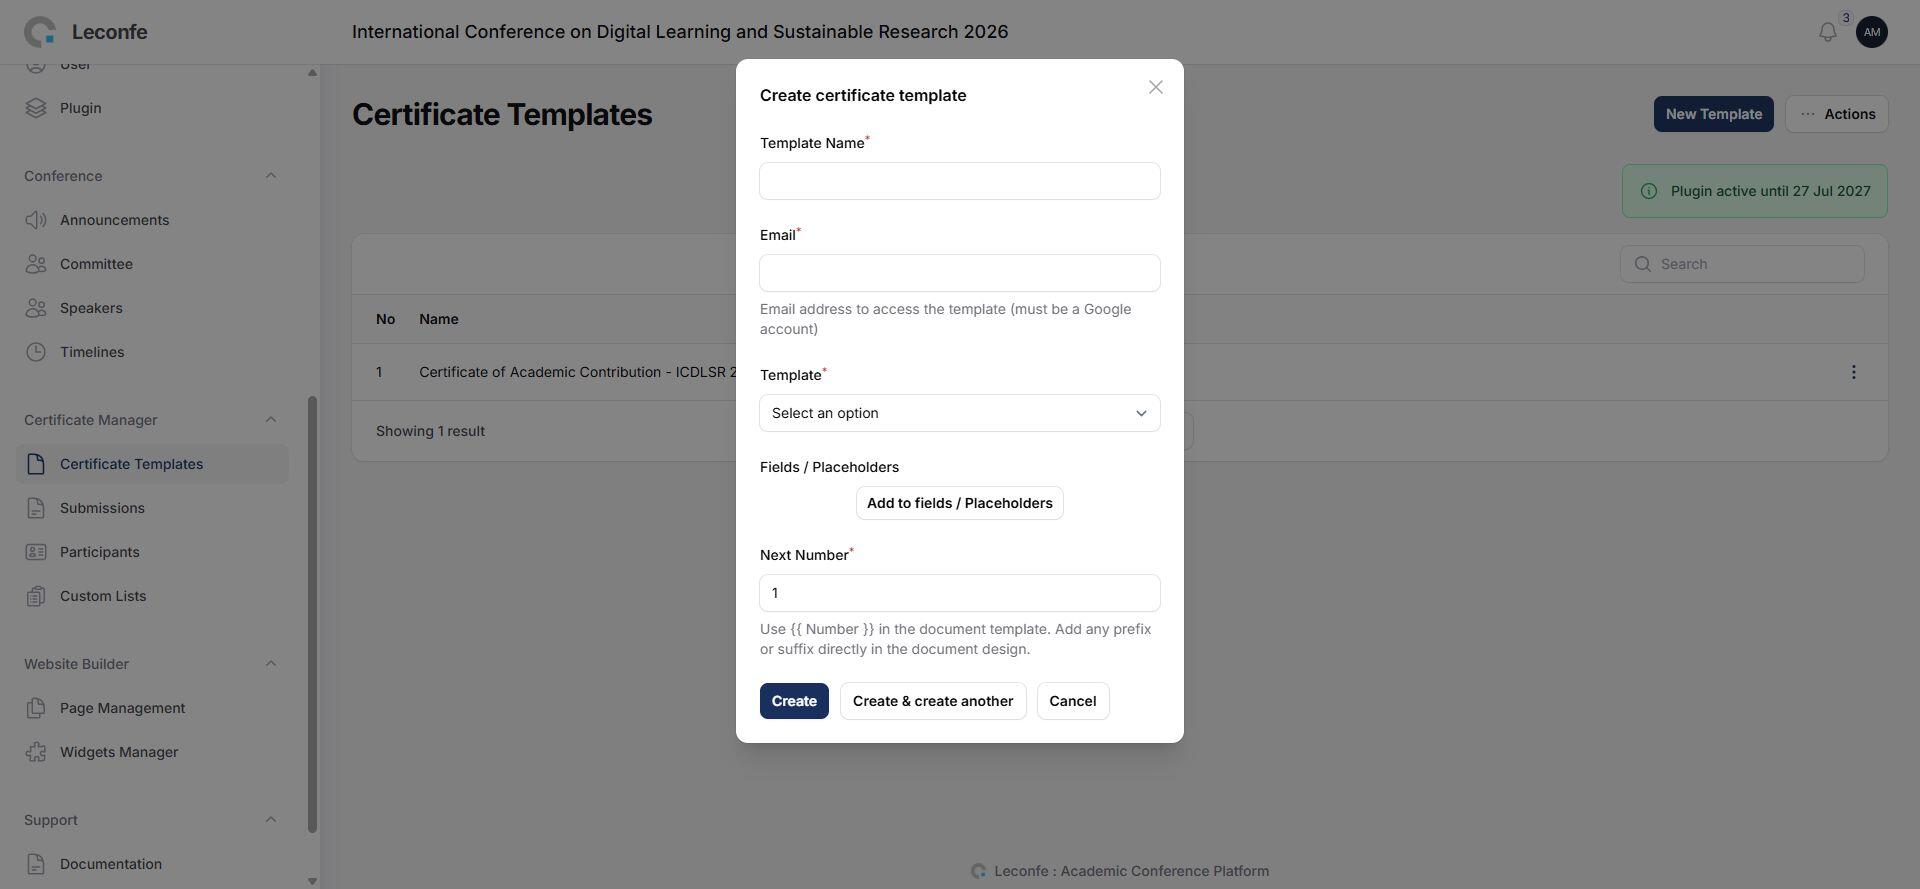
- Open Certificate Manager > Certificate Templates and select New Template.
- Enter a clear Template Name, for example Certificate of Academic Contribution – ICDLSR 2026.
- Enter the Google account email that should access the template. It must be a Google account with permission to open and edit Google Slides.
- Choose the template type offered by your installation. The 2.0.2 interface may include options such as Letter of Acceptance Template and Participant certificate template. Choose the option that matches your certificate workflow.
- After selecting the template type, review Fields / Placeholders. The plugin can pre-fill the fields supplied by the selected template.
- Set Next Number. The first certificate normally starts at
1; the value is used with{{ Number }}. - Select Create. The plugin creates a certificate record and a Google Slides document link.
- Open the document link from the template row and edit the design in Google Slides.
Use the exact placeholder spelling shown in the field list. Certificate Manager replaces tags in the form {{ Field Name }}. Keep the double braces, capitalization, and spaces exactly as shown.
{{ Recipient Name }}
{{ Certificate Name }}
{{ Conference Title }}
{{ Number }}
Use your own certificate text around the tags, for example: This certificate is presented to {{ Recipient Name }} for {{ Author Role }} at {{ Conference Title }}. Save the Google Slides document before closing it.
4. Certificate tags and available data
The following names are provided by Certificate Manager 2.0.2. Add a field to the template, then use the same name between double braces in Google Slides.
System and conference fields
| Tag | Value |
|---|---|
{{ Id }} |
The recipient record ID. |
{{ Conference Title }} |
The scheduled conference title. |
{{ Conference URL }} |
The scheduled conference website URL. |
{{ Number }} |
The certificate number generated from the template’s numbering settings. |
Author and submission fields
| Tag | Value |
|---|---|
{{ Recipient Name }} |
The author’s full name. |
{{ Recipient Email }} |
The author’s email address used for delivery and account matching. |
{{ Author Role }} |
The author’s role, such as Author, Presenter, or another configured role. |
{{ Submission Title }} |
The paper or submission title. |
{{ Authors }} |
The names of all authors on the submission. |
{{ Track }} |
The submission track title. |
{{ Author Public Name }} |
The author’s public name profile value. |
{{ Author Expertise }} |
The author’s expertise value. |
{{ Author Affiliation }} |
The author’s institution or affiliation. |
{{ Author Country }} |
The author’s country name. |
{{ Author Phone }} |
The author’s phone value. |
{{ Author ORCID URL }} |
The author’s ORCID link. |
{{ Author Google Scholar URL }} |
The author’s Google Scholar link. |
{{ Author Scopus URL }} |
The author’s Scopus link. |
Participant and payment fields
| Tag | Value |
|---|---|
{{ Recipient Name }} |
The participant’s full name. |
{{ Recipient Email }} |
The participant’s email address. |
{{ Participant Name }} |
The participant’s full name. |
{{ Registered At }} |
The participant registration date. |
{{ Paid At }} |
The payment date, when payment data exists. |
{{ Invoice }} |
The participant invoice value. |
{{ Fee Name }} |
The selected registration fee name. |
{{ Fee Amount }} |
The formatted registration fee amount. |
{{ Participant Affiliation }} |
The participant’s affiliation. |
{{ Participant Address Line }} |
The participant’s address line. |
{{ Participant Post Code }} |
The participant’s postal code. |
{{ Participant City }} |
The participant’s city. |
{{ Participant Country }} |
The participant’s country name. |
Custom-recipient fields
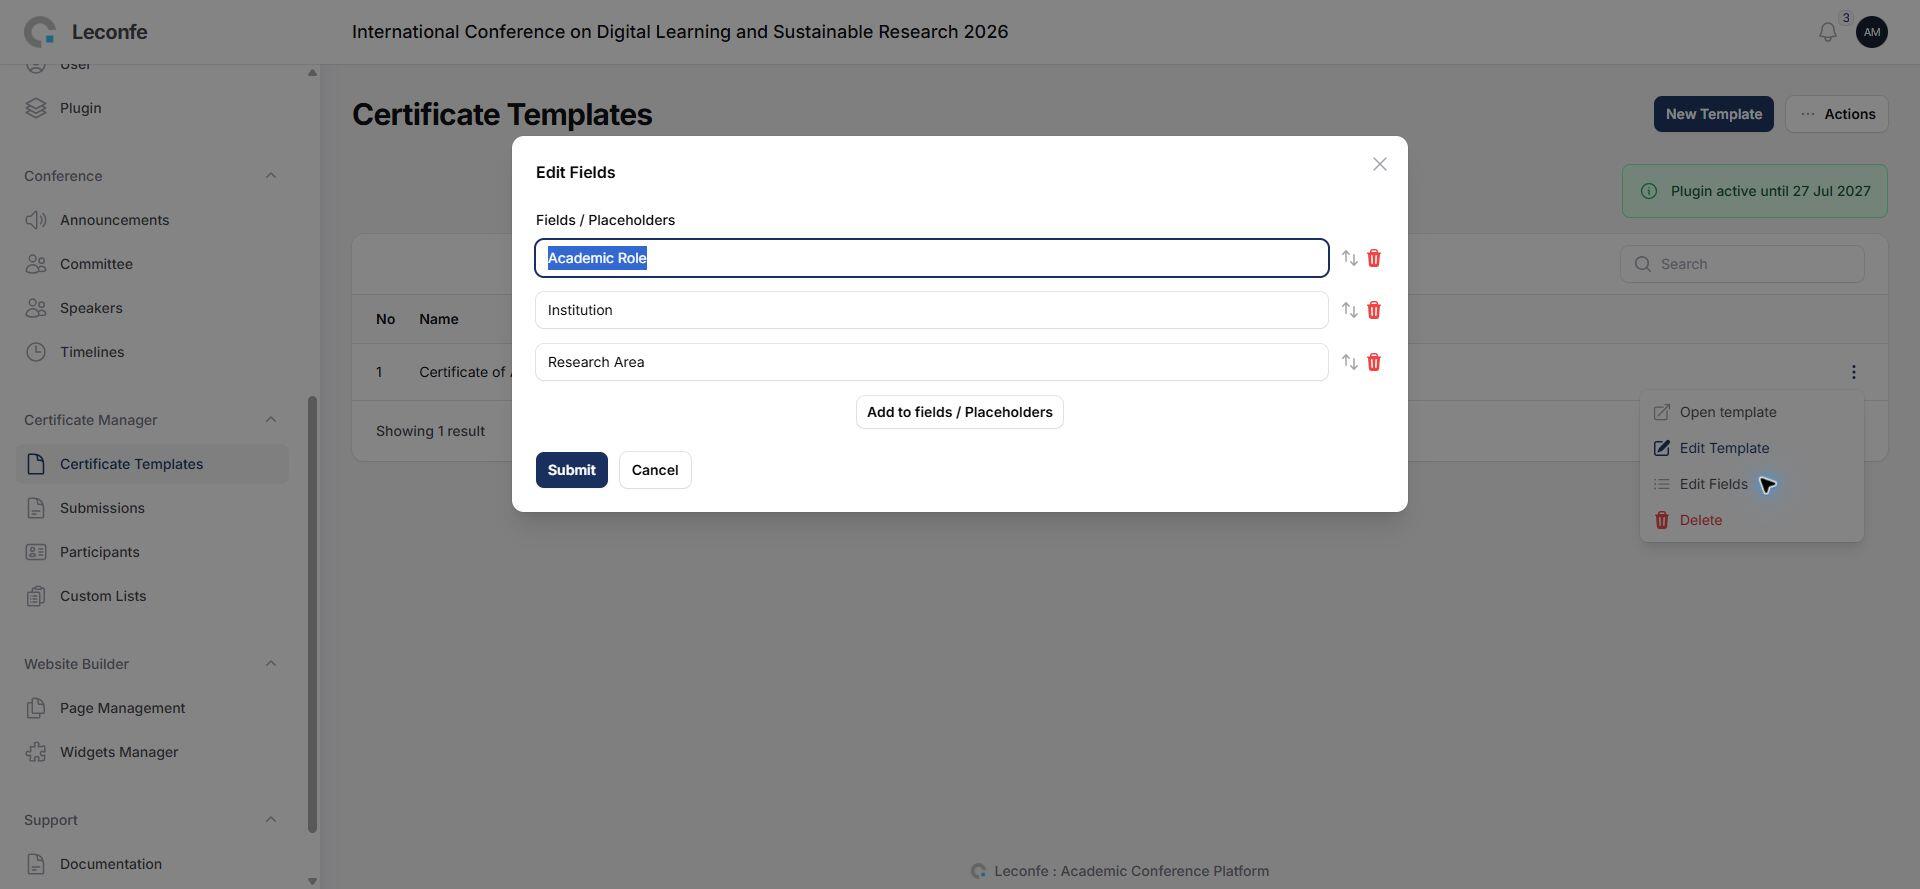
For a custom recipient, {{ Recipient Name }} and {{ Recipient Email }} are always available. Any fields created in the custom list are also available, for example {{ Academic Role }}, {{ Institution }}, or {{ Research Area }}. The spelling must match the custom field name exactly.
5. Review or edit the template fields
When creating a template, the selected template type can provide the initial field list. You can also maintain the list later:
- Open Certificate Templates.
- Open the row actions for the template.
- Select Edit Fields.
- Keep the reserved fields you use in Google Slides and add any custom field names required by your design.
- Save the field list, then open the Google Slides document and make sure every tag has the same spelling.
Only fields that belong to the recipient type should be used. For example, payment fields are useful for participant certificates, while submission title and author role are useful for author certificates.
6. Configure the default certificate emails
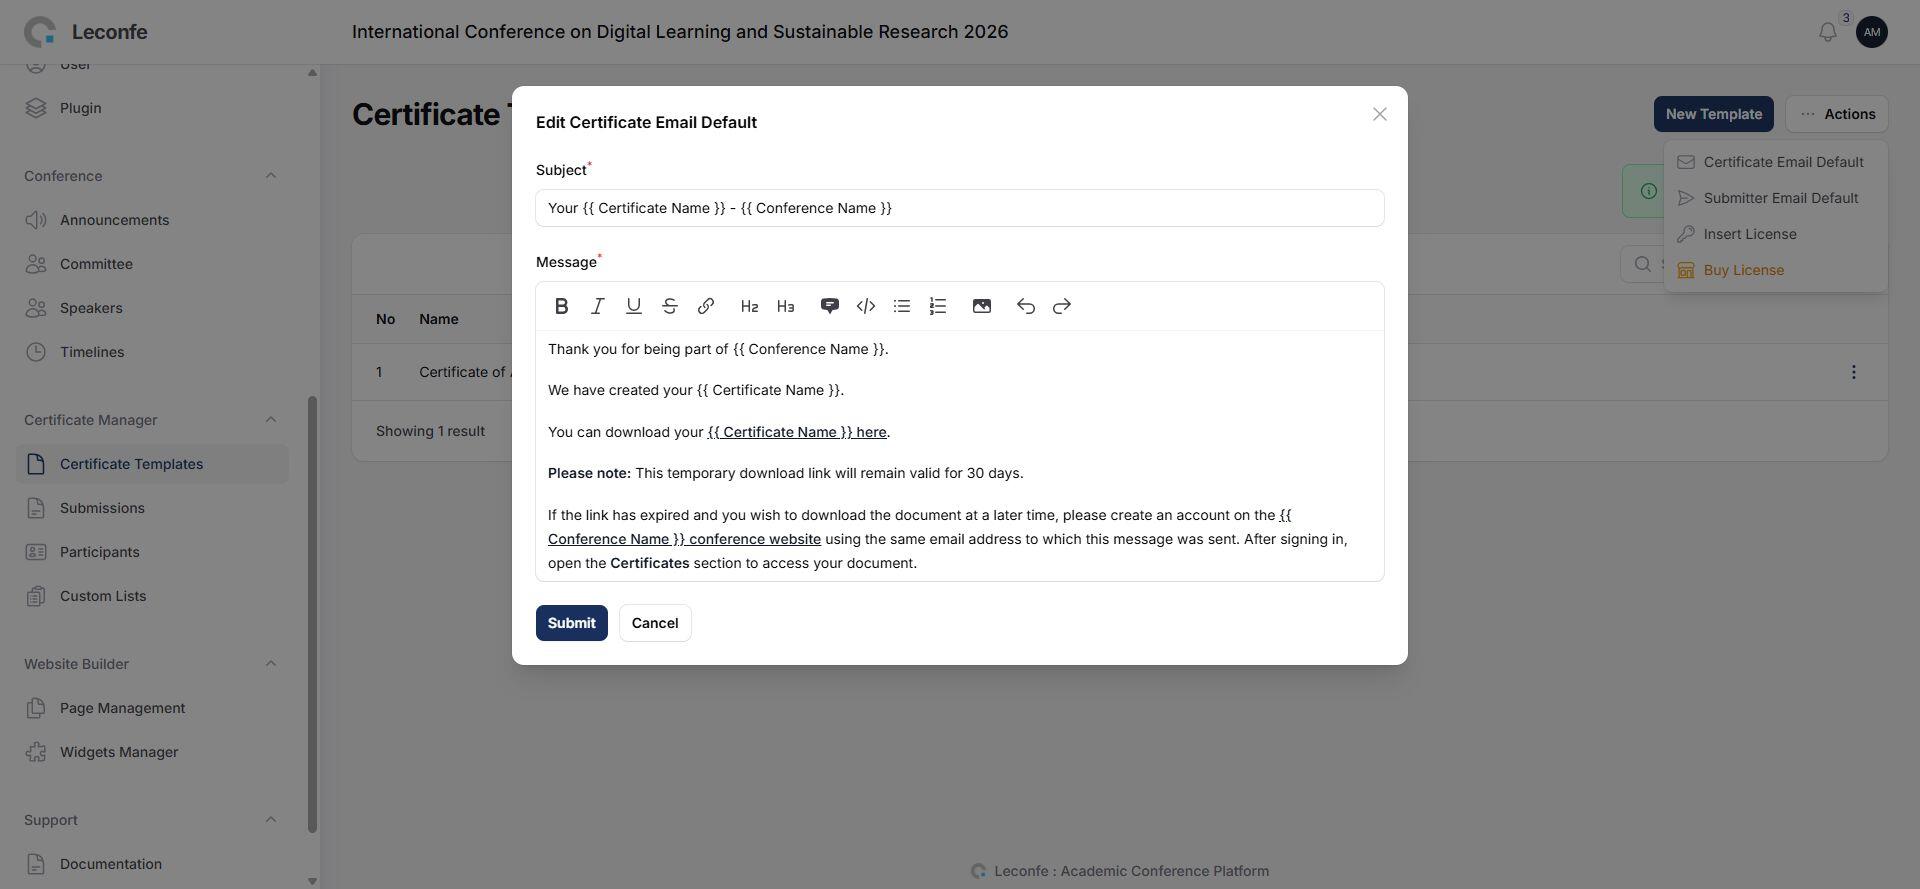
Open Certificate Templates > Actions. Version 2.0.2 has two separate default email editors:
- Certificate Email Default is used when one certificate is sent from a recipient record.
- Submitter Email Default is used when the organizer sends one message containing all ready certificates for a submission.
Each editor contains a subject and a rich-text message. Save the default after editing. Useful email variables include:
{{ Certificate Name }}and{{ Certificate Download Link }}for an individual certificate.{{ Conference Name }},{{ Conference URL }}, and{{ Conference Link }}for conference information.{{ Recipient Name }},{{ Recipient Email }}, and{{ Submission Title }}when the relevant record supplies them.{{{ Certificate List }}}in the submitter message. This variable renders a list of links for all ready certificates in the submission.
The individual certificate download link is temporary and valid for 30 days. Keep a link to the conference website in the message so recipients can recover the file from their account later.
7. Generate an author certificate
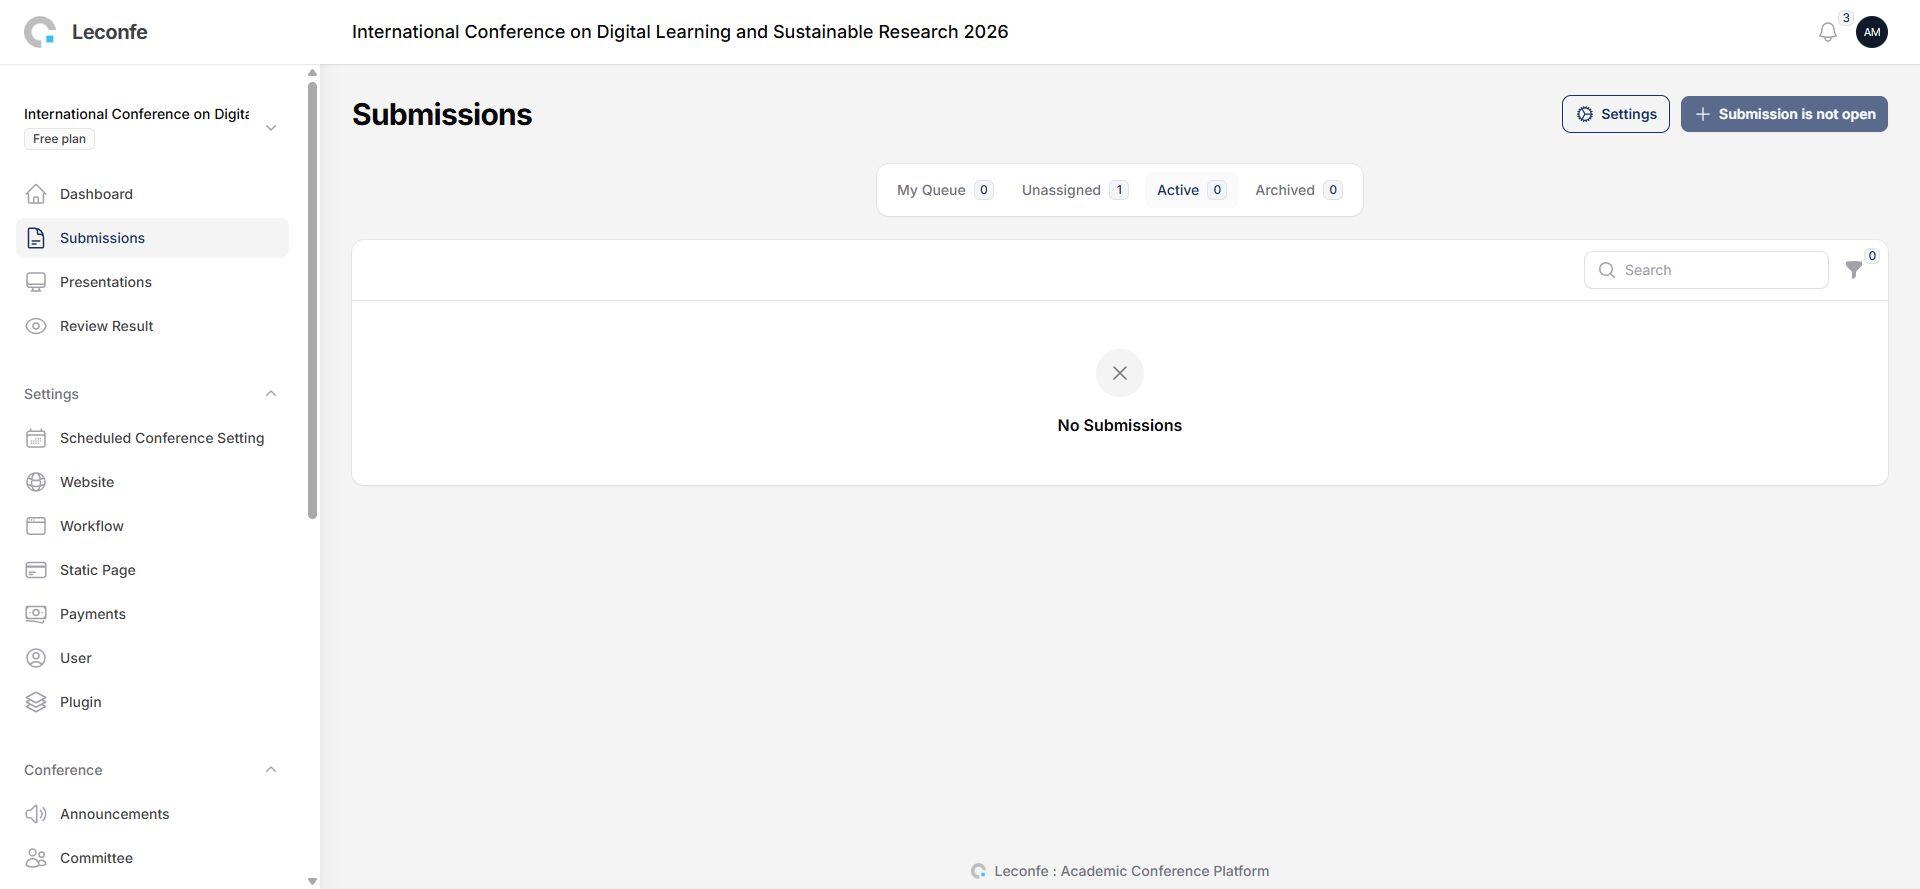
- Open Certificate Manager > Submissions.
- Find the paper and open it. The list shows the submission, submitter, contributor count, and ready-certificate count.
- Open the contributor who should receive a certificate.
- Select Generate Certificate.
- Choose the certificate template.
- Review the source fields. Values from the author and submission are shown as read-only; correct the author or submission record if a value is wrong.
- Complete any editable custom fields, then select Generate Certificate.
- Wait for the success message and confirm that the certificate row shows a generated document.
From the certificate row, the available actions are Download Certificate, Regenerate Certificate, and Send Email. The download and email actions appear after a document has been generated.
8. Generate a participant certificate
- Open Certificate Manager > Participants.
- Search for and open the participant record.
- Select Generate Certificate.
- Choose a participant template and review the registration, payment, fee, and profile fields.
- Complete any custom fields and select Generate Certificate.
- Download the document to check the participant name, conference title, number, and formatting.
If payment fields are empty, check that the participant has a matching payment/fee record. Source fields are not edited in the certificate form; update the participant or payment record and regenerate.
9. Generate certificates for custom recipients
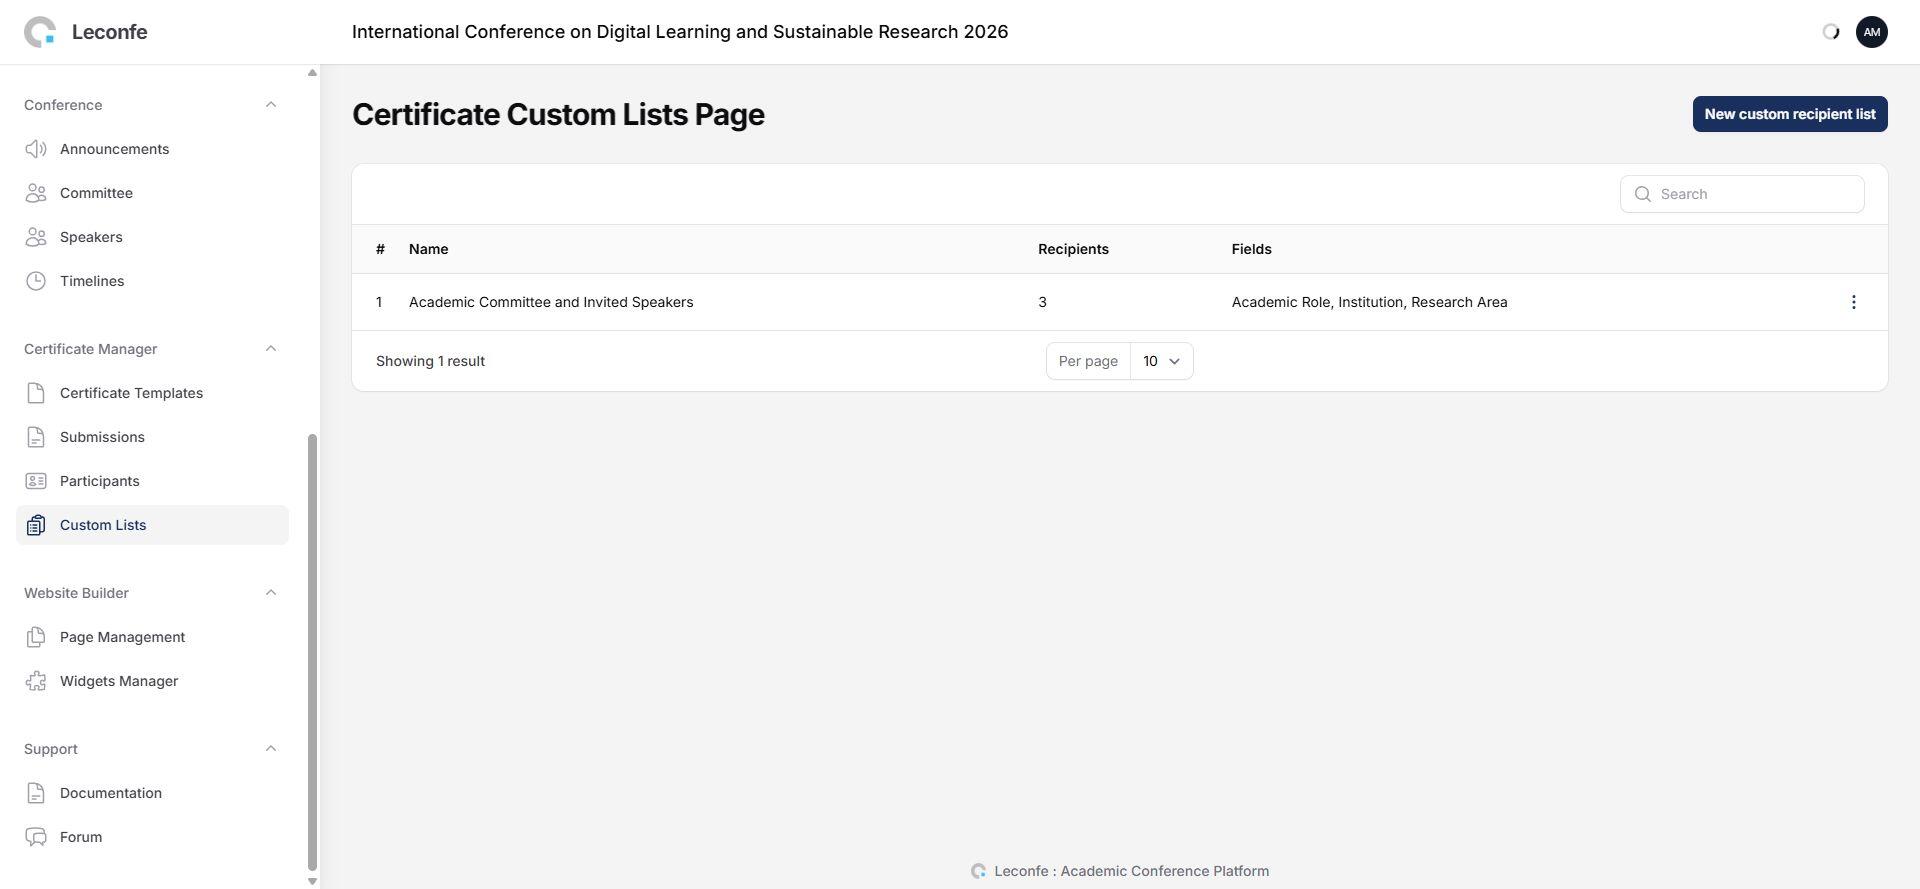
- Open Certificate Manager > Custom Lists and select New.
- Give the list a name, such as ICDLSR 2026 Academic Committee.
- Add the custom fields needed by the certificate, such as
Academic Role,Institution, orResearch Area. - Open the list and select New to add each recipient’s name, email, and custom values.
- Open the recipient, select Generate Certificate, choose the template, and generate the document.
- Use Download Certificate and Send Email from the generated certificate row.
10. Send one certificate by email
- Open the author, participant, or custom recipient record.
- Confirm that the certificate has a document and is marked Ready.
- Open the certificate row actions and select Send Email.
- Review the subject and message. You may change the text for this one email without changing the global default.
- Select Send Email in the dialog.
Certificate Manager sends the message to the email stored on the recipient record. If the recipient email is wrong, correct the source record, regenerate if necessary, and send again.
11. Email all ready certificates to a submission submitter
Use this option when a paper has several authors and you want the submitter to receive one message with links to all generated author certificates.
- Open Certificate Manager > Submissions and open the paper.
- Generate certificates for the required authors first.
- Wait until at least one author certificate is ready and confirm that the submission has a submitter email address.
- Select Email Submitter.
- Review the subject and message. The message contains a list of links for the ready certificates.
- Select Send Email.
The Email Submitter action is shown only when the submission has a submitter email and at least one ready contributor certificate.
12. Download and recover certificates
A generated certificate normally has the status Ready. A certificate marked Preparing is still being generated; refresh the page and wait before sending it.
- Download Certificate: downloads the generated document for an administrator check.
- Regenerate Certificate: uses the current template and source data again. Use it after changing a name, role, field value, or design.
- Send Email: sends a temporary download link to one recipient.
The secure download link in an email is valid for 30 days. After it expires, the recipient should:
- Create or use a Leconfe account with the same email address used for the certificate.
- Sign in to the scheduled conference website.
- Open Certificates.
- Use My Certificates for certificates issued directly to that account.
- Use Contributor Certificates for an author certificate associated with a submission.
- Select Download.
13. Troubleshooting
Certificate Manager is not visible
Confirm that the plugin is installed for the scheduled conference and that your account is an administrator, conference manager, or scheduled-conference editor. Ask an administrator to open the Plugin page and check the plugin status.
The onboarding wizard keeps appearing
Finish the three steps and select Open Certificate Manager. If the wizard was skipped, open Certificate Templates and use Actions > Insert License. The first template is also used as a signal that setup is complete.
The license cannot be activated
Check that the key belongs to the correct Certificate Manager product and that it is being entered in the correct scheduled conference. If the conference is included in an active billing plan, no key may be required.
No fields appear after choosing a template type
Complete the required template name and Google account fields, wait for the template selection to load, and then review Fields / Placeholders. If the list is still empty, add the fields manually and use the exact tag names in the reference above.
A tag is printed instead of its value
Check the double braces, capitalization, and spaces. For example, use {{ Recipient Name }}, not {{ recipient name }} or { Recipient Name }. Confirm that the field is present in the template’s Fields / Placeholders list.
A source value is blank or incorrect
Edit the author, participant, payment, submission, or custom-recipient record in Leconfe. Source fields are read-only in the generation dialog. Generate or regenerate the certificate after correcting the source.
The submission is not listed
The Certificate Submissions page lists submissions in supported workflow statuses and submissions that have authors. Check the scheduled conference, author records, and submission workflow status.
Generate Certificate is blocked
Check the license or billing status. Certificate generation and regeneration are blocked when the plugin license is expired.
Send Email is not available
Generate the certificate first and wait until its document is ready. Also verify that the recipient has a valid email address. For Email Submitter, at least one contributor certificate must be ready and the submission must have a submitter email.
The recipient cannot download the expired link
The 30-day expiry is intentional. Ask the recipient to sign in with the same email address and open the conference’s Certificates page.
14. End-to-end test checklist
- Plugin installed and active in the intended scheduled conference.
- Onboarding completed, with a valid license, trial, or active billing plan.
- Google Slides template opens for the configured Google account.
- Every tag in the design matches a field in Certificate Manager.
- One test author, participant, or custom recipient has complete source data.
- Certificate generates successfully and shows Ready.
- Downloaded PDF has the correct name, role, conference title, number, and layout.
- Individual email contains a working 30-day link.
- Submitter email contains all expected ready contributor certificates, when that workflow is used.
- Recipient can recover the document from Certificates after signing in.
15. 2.0.2 update summary
- Added My Certificates and Contributor Certificates views.
- Added certificate submission and contributor pages with ready counts.
- Added participant and custom-recipient certificate workflows.
- Added separate Certificate Email Default and Submitter Email Default settings.
- Added per-email subject and message editing.
- Added secure temporary download links valid for 30 days, with account-based recovery after expiry.
- Added clearer Ready and Preparing states.
For a reliable rollout, test one complete academic case first: activate the plugin, create the template, verify the tags, generate one certificate, download it, send the individual email, and then test the submission-level email if the paper has multiple contributors.


