
Invitation-Based Registration lets an authorized conference manager invite a person by email and assign the intended role before the person joins. The recipient follows a unique invitation link, signs in or creates an account, and receives the role attached to that invitation.
This guide covers the workflow available in Leconfe 1.5. Menu visibility and available roles depend on your permissions, the selected conference or Scheduled Conference, and its configuration.
When Should You Use an Invitation?
Use invitation-based registration when the organizer needs to control who receives a role. Common examples include inviting a reviewer, editor, track editor, committee member, speaker, or another trusted team member.
For open attendee registration, use the normal participant-registration workflow instead. For authors or presenters who should start their own submission, use the author or presenter workflow configured for the Scheduled Conference.
Before You Start
Make sure that:
- you are signed in with permission to manage users and invitations;
- you opened the correct conference series or Scheduled Conference;
- the recipient’s email address is correct and belongs to the intended person;
- the role exists and has the permissions the person actually needs;
- outgoing email has been configured and tested; and
- the privacy statement and organization policy permit you to invite the recipient.
Security reminder: Assign the least-privileged role that allows the person to complete their task. Do not invite a routine reviewer or participant as an administrator or conference manager.
Understand the Invitation Workflow
- An authorized manager creates an invitation for an email address and selects a role.
- Leconfe creates a unique invitation link and sends it to the recipient when email delivery is available.
- The invitation remains pending until it is accepted, cancelled, or expires.
- The recipient opens the link and signs in or creates an account using the invited email address.
- After successful acceptance, Leconfe assigns the invited role in the relevant conference context.
The default invitation validity is seven days. Treat the expiration date shown in the Invitations table as the authoritative value for a particular invitation.
For Managers: Send an Invitation
Open the Correct Panel
- Sign in to Leconfe.
- Open the relevant conference series and Scheduled Conference.
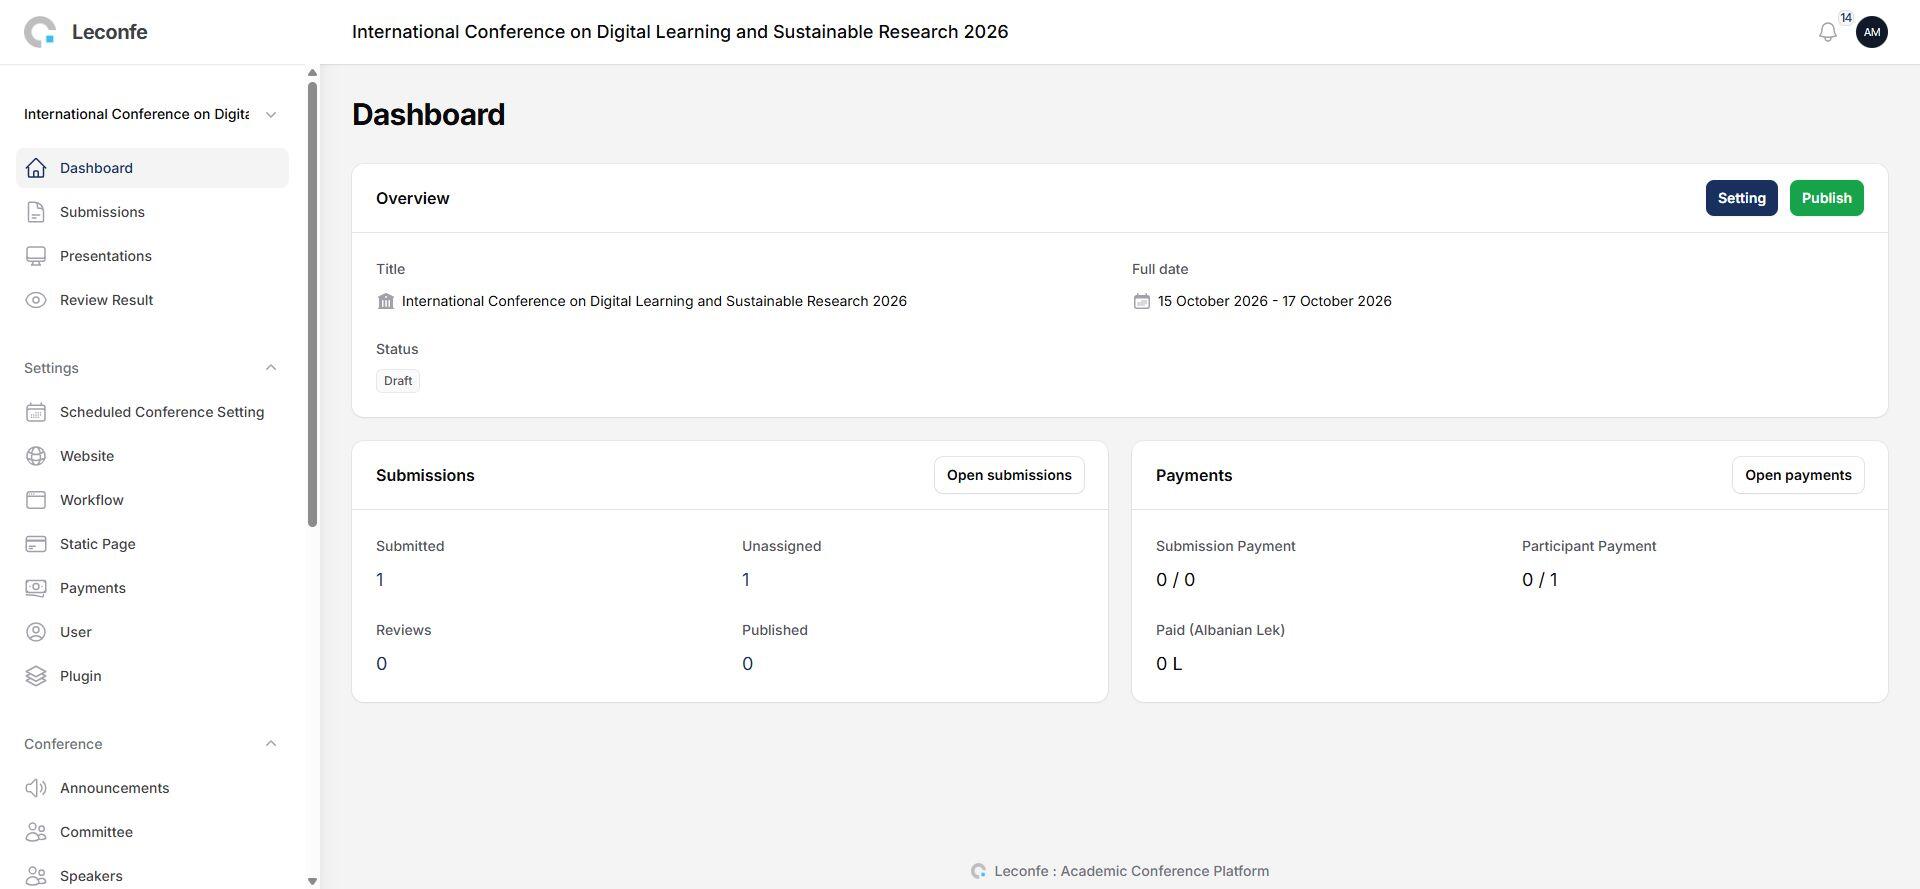
- Confirm the event title displayed at the top of the panel.
- Open User from the settings navigation.
Open the Invitations Tab
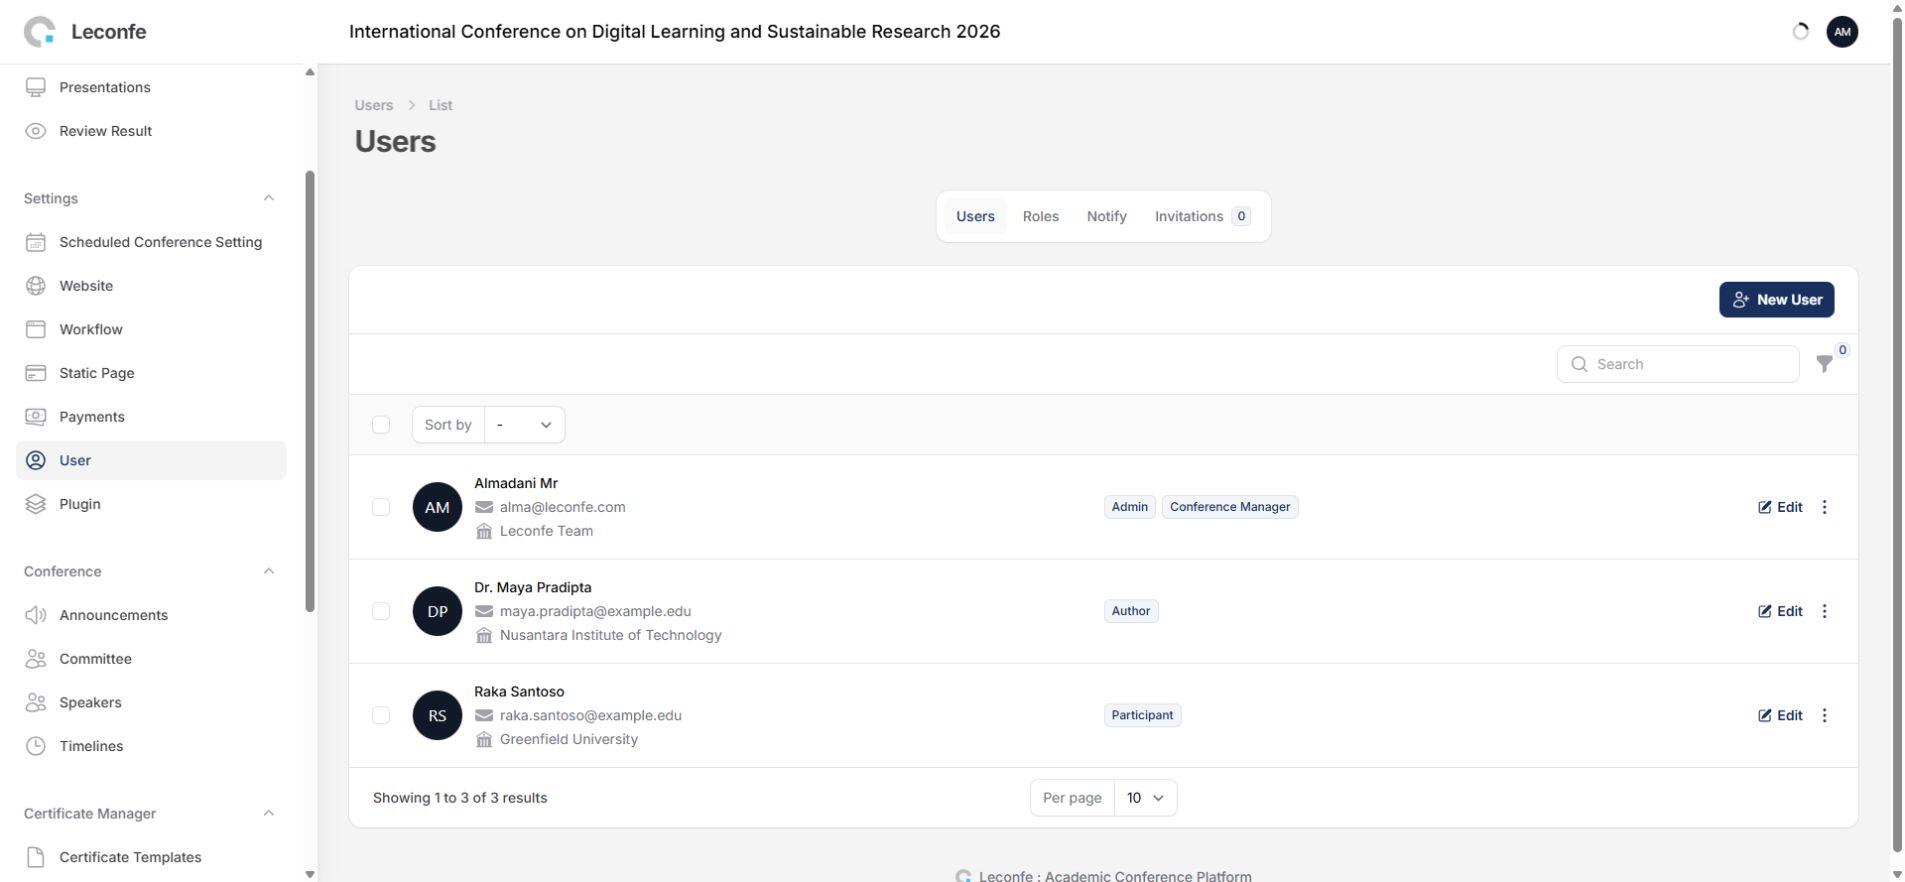
On the Users page, select Invitations. The number beside the tab indicates the current invitation count. The available tabs can include Users, Roles, Notify, and Invitations, depending on your permissions.
Create the Invitation
- Select the action for creating a new invitation.
- Enter the recipient’s email address carefully.
- Select the role the recipient should receive.
- Review the selected conference context and role.
- Submit the invitation.
After submission, confirm that the invitation appears in the table with the expected email address, role, status, and expiration date. Do not repeatedly create new invitations if the first record already exists.
Conference scope matters: A role assigned only to one Scheduled Conference does not automatically grant the same access to another event. If the recipient needs wider access, use the appropriate conference-level role according to your organization’s policy.
Manage Existing Invitations
The Invitations table can show the recipient, assigned role, status, creation date, and expiration information. Available actions depend on the invitation status and your permissions.
- Copy Link: copy the unique invitation URL when you need to send it through an approved communication channel.
- Resend: send the invitation again when the earlier email was not received or the validity period needs to be renewed.
- Cancel: invalidate a pending invitation that was sent to the wrong person or is no longer required.
Protect invitation links: A link is intended for the invited recipient. Do not post it publicly, include it in a public documentation page, or share it with unrelated people.
Invitation Statuses
- Pending: the invitation is still valid and has not been accepted.
- Accepted: the recipient completed the invitation workflow and the role was assigned.
- Expired: the validity period ended before acceptance.
- Cancelled: an authorized manager invalidated the invitation.
For Recipients: Accept an Invitation
- Open the invitation email and confirm the conference name, sender, and intended role.
- Select the invitation link before it expires.
- Follow the sign-in or account-creation path shown by Leconfe.
- Accept the privacy statement when required.
- Complete the process and confirm that the expected conference and role are available.
If You Already Have a Leconfe Account
Sign in with the account that uses the invited email address. After the invitation is accepted, check the selected conference or Scheduled Conference and verify that the expected menu or assignment is available.
If You Do Not Have an Account
Complete the registration form using the invited email address. Enter the required name fields, create a password that meets the displayed requirements, review the privacy statement, and submit the form. After successful registration, Leconfe assigns the invited role and opens the relevant conference context.
Email matching: Do not replace the invited email address with a different address during acceptance. If the invitation was sent to the wrong address, ask the manager to cancel it and create a new invitation.
Invitation Registration vs. Regular Registration
- Invitation-based registration: the manager selects the recipient and role. It is appropriate for controlled roles and private onboarding.
- Participant registration: an attendee registers for an event without submitting a paper, subject to the event’s registration and payment settings.
- Author or presenter workflow: a user creates or manages a submission and completes any related submission-payment or presentation requirements.
See Participant Registration in Leconfe and Presenter Registration in Leconfe for those workflows.
Troubleshooting
The Invitations Tab Is Missing
Confirm that you opened User in the correct conference context and that your account has permission to manage invitations. Ask a conference manager or administrator to review your role if the tab remains unavailable.
The Recipient Did Not Receive the Email
- Verify the email address in the invitation record.
- Ask the recipient to check spam, junk, and filtered folders.
- Confirm that Leconfe outgoing email is configured and working.
- Use Resend only after checking the existing invitation.
- Share the copied link only through an approved private channel.
The Link Has Expired or Was Cancelled
An expired or cancelled link cannot be used. The manager should review the existing record and resend or create a replacement invitation as appropriate.
The Link Opens the Wrong Account
Sign out, reopen the invitation link, and sign in with the invited email address. If the invitation email is incorrect, do not try to accept it with another account; contact the manager.
The Role Was Accepted but the Menu Is Missing
Confirm that the user opened the same conference or Scheduled Conference named in the invitation. Managers should verify the assigned role, its scope, its permissions, and whether the relevant workflow feature is enabled.
The Invitation Was Sent to the Wrong Person
Cancel the pending invitation immediately. Create a new invitation for the correct address and review the role before submitting it.
Manager Checklist
- The correct conference and Scheduled Conference are open.
- The recipient email address has been verified.
- The minimum appropriate role has been selected.
- The invitation appears in the table with the expected status and expiration date.
- Outgoing email has been tested.
- Expired, duplicate, incorrect, or unnecessary invitations are cancelled or otherwise handled according to policy.
Invitation complete: The recipient has accepted the invitation, appears in the relevant user list, and can access only the menus and assignments required for the invited role.


