
This chapter explains how managers and editors handle the publication workflow in Leconfe — from creating proceedings and assigning roles to publishing articles and managing submissions.
If you are organizing a conference using the Leconfe platform and are responsible for managing submissions, assigning reviewers, and publishing proceedings, this guide walks you through every step.
How to Create Users and Assign Roles
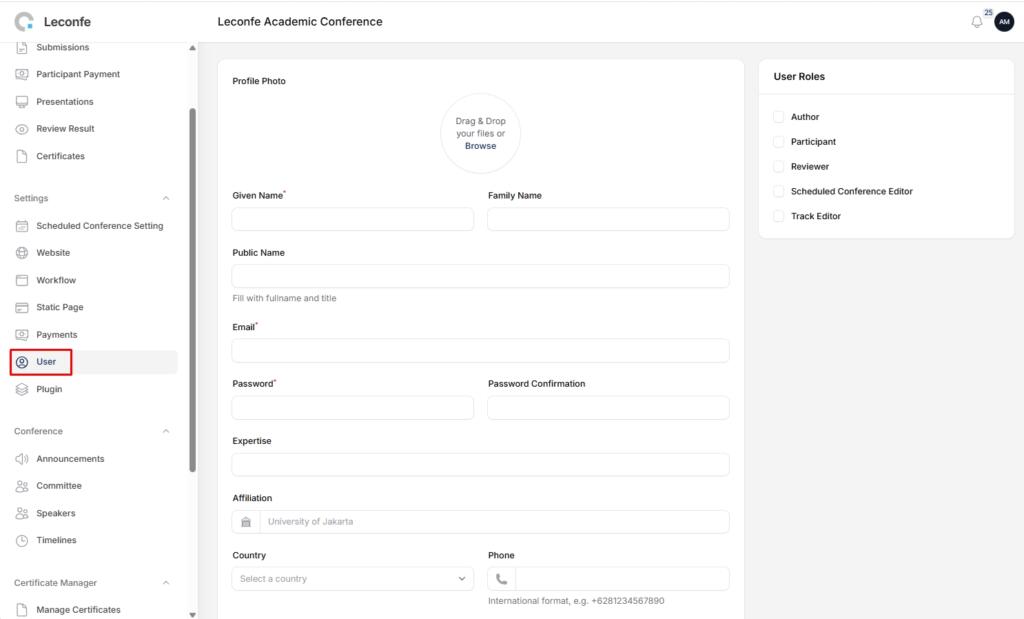
After creating a conference in Leconfe, the first user you registered will automatically be assigned the Manager role. As a Manager, in a scheduled conference you have full access to create and manage other users, including assigning roles such as Editor, Track Editor, Reviewer, and others.
There are two methods to assign roles to users:
1. Create a New User and Assign Roles
Manually create a new user account through the Users menu. Once created, you can immediately assign them one or more roles — for example, Editor, Track Editor, or Reviewer.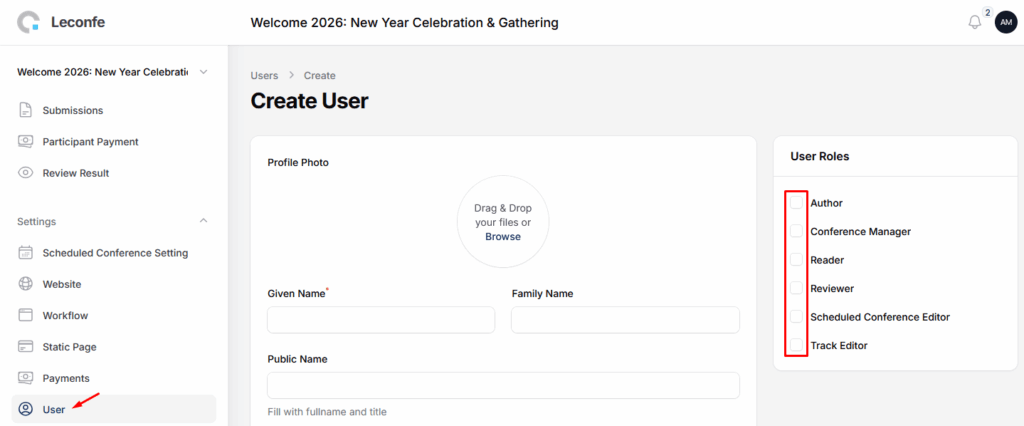
2. Assign Roles to an Existing User
If the user is already registered in your conference, simply edit their profile and assign additional roles without needing to create a new account.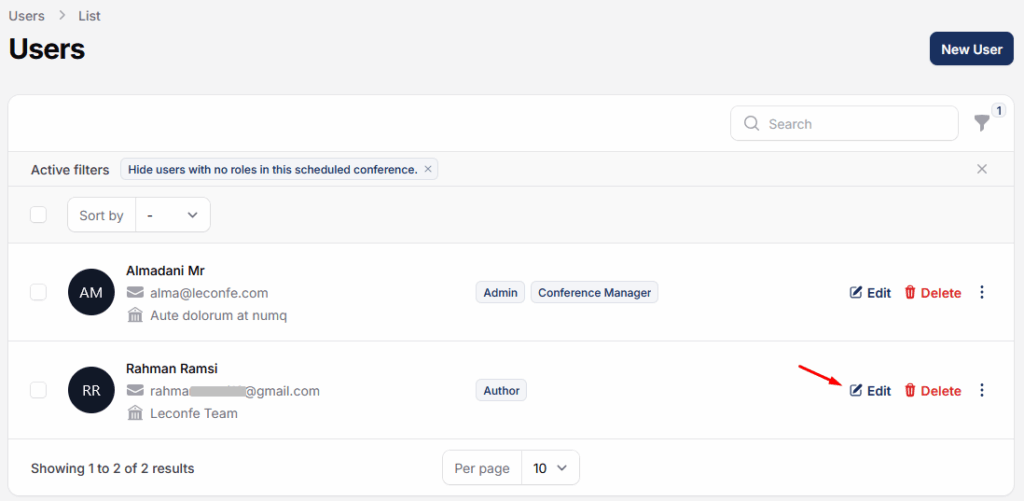
How to Publish an Article
This guide explains the complete process of creating a proceeding and publishing articles within Leconfe. Follow each section carefully to ensure your publication workflow runs smoothly.
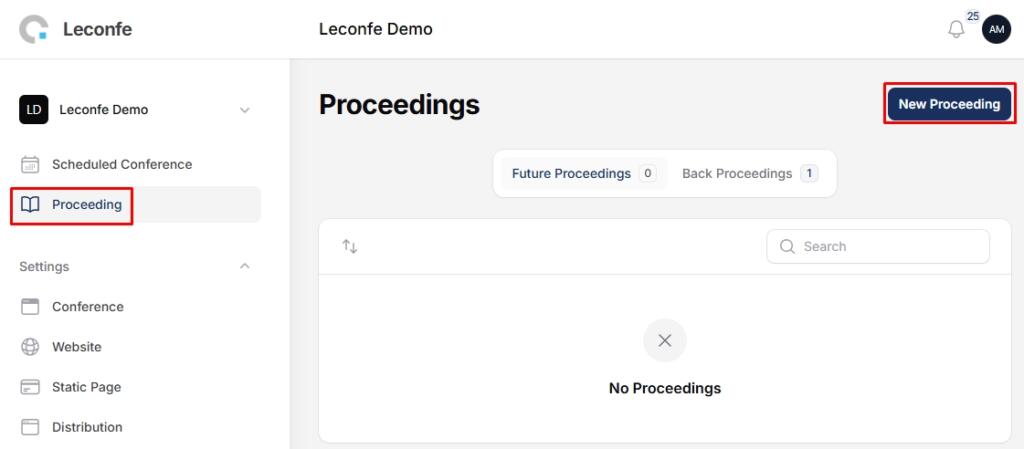
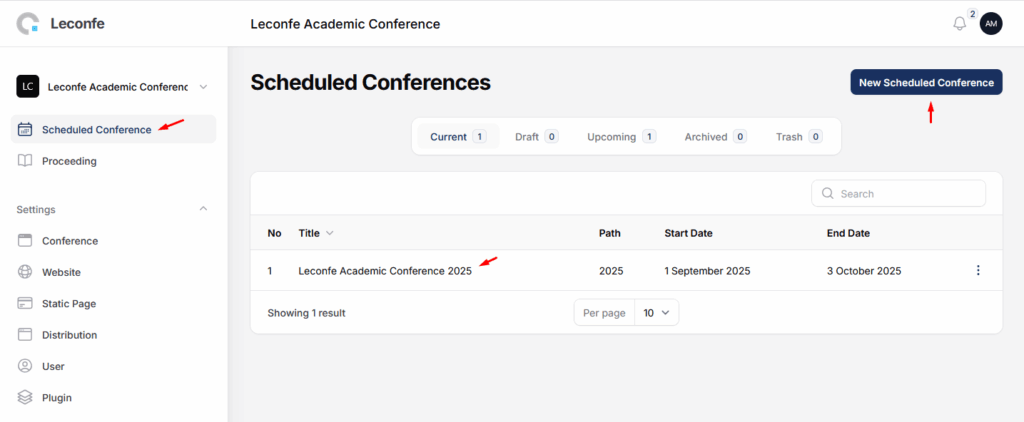
Step 1 — Create a Proceeding
Navigate to your conference dashboard and open the Proceedings section.
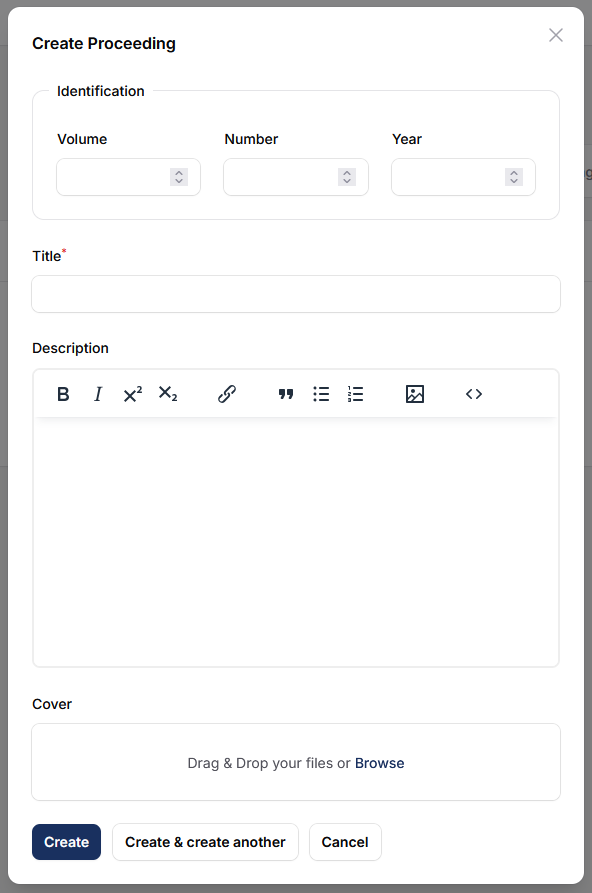
- Proceeding title
- Description
- Publication year
- Additional metadata
Save the configuration when done.
Set Proceeding Status
After creating a proceeding:- Keep the status as Draft while preparing content.
- Once ready for public access, change the status to Published.
Step 2 — Submit and Publish the Article
Submit Your Paper
Leconfe provides two submission methods:- Manual Submission — Fill in all metadata and upload the file step by step.
- Quick Submit plugin — A faster method to upload a finalized article and metadata using one simplified form.

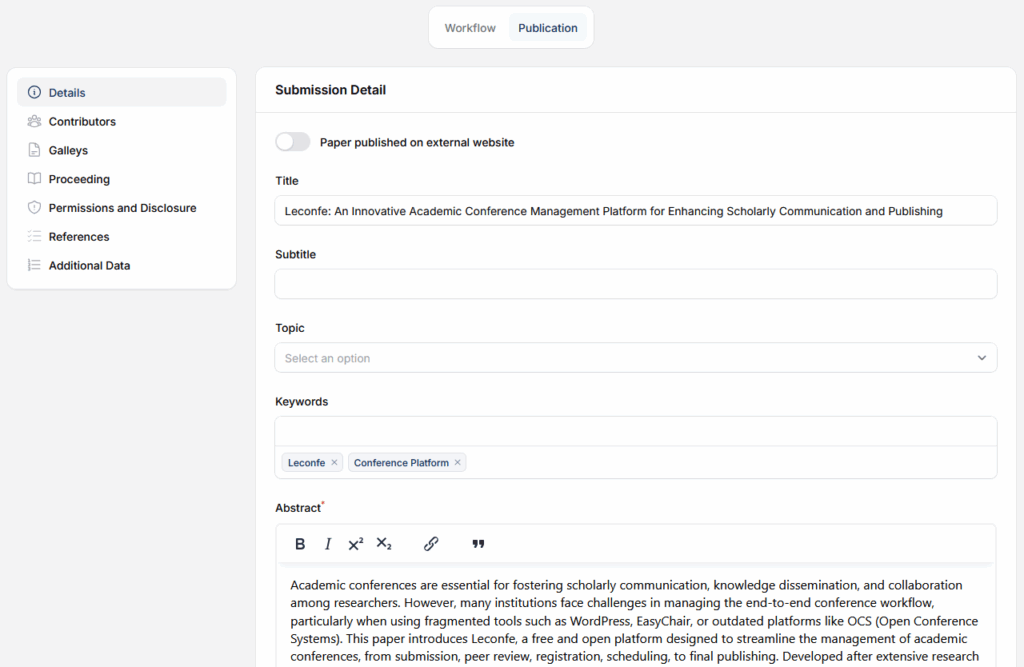
Title; Abstract; Authors; Keywords; File versions; References; etc.
Assign the Article to a Proceeding
Navigate to the article you want to publish. Select the Proceeding you created earlier. Save the selection.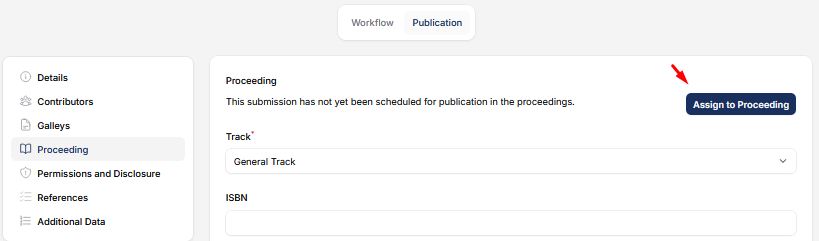

How to Show the Proceedings Menu on the Navigation Page
Go to Website > Navigation Menu > Setup and click Add Item.


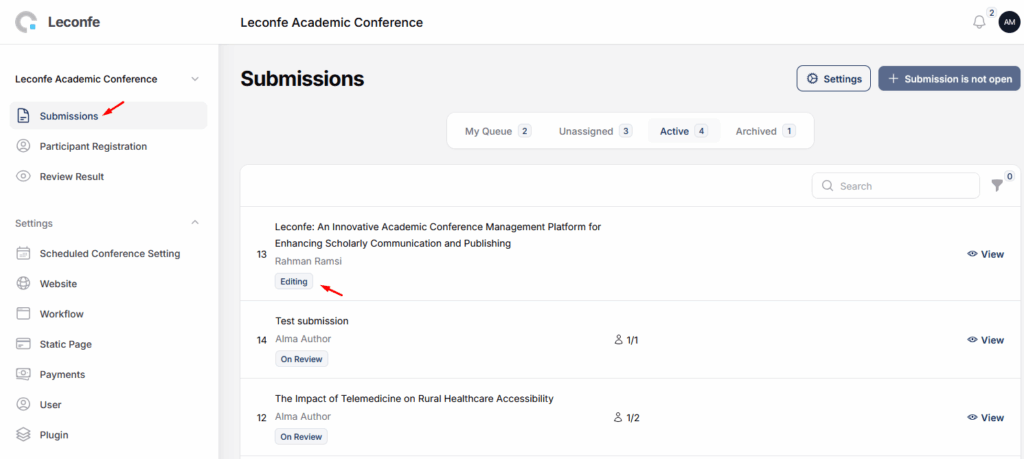
How to Assign Reviewers
This guide explains how Editors or Track Directors can assign reviewers to a submission. Assigning reviewers is the essential first step of the peer review process.Log in using your Editor or Track Director account. From the sidebar menu, click Submissions and open the Unassigned or Active tab to view submissions that need reviewers.
Click the title of the submission you want to process.
Inside the submission page, go to the Peer Review tab and click the Add Reviewer button.
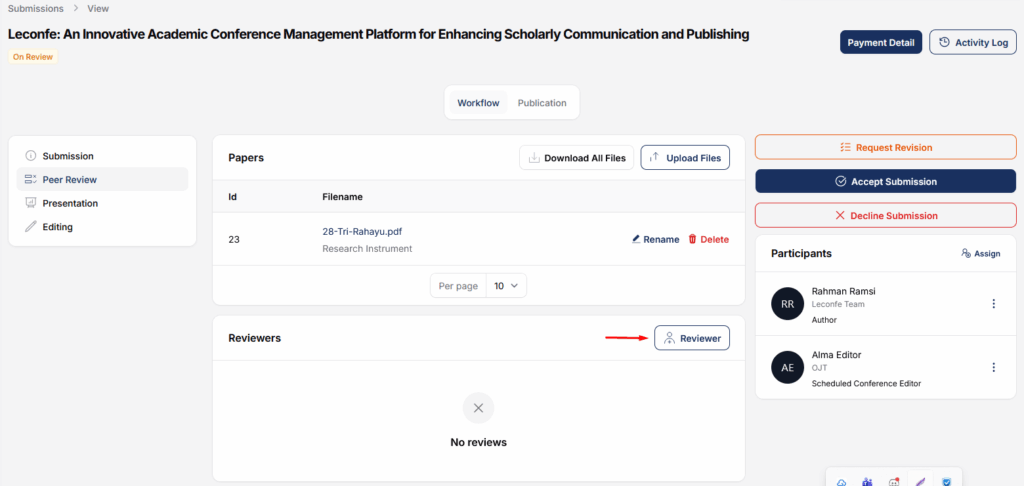
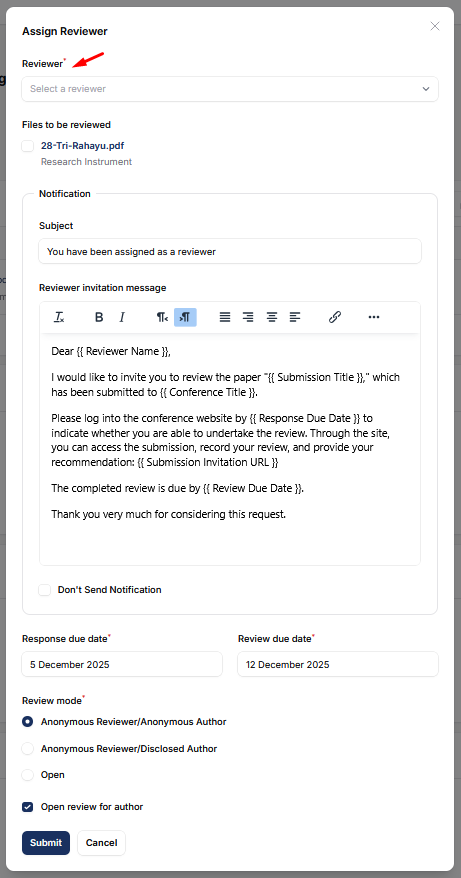
Click Submit to confirm. The system will automatically send an email notification to the reviewer.
Guide for Editors
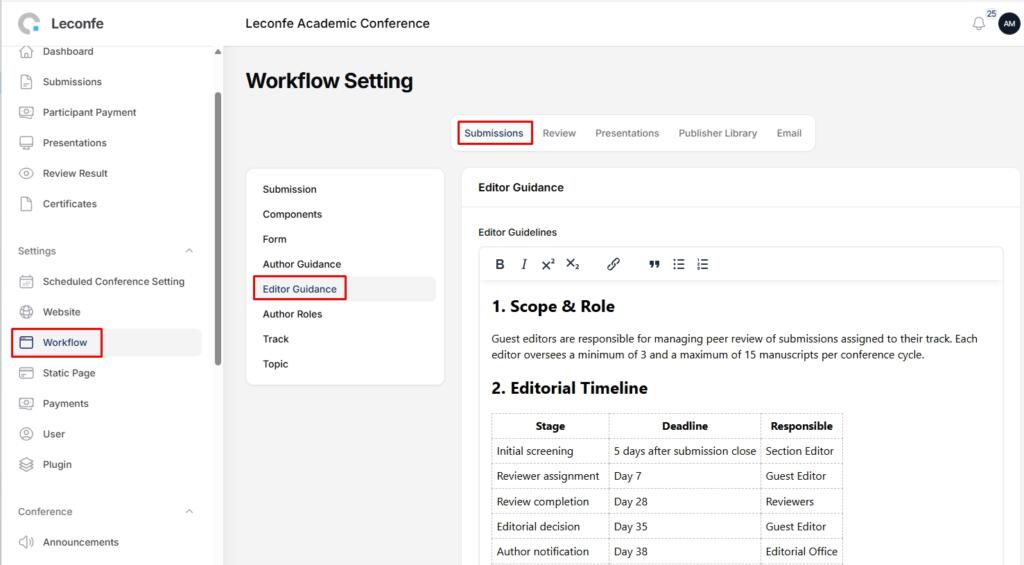
As a Manager or Editor, you can write a guide for fellow editors in your conference. This guide helps other editors understand the workflow they should follow.
To create the guide, go to Workflow > Submissions > Editor Guidance. A full text editor is available where you can write instructions such as:
- The review process that must be followed
- Article formatting requirements
- Criteria for rejecting a submission
- Publication steps
- Any conference-specific policies
Once saved, every editor who opens a submission page will see an Editor Guidance button. Click the button to read the guide at any time.
Publication Data
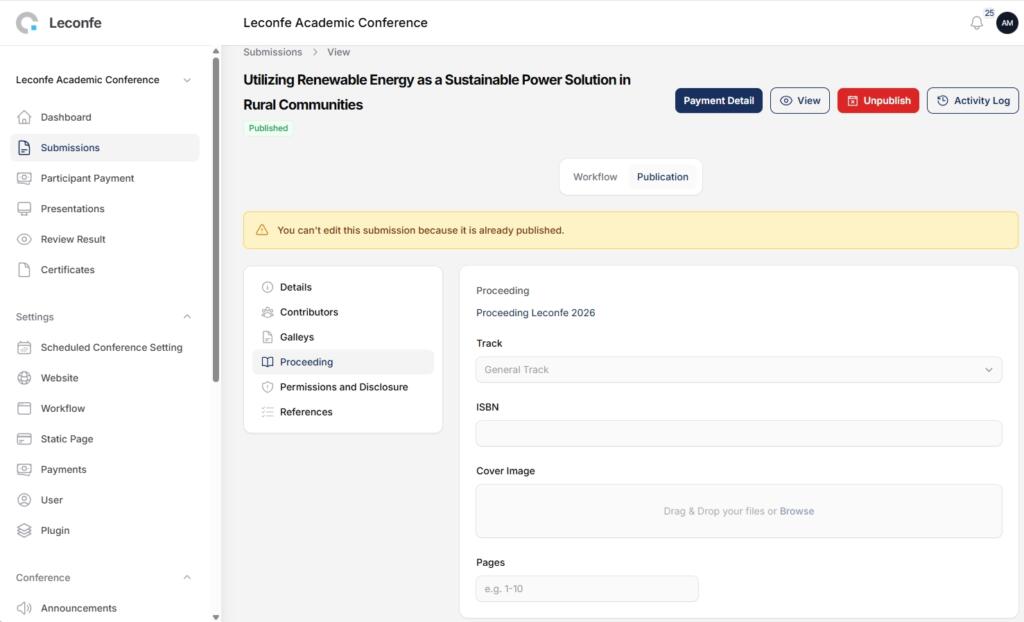
When preparing a proceeding, you can fill in the publication data for each article under the Publication > Proceeding tab. The following fields are available:
- Track — Select the presentation track where this article was presented.
- ISBN — Enter the proceeding’s ISBN number if available.
- Cover Image — Upload a cover image for the proceeding.
- Pages — Fill in the article’s page numbers (e.g., 1–10).
All of this data will be displayed on the published proceeding page.
Copyright and License
Leconfe lets you customize copyright and license information for each submission. Open the Publication > Permissions and Disclosure tab on the submission page.In this section you can change:
- Copyright Holder — Change the copyright holder name if it differs from the default conference setting. Click the Override button to enable editing.
- Copyright Year — Update the copyright year as needed. Click Override to edit.
- License URL — Change the license link (for example, Creative Commons) per article. Click Override to enable editing.
This copyright and license information will appear on the published proceeding.
Discussions with Authors

The Discussion feature lets you communicate directly with authors through the submission page. This feature is available on the Submission, Peer Review, and Presentation tabs in the Workflow section.
With this feature you can:
- Create a new discussion topic — Give each topic a relevant name, such as “Format Revision” or “Author Data Query”.
- Send messages — Write messages to the author directly from the submission page.
- Attach files — Include supporting files such as formatting guides, review results, or revision documents.
- Receive replies — Authors can reply to your messages. All discussion history is saved and can be viewed at any time.
- Close discussions — Once the issue is resolved, you can close the discussion topic so no new messages can be added.
Discussion participants will receive an email notification whenever a new message is posted.
Submission Payments
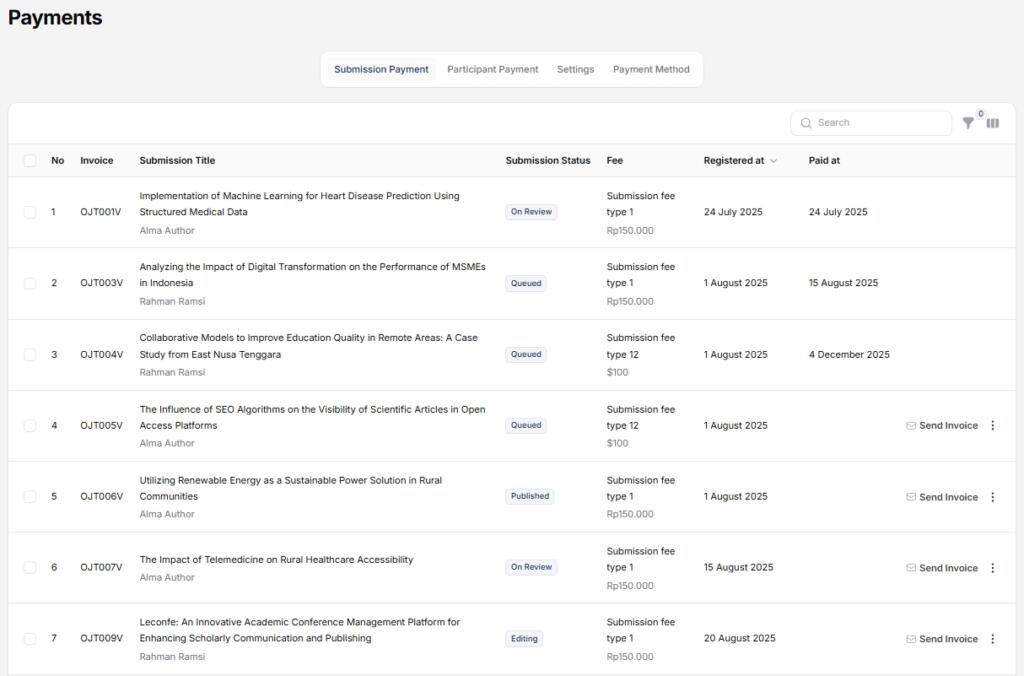
If your conference has enabled submission payments, you can view payment details for each submission. On the submission page, click the Payment Detail button to see:
- Payment Fee — The type and amount of the fee charged.
- Payment Status — Shows whether the payment has been settled (paid) or not (unpaid).
- Add-on Items — Breakdown of additional fees, if any (for example, printing or certificate fees).
- Invoice — You can download the payment invoice if the invoice feature is enabled.
- Receipt — Once the payment is settled, a receipt is available for download.
You can also manually mark a payment as paid if the payment was made outside the system (for example, via bank transfer). Simply click the Mark as Paid button on the payment detail page and enter the payment date.
Additional Submission Data
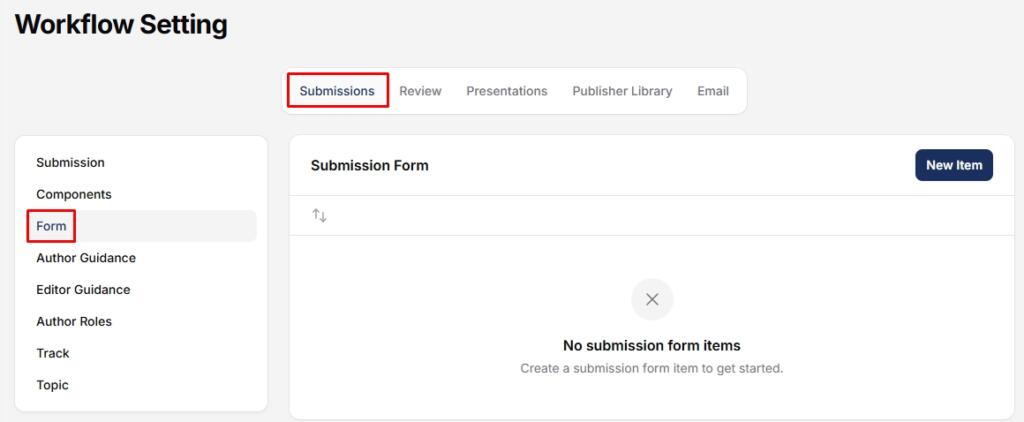
You can add custom form fields that authors must fill in when submitting an article. This feature is useful for collecting extra information specific to your conference.
To set it up, go to Workflow > Submissions > Components > Additional Data. You can create several types of fields:
- Short Text — A single-line input field (for example, additional title, reference number).
- Long Text — A multi-line input field (for example, originality statement, special notes).
- Checkbox Options — Authors can select multiple options (for example, topics of interest).
- Radio Buttons — Authors choose one from several options (for example, presenter category: oral/poster).
- Dropdown — A menu with predefined options.
- File Upload — Authors can upload supporting documents (for example, recommendation letter, student ID).
Each field can be set as required or optional. Data filled in by the author will appear in the Publication > Additional Data tab on the submission page and can be edited by the Editor.


