
Applies to: Leconfe 1.5.0
This guide explains the complete Author workflow in Leconfe: creating an account, starting a submission, completing the four-step wizard, monitoring editorial decisions, handling fees, uploading a revision, requesting withdrawal, and adding a final presentation.
Important: Leconfe 1.5.0-beta.3 is a pre-release. Labels and layouts may still change before the final 1.5.0 release. The screenshots retained on this page were captured from an earlier interface, but their captions connect them to the current workflow.
Before You Start
Prepare the following before opening the submission form:
- Your Leconfe account email address and password.
- The correct conference series and Scheduled Conference.
- Your working paper title, abstract, and keywords.
- The names, email addresses, affiliations, countries, and roles of all contributors.
- The required abstract, manuscript, or supporting files.
- Payment information if the conference charges a submission fee.
Read the conference timeline, submission guidelines, track policy, and file requirements. Each conference controls its own deadlines, required fields, fees, and accepted file types.
Create an Account or Sign In
- Open the public website for the correct Scheduled Conference.
- Select the registration or account-creation action.
- If you already have a Leconfe account on that website, sign in instead of creating a duplicate account.

Complete every required account field. Use an email address that you check regularly because the organizer may send decisions, invoices, and reminders to it.
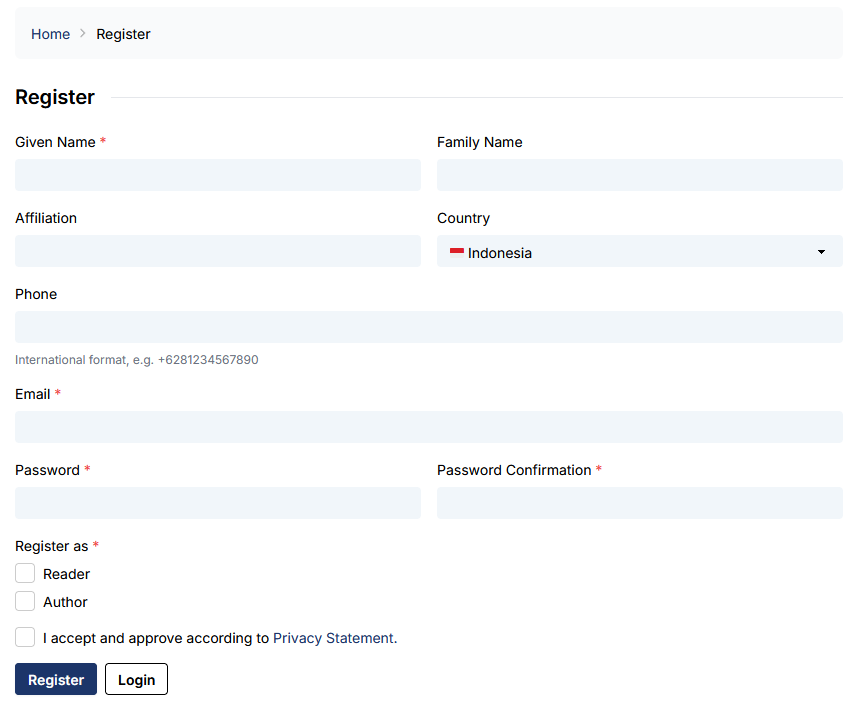
After registration, sign in and open the Scheduled Conference panel. Confirm the event title before starting a submission.

Understand Author and Participant Roles
- Author: creates and follows a paper submission.
- Participant: registers to attend without submitting a paper.
These roles serve different purposes. Presenter or Participant registration does not replace the Author submission workflow. If your account does not yet have the Author role, Leconfe assigns it automatically when you start a submission. A role-selection shortcut may also appear for new accounts, depending on the conference settings.
For attendance registration, see Presenter Registration in Leconfe or Participant Registration in Leconfe.
Check Whether Submissions Are Open
Open Submissions. If the create action says Submission is not open, the submission timeline is closed or no eligible active track is available to you.

When submissions are open, select the create-submission action.

Start a New Submission
The first Make a Submission form creates an incomplete submission record. Depending on the organizer’s configuration, it can contain:
- Before You Begin: instructions from the organizer.
- Title: the working title of the paper.
- Additional questions: custom submission fields created by the organizer.
- Payment Fee and Add-on Items: shown when submission payment is enabled.
- Track: select the most appropriate active track when more than one is available.
- Track policy: read any policy displayed after selecting a track.
- Submission Checklist: confirm that the paper meets the listed requirements.
- Privacy consent: confirm that you agree to the conference privacy statement.
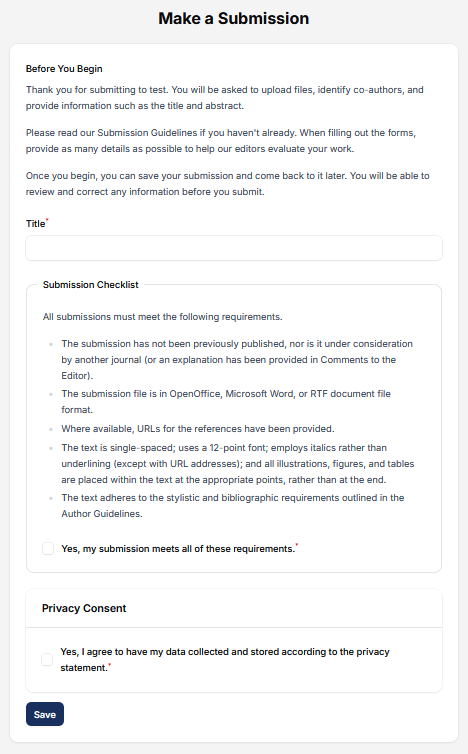
Do not confuse this first action with final submission. After the record is created, it remains Incomplete until all four wizard steps are completed and the final Submit confirmation succeeds.
Complete the Four-Step Submission Wizard
Step 1: Details
Complete the paper metadata:
- Topic: appears when the conference has topics. A maximum selection limit may apply.
- Title: review the working title and correct it if necessary.
- Keywords: enter keywords and separate them as instructed by the field.
- Abstract: required unless the selected track makes it optional. A track-specific word limit may apply.
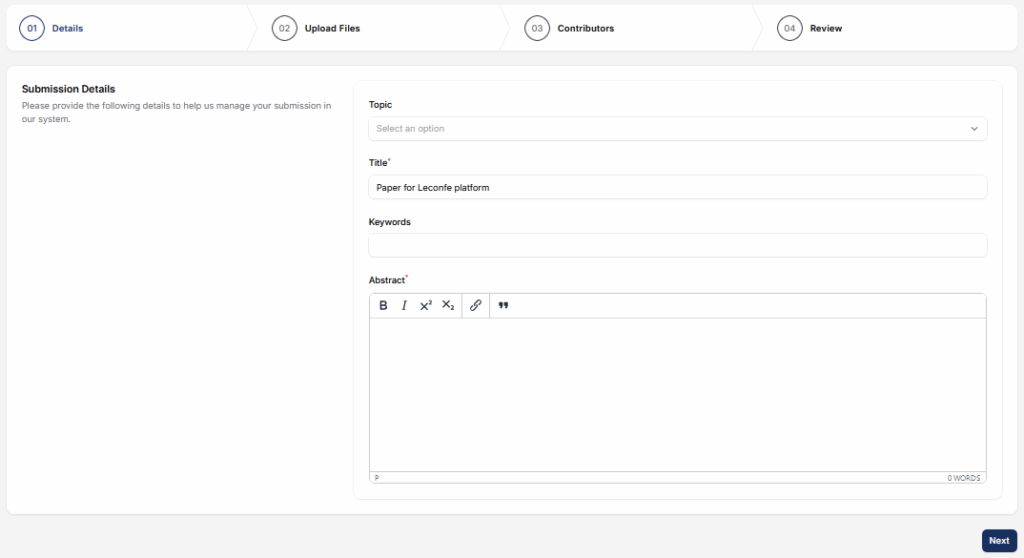
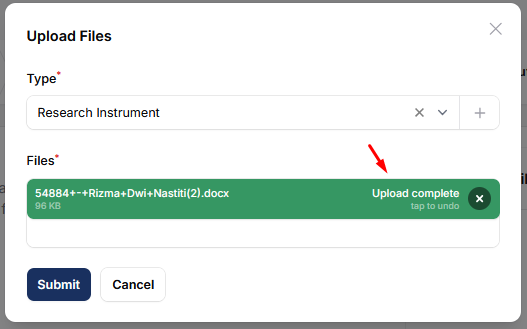
Step 2: Upload Files
- Select the requested file type.
- Choose the correct file from your device.
- Wait until the upload finishes and the file appears in the list.
- Repeat the process for every required file type.
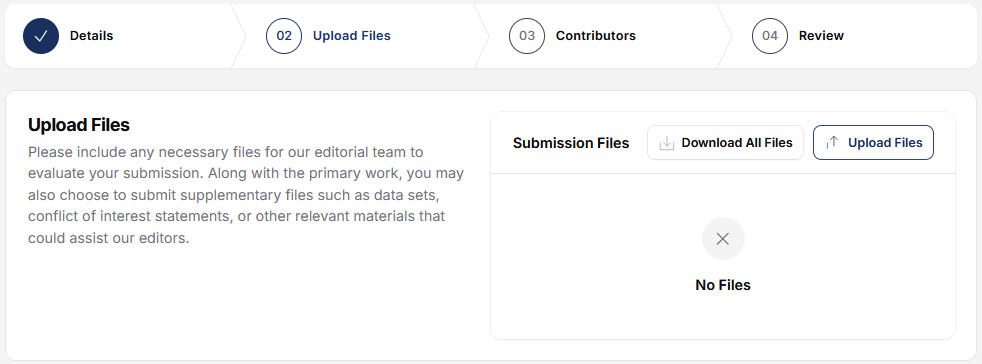
Leconfe requires at least one submission file. If the organizer configured required file types, you cannot continue until every required type has an uploaded file.
Step 3: Contributors
Add every person who should be credited for the submission. Check spelling, email address, affiliation, country, contributor role, and the order in which contributors should appear.
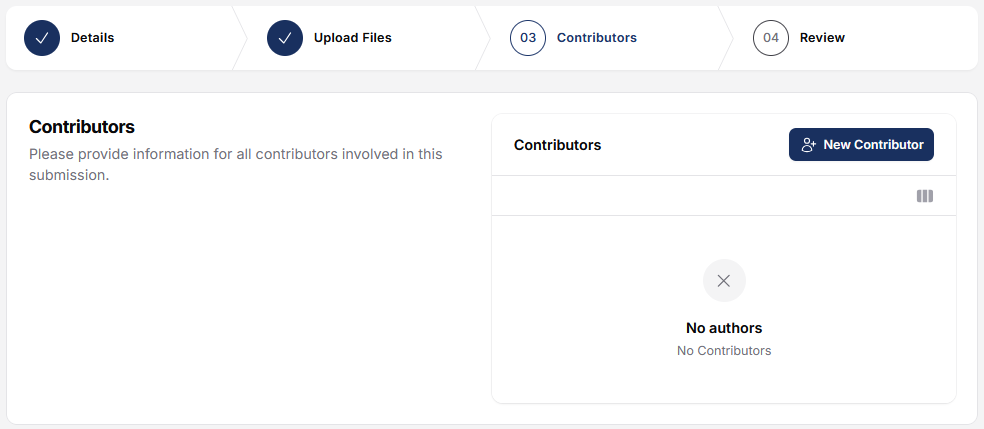
Account access and contributor credit are different. Adding a person’s name as a contributor does not necessarily create an account or give that person access to the submission.
Step 4: Review and Submit
Review the Details, Upload Files, and Contributors summaries. Use the edit action for any section that is incomplete or incorrect.
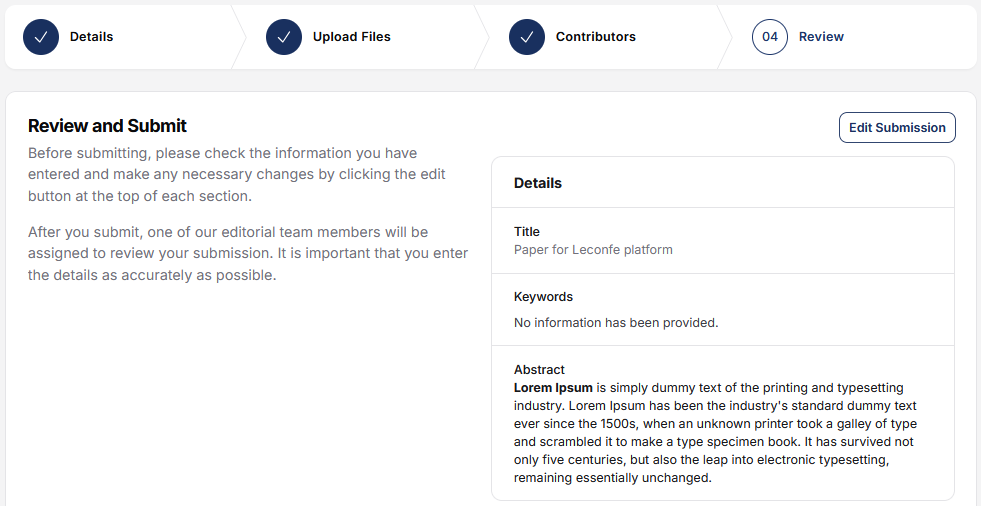
- Select Submit.
- Read the confirmation message.
- Confirm the final submission.
- Wait for the submission-complete screen before closing the page.
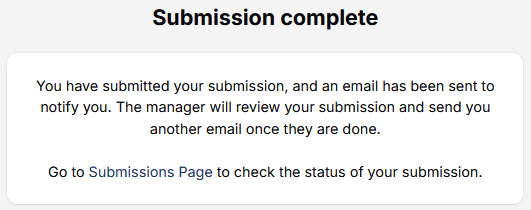
Understand What Happens After Submission
After final submission, the paper enters the Call for Abstract stage. The organizer can send it for peer review, decline it, or skip review and move it forward. Monitor the submission page even if you also receive email.
Common status labels include:
- Incomplete: the four-step wizard has not been submitted.
- Queued: final submission succeeded and the paper is waiting for initial editorial action.
- On Review: the paper is in peer review.
- On Presentation: the presentation stage is active.
- Editing: the accepted paper is being prepared for publication.
- Published: publication processing is complete. A proceeding can also be scheduled before it becomes publicly visible.
- Declined: the submission was not accepted.
- Withdrawn: an authorized editor approved the withdrawal.
Your papers normally appear under My Queue while active. Finalized papers can appear under Archived. Additional tabs are permission-dependent.
Manage Submission Fees and Payment
When submission payment is enabled, the initial form can ask you to select a fee and optional add-on items such as extra pages or other conference services. Review the currency, quantity, description, and total before continuing.
Payment notification timing is conference-specific. Leconfe can create the payment record during submission but delay the invoice and notification until a configured workflow stage—such as Peer Review or Presentation—is reached. Organizers can also disable automatic notification.
When Payment Detail is available:
- Open the submission.
- Select Payment Detail.
- Review the fee, add-ons, total amount, invoice status, and available payment methods.
- Follow the displayed payment instructions.
- Keep the invoice or receipt if the organizer enables those documents.
A payment method may be unavailable before the payment period opens or after it closes. Contact the conference organizer about unavailable methods, payment confirmation, or refunds.
Complete Additional Questions
The organizer can add custom questions to the submission form or payment form. These may use:
- Single-line text.
- Extended text.
- Checkboxes with one or more selections.
- Radio buttons with one selection.
- A dropdown list.
- A private file upload.
Complete all fields marked as required. Submission questions are stored with the paper; payment questions are stored with the related payment record.
Respond to Review and Upload a Revision
When an editor requests a revision, the in-app submission page is the authoritative source for the decision, deadline, current review round, and requested files. Email delivery can be delayed or filtered.
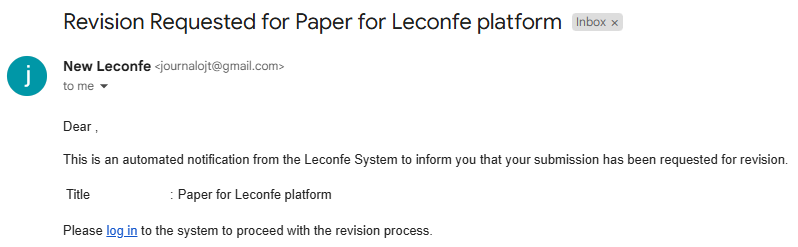
- Open the submission from My Queue.
- Open the Peer Review stage.
- Select the current open review round when more than one round exists.
- Read the editor’s request and the reviewer comments visible to you.
- Revise the paper outside Leconfe.
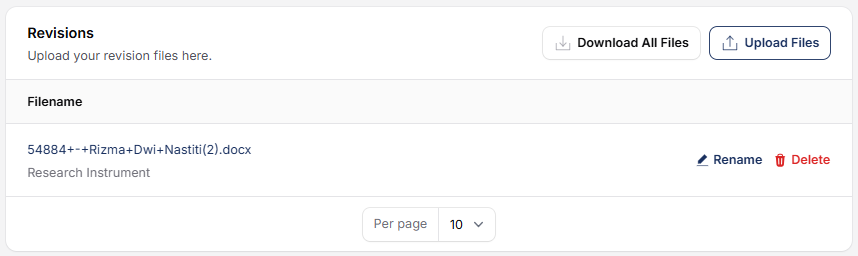
- Upload the revised file in Revisions.
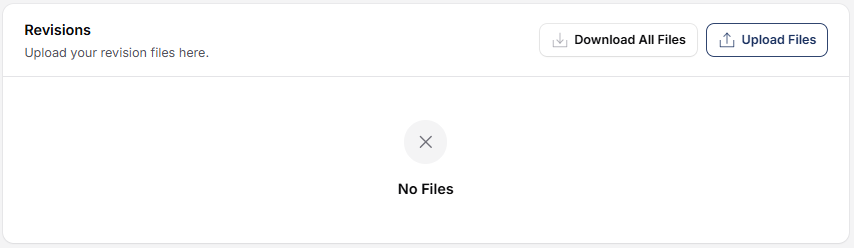
After upload, verify that the revised file appears in the list. Leconfe notifies the relevant editor automatically when a new revision file is uploaded.
Use Discussions
Use Discussion when you need clarification from the editorial team. Discussions are connected to a workflow stage, so open the discussion inside the relevant Submission, Peer Review, or Presentation stage.
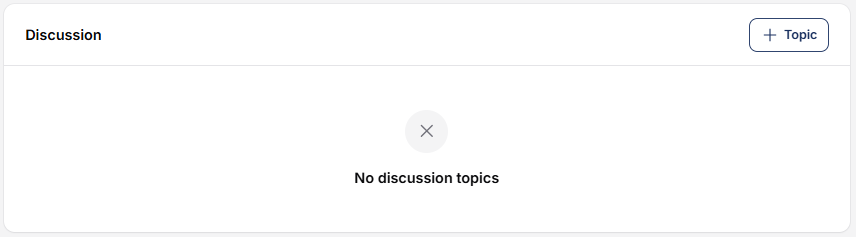
Use a clear topic, explain the question, and attach only relevant files. Do not rely on Discussion for an emergency deadline extension unless the organizer confirms it.
Request Withdrawal
The original submitter can request withdrawal after the wizard is complete, provided the submission is not already Declined, Withdrawn, Published, or in Editing.
- Open the submission from My Queue.
- Select Request for Withdrawal.
- Enter the reason for the request.
- Review the confirmation and submit the request.
- Wait for an authorized manager or editor to accept or reject it.
A request does not immediately change the status to Withdrawn. After approval, the submission moves out of the active workflow and you receive a notification. If a fee has been paid, ask the organizer about its refund policy; Leconfe does not promise a refund merely because a withdrawal was approved.
Add and Finalize a Presentation
Presentation controls appear only when the submission’s workflow stage, status, and your permissions allow them. Do not upload a presentation until the organizer has moved the paper to the appropriate stage or asked you to do so.
Leconfe 1.5.0-beta.3 supports:
- PDF: upload a PDF presentation file.
- YouTube: enter the YouTube video information requested by the form.
- Google Slide: use the published Google Slides URL, not the normal editing or sharing URL.
- Other: upload another file format allowed by the conference.
- Open the Presentation stage.
- Select Add Presentation.
- Add an optional thumbnail.
- Select the presentation type and provide the required URL or file.
- Save the presentation.
- Preview it and correct any problem.
- Select Set as Final Presentation for the version that participants should see.
You can create more than one presentation record, but only the final version should be marked as final. For detailed publishing instructions, see Presentation Feature in Leconfe.
Understand Editing, Proceedings, Copyright, and License
After acceptance and presentation, an editor can move the paper to Editing and prepare it for the proceedings. In the normal Author role, publication sections may be visible but read-only.
Editors and managers normally handle:
- Final publication metadata.
- Galleys or publishable files.
- Proceedings assignment and scheduling.
- Copyright holder and copyright year.
- License URL and other permissions or disclosure data.
Conference defaults for copyright and license are applied during publication unless an authorized editor overrides them. As an Author, respond to explicit requests for corrected metadata or files and use Discussion when it is available. A published submission cannot be edited through the normal submission-edit controls.
Troubleshooting
I cannot start a submission
- Confirm that you opened the correct Scheduled Conference.
- Check the submission timeline.
- Confirm that at least one relevant track is open to Authors.
- Refresh the page after the organizer changes a deadline or role.
I cannot continue from Upload Files
- Wait until every upload is complete.
- Upload at least one file.
- Check whether every required file type has been provided.
- Confirm that the file type and size match the organizer’s requirements.
I cannot continue from Contributors
Add at least one contributor with the Author role. Recheck the contributor role if the person is listed but validation still fails.
I cannot upload a revision or presentation
The current stage, status, review round, or your permissions may not allow the action yet. Read the latest editorial decision and contact the conference organizer with the submission title and ID.
I did not receive an email
Check spam and promotions folders, then open the submission in Leconfe. In-app status, files, decisions, and payment information are the primary source of truth.
Final Author Checklist
- The correct Scheduled Conference and track were selected.
- The title, abstract, keywords, and topics are accurate.
- Every required file type was uploaded successfully.
- All contributors and roles are correct and at least one Author is listed.
- The final Submit confirmation succeeded.
- The submission appears in My Queue or the appropriate archived view.
- Payment Detail has been checked when a fee applies.
- The current review round and revision files have been verified.
- The correct presentation is marked as final when required.
- Important emails, invoices, receipts, and uploaded file copies have been retained.


